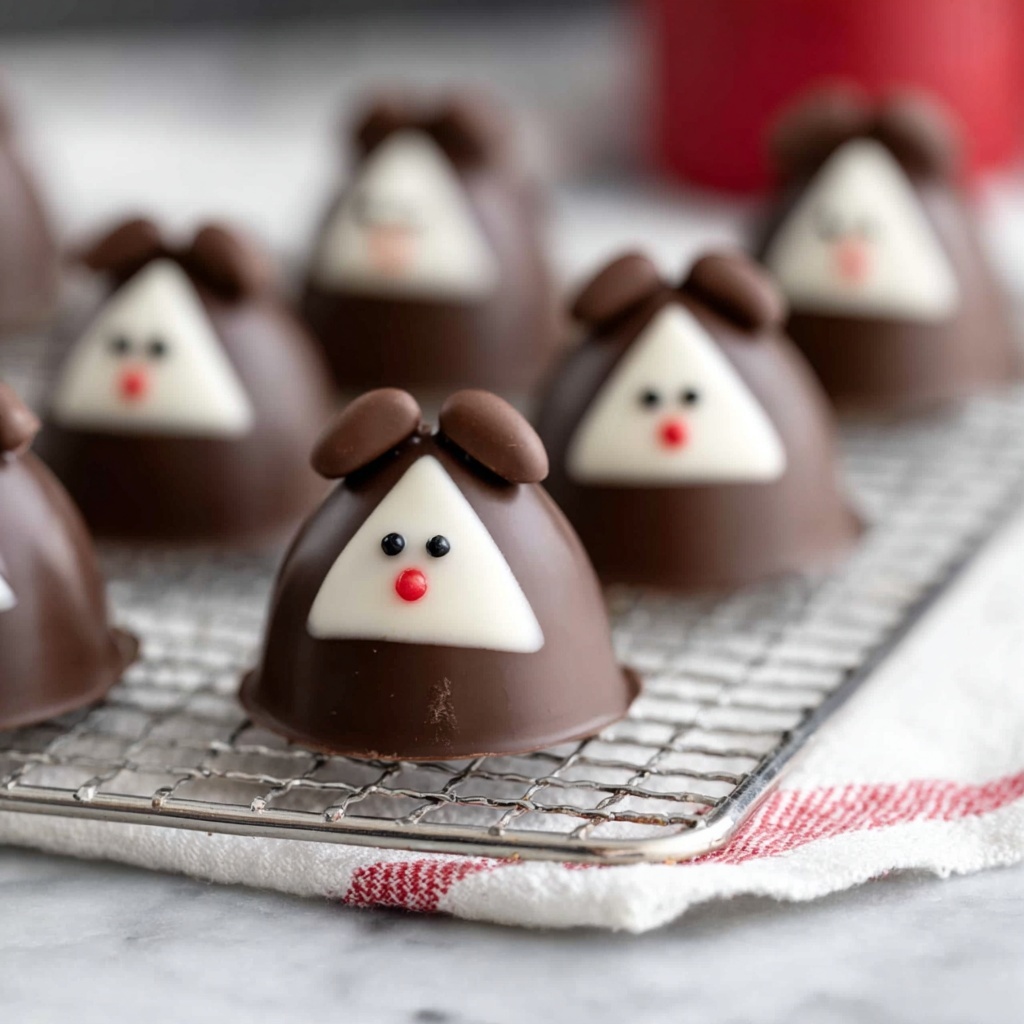
If you’re a Star Wars fan with a sweet tooth, you are absolutely going to adore this Princess Leia Oreo Truffles Recipe. These adorable, bite-sized treats combine the luscious creaminess of Oreo cookie-dough with smooth white and dark chocolates, finished with those iconic Leia buns made from Rolos. Every element works in perfect harmony to deliver a fun, delicious dessert that’s sure to spark joy and conversations at any gathering. Trust me, once you try these, they’ll be your go-to galaxy far, far away-themed treat.
Ingredients You’ll Need
Gathering your ingredients for this Princess Leia Oreo Truffles Recipe is surprisingly simple, yet each component plays an essential role. From the crunchy Oreo base to the creamy cheese, and the sweet chocolate coatings, every ingredient is handpicked to create that perfect balance of texture, flavor, and charm.
- Oreo cookies (30, 339 grams): The crunchy, chocolaty foundation that brings the truffles to life.
- Low-fat cream cheese (4 ounces, cold): Adds smoothness and holds the mixture together for easy shaping.
- White chocolate melting wafers (6 ounces): Provide the silky white coating that’s perfect for Leia’s iconic look.
- Dark or milk chocolate melting wafers (5 ounces): Used to create the hairline effect and add depth to the appearance.
- Chocolate icing (¼ cup): Acts as the ‘glue’ for attaching the hair buns, making sure nothing slips.
- Rolo candies (24 pieces): These make the unmistakable buns on the sides of the truffles—so adorable and tasty!
- Edible markers: The finishing touch to draw Leia’s eyes and lips with precision and personality.
How to Make Princess Leia Oreo Truffles Recipe
Step 1: Prepare Your Workspace
Start by lining a large baking sheet with wax paper. This prevents sticking and makes it easy to chill and move your truffles without any mess, setting the stage for success.
Step 2: Crush the Oreos and Mix with Cream Cheese
Using a food processor or a strong blender, pulse those Oreo cookies until they are finely chopped. Then add the cold cream cheese and pulse again until the mixture is completely blended into a creamy, dough-like consistency. This creates the perfect base for your truffles.
Step 3: Chill the Mixture
Pop the mixture into the refrigerator for about 10 to 20 minutes. This step firms it up a bit, making it much easier to roll into neat balls without it sticking to your hands.
Step 4: Roll into Balls
Spray your hands lightly with nonstick spray (this little trick makes rolling easier and less sticky). Then shape the chilled mixture into 12 evenly sized balls on the prepared baking sheet. This hands-on step is as satisfying as it is fun.
Step 5: Chill Again to Firm Up
Refrigerate the balls for another 20 minutes until they are firm. If any truffle loses its shape slightly, you can roll it gently again to perfect the sphere—attention to detail counts here!
Step 6: Melt the White Chocolate
Heat the white chocolate or vanilla almond bark in the microwave in 30-second bursts, stirring in between to avoid burning. This luscious coating will be the hallmark of your Leia truffles.
Step 7: Dip the Truffles in White Chocolate
Fully coat each chilled truffle in the melted white chocolate and return them to the wax paper-lined baking sheet. Chill again for 20 minutes to set the coating firmly—this layer is the canvas for all the adorable features.
Step 8: Melt the Dark or Milk Chocolate
Using the same melting method, warm your dark or milk chocolate until smooth. This will be used to create Leia’s famous hairline on the truffles, adding contrast and detail.
Step 9: Create the Hairline
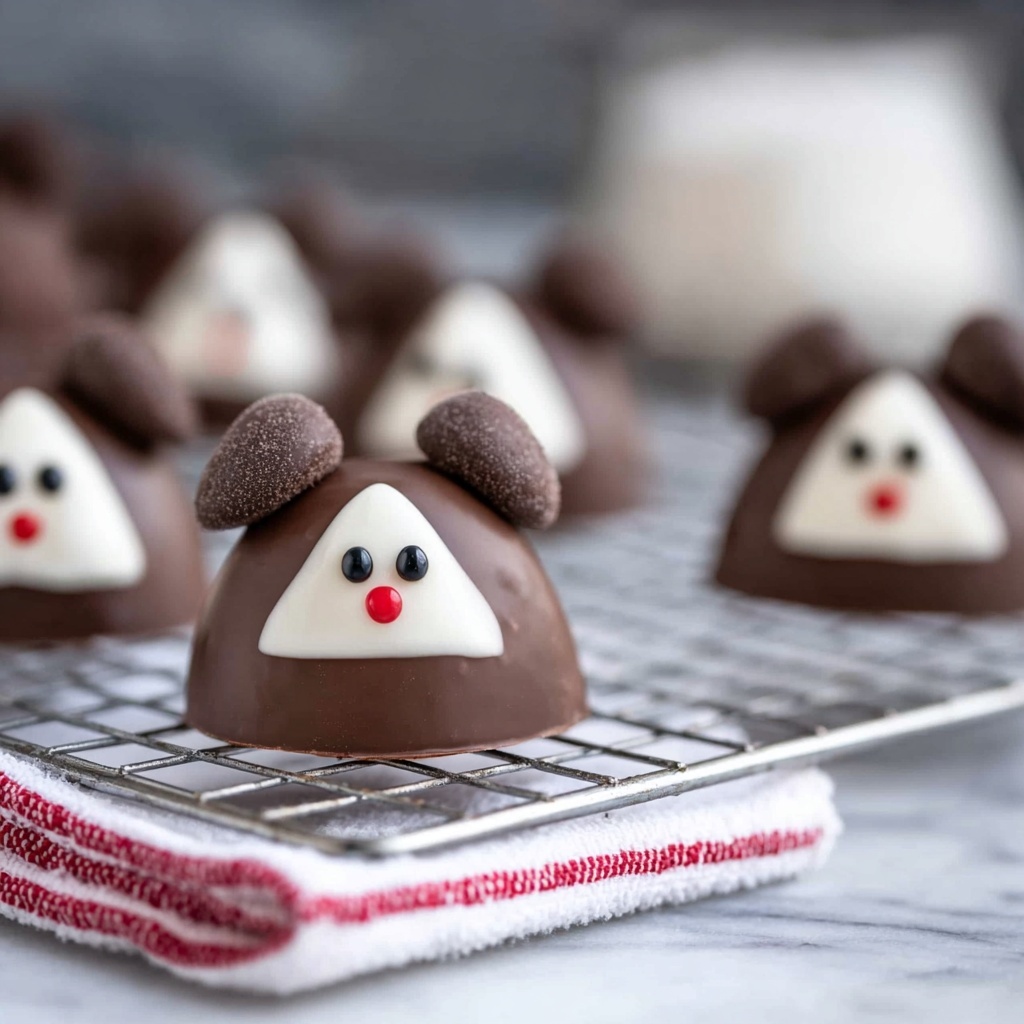
Dip each side of the truffle lightly in the dark chocolate or use a fork to carefully cover the sides, mimicking Leia’s iconic hairstyle. Place the truffles back on the wax paper and chill for another 20 minutes to allow the chocolate to set solidly.
Step 10: Attach the Hair Buns
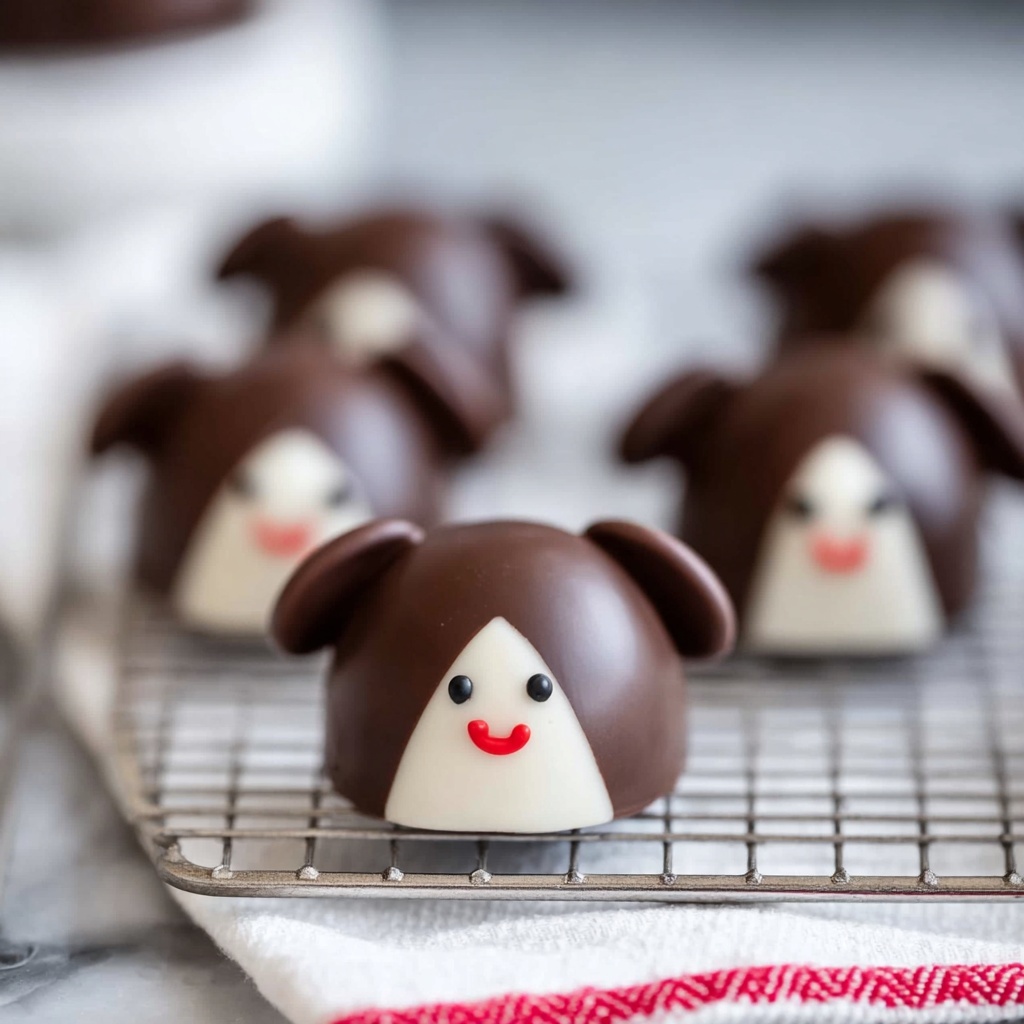
Apply a small dab of chocolate icing on each side of the truffle where the “hair buns” go. Press one Rolo candy onto each side gently but firmly, then place the truffles back onto the wax paper to chill once more. This might feel a little tedious, but the cuteness is totally worth it!
Step 11: Draw Leia’s Face
Once everything is set, take your edible markers and carefully draw simple dots for eyes and a little heart-shaped mouth on each truffle. This final step brings your Princess Leia Oreo Truffles Recipe to life with character and charm.
How to Serve Princess Leia Oreo Truffles Recipe
Garnishes
These truffles are already stunning, but for a little extra flair, sprinkle some edible glitter or place a tiny sugar star next to each one to channel a bit of that intergalactic magic. They make your serving plate as visually exciting as the flavors.
Side Dishes
Pair these truffles with a chilled glass of milk or a robust cup of coffee for the perfect balance. For themed parties, adding blue milk or a rich hot chocolate can keep your guests delightfully immersed in the Star Wars world.
Creative Ways to Present
Display the truffles on a star-shaped platter or nestle them in a tray lined with silver or gold foil to evoke a space-age vibe. Wrap them individually in clear cellophane with tiny printed “Force” tag cards for gifting or party favors that will wow everyone.
Make Ahead and Storage
Storing Leftovers
If you happen to have any Princess Leia Oreo Truffles left (which might be rare!), store them in an airtight container in the refrigerator to keep the chocolate coatings firm and fresh. They stay delicious for up to one week.
Freezing
You can freeze these truffles by placing them in a single layer on a baking sheet until solid, then transferring them to a freezer-safe container. They’ll keep well for up to three months and thaw beautifully in the fridge before serving.
Reheating
These truffles are best enjoyed cold or at room temperature, so there’s no need to reheat. Simply let them sit out of the fridge for about 10 minutes before serving to soften the white chocolate coating slightly without melting the design.
FAQs
Can I use regular chocolate instead of melting wafers?
Yes! You can use good-quality chocolate chips or bars, but melting wafers tend to be smoother and easier to work with for dipping and coating. If using regular chocolate, melt it gently and add a little vegetable oil to help with the texture.
What if I don’t have a food processor?
No worries! Place the Oreos in a sealed plastic bag and crush them with a rolling pin or a sturdy glass until finely ground, then mix thoroughly with the cream cheese by hand until creamy and combined.
Can I use full-fat cream cheese instead of low-fat?
Absolutely! Full-fat cream cheese will result in even richer and creamier truffles, enhancing the texture, so feel free to swap it in your Princess Leia Oreo Truffles Recipe.
How do I avoid the white chocolate cracking after it sets?
Make sure your truffles are completely chilled before dipping and keep the chocolate at a moderate temperature while melting. Rapid temperature changes cause cracking, so be patient and avoid overheating the chocolate.
Is there a way to make the truffles vegan?
It’s a bit tricky but possible. Use vegan Oreo-style cookies, dairy-free cream cheese alternatives, and vegan white and dark chocolates. Just note that the overall texture and flavor may vary slightly, but it can still be a fun, delicious experiment.
Final Thoughts
Making the Princess Leia Oreo Truffles Recipe is not just about creating a tasty treat—it’s about crafting a small piece of Star Wars joy with your own hands. These truffles are perfect for celebrations, gifting, or simply indulging yourself in something imaginative and delightful. So grab your ingredients, enjoy the process, and may the sweets be with you!
Print
Princess Leia Oreo Truffles Recipe
- Prep Time: 30 minutes
- Cook Time: 0 minutes
- Total Time: 30 minutes
- Yield: 12 truffles
- Category: Dessert
- Method: No-Cook
- Cuisine: American
Description
These adorable Princess Leia Oreo Truffles are a fun and delicious treat perfect for Star Wars fans and anyone who loves creative desserts. Made with crushed Oreo cookies and cream cheese, dipped in white and dark chocolate, and decorated with Rolos and edible markers to create Leia’s iconic hairstyle and facial features, these no-bake truffles are easy to make and sure to impress at any party or gathering.
Ingredients
Truffle Base
- 30 Oreo cookies (339 grams)
- 4 ounces low-fat cream cheese (114 grams, cold, ½ brick)
Chocolate Coating
- 6 ounces white chocolate melting wafers (170 grams, or Vanilla Almond Bark)
- 5 ounces dark or milk chocolate melting wafers (142 grams, or good quality chocolate chips)
Decoration
- ¼ cup chocolate icing (31 grams, homemade or store-bought, to act as glue)
- 24 Rolo candies (144 grams)
- Edible markers (to make the eyes and lips)
Instructions
- Prepare your workspace: Line a large baking sheet with wax paper and set aside to make handling the truffles easier later.
- Make the truffle mixture: Pulse the Oreo cookies in a food processor or strong blender until finely chopped. Add the cold cream cheese and pulse again until the mixture is smooth and fully combined into a creamy dough.
- Chill the mixture: Place the truffle mixture in the refrigerator for 10-20 minutes to firm up slightly and become easier to handle.
- Form truffle balls: Roll the chilled mixture into small balls and place them on the prepared baking sheet. Spraying your hands with nonstick spray can help prevent sticking during rolling.
- Firm the balls: Refrigerate the formed truffles for another 20 minutes to set well. If they lose shape, you can gently re-roll them once chilled.
- Melt white chocolate: Heat the white chocolate or almond bark in the microwave in 30-second intervals, stirring in between, until fully melted but not burnt.
- Dip truffles in white chocolate: Fully dip each truffle into the melted white chocolate, coating thoroughly, and place them back onto the wax paper-lined baking sheet. Refrigerate for 20 minutes to set.
- Melt dark or milk chocolate: Heat the dark or milk chocolate wafers in the microwave using the same method as the white chocolate—30-second bursts, stirring in between—to prevent burning.
- Add “hairline” chocolate: Dip each side of the truffles into the dark or milk chocolate to create Leia’s signature hairline. A fork can be used to dip and handle the truffles delicately. Place them on the wax paper again.
- Chill again to set chocolate: Refrigerate the truffles for another 20 minutes to allow the chocolate hairlines to fully set and harden.
- Attach hair buns with icing and Rolos: Dab a small amount of chocolate icing on each side of the truffles where Leia’s hair buns will be. Stick a Rolo candy to each side as buns, then place back on the wax paper.
- Final chilling: Allow the truffles to sit in the refrigerator to fully set the icing and secure the Rolos firmly.
- Decorate faces: Using edible markers, draw simple facial features on each truffle. Typical features include dots for eyes and a small heart shape for the lips to capture Leia’s iconic look.
Notes
- Keep your hands slightly sprayed with nonstick spray or lightly wet to prevent sticking while rolling the truffles.
- Be careful to not overheat the chocolate when melting; use short bursts and stir well in between to avoid burning.
- If you don’t have a food processor, finely crush the Oreos in a sealed bag using a rolling pin before mixing with cream cheese.
- The truffles’ shapes can be gently re-rolled after chilling if they flatten or deform.
- Edible markers can be found at specialty baking stores or online; use food-grade markers safe for direct contact with candies.
- Store the truffles in the refrigerator until serving to keep chocolate coatings firm and maintain freshness.

