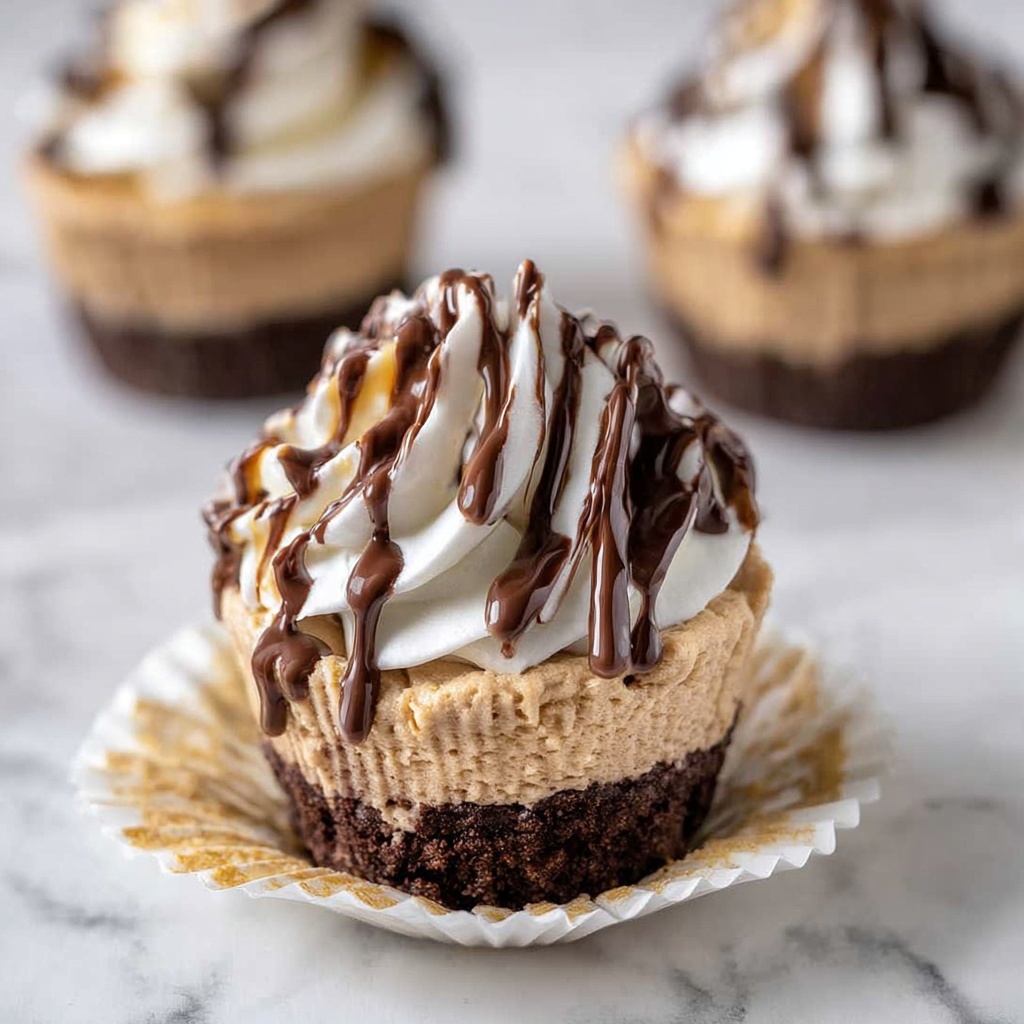
If you’re on the hunt for a delightful dessert that’s both elegantly simple and irresistibly creamy, this Mini No Bake Nutella Cheesecake Recipe is pure magic. Perfectly portioned into charming little bites, these cheesecakes combine a crunchy Oreo base with a luscious Nutella-infused filling that melts in your mouth. What makes this recipe shine is how easy it is to whip up without needing an oven, yet it looks and tastes like a dream come true. Whether you’re planning a casual get-together or just want a sweet treat anytime, these mini cheesecakes will quickly become your go-to indulgence.
Ingredients You’ll Need
This recipe uses a handful of essential ingredients that come together beautifully to create the perfect harmony of flavors and textures. Each element plays a vital role, from the buttery Oreo crust providing the crunch to the rich Nutella and cream cheese filling offering that irresistible smoothness and indulgence.
- Oreo cookies (4.8 oz / 137g): Crushed into fine crumbs, they create a chocolatey, crunchy base that holds everything together.
- Unsalted butter (3 tbsp / 45g, melted): Adds richness to the crust and helps the crumbs bind firmly when pressed into the tins.
- Philadelphia cream cheese (8 oz / 250g, softened): The main star for that creamy, tangy cheesecake texture—make sure to use the brick form for best results.
- Nutella (3/4 cup + 2 tbsp / 240g, plus 1/3 cup / 80g): Loads of luscious hazelnut spread to infuse the filling with decadence and a hint of nuttiness.
- Heavy cream (1/4 cup / 65ml plus 3/4 cup / 185ml): Whipped cream lightens the mixture, adding fluffiness and a smooth finish to the filling.
- Icing sugar (1/2 cup / 30g): Sweetens the cheesecake filling delicately while keeping it silky smooth.
- Vanilla extract (1/2 tsp, optional): Just a whisper to complement and deepen the flavors without overpowering the Nutella.
- Sugar (2 tbsp / 25g): Added with the heavy cream to enhance sweetness when whipping the topping.
How to Make Mini No Bake Nutella Cheesecake Recipe
Step 1: Prepare Your Muffin Tin
Start by lining a standard 12-hole muffin tin with paper cupcake liners. This step is essential as it helps the mini cheesecakes release easily without any mess and keeps all those beautiful layers intact.
Step 2: Make the Oreo Crust
Grab your Oreos and crush them into fine crumbs. You can use a food processor for a quick blitz or place them in a ziplock bag and crush with a rolling pin—either way works perfectly. The goal is to achieve a sandy texture that will form the crunchy base.
Step 3: Combine Crust Ingredients
Mix the Oreo crumbs with the melted unsalted butter until well combined. This step binds the crumbs and gives the crust that buttery richness. Divide this mixture evenly among the muffin tin holes and press firmly to create a compact base. A solid crust is the foundation of every great cheesecake.
Step 4: Whip Up the Cheesecake Filling
In a mixing bowl, beat the softened cream cheese until it’s smooth and creamy. Then add icing sugar, the large portion of Nutella, and vanilla extract if using. Mix well. Next, pour in the smaller amount of heavy cream and whip for 2 to 3 minutes until the mixture becomes light and fluffy—much like frosting. This step is where the magic happens, turning rich ingredients into a melt-in-your-mouth filling.
Step 5: Fill the Mini Cheesecakes
Divide your Nutella cheesecake mixture evenly into each muffin liner, smoothing out the tops with the back of a spoon or a small offset spatula. Make sure each mini cheesecake looks neat and even before chilling—that way, every bite is as perfect as it can be.
Step 6: Chill Until Set
Place the muffin tin in the refrigerator and let the cheesecakes firm up for several hours or overnight. This no bake process allows the flavors to meld beautifully, while the filling solidifies into that creamy texture we all crave. Patience here pays off with each luscious bite!
How to Serve Mini No Bake Nutella Cheesecake Recipe
Garnishes
Enhance these mini desserts with simple yet elegant touches. A sprinkle of crushed hazelnuts adds crunch and nuttiness, while a dusting of cocoa powder or a drizzle of extra Nutella can elevate the presentation. For a fresh contrast, try a few raspberries or a mint leaf on top to brighten every mouthful.
Side Dishes
These mini cheesecakes are wonderful on their own, but pairing them with fresh fruit salad or a scoop of vanilla ice cream really ups the indulgence factor. A cup of rich espresso or creamy hot chocolate alongside makes for a soothing pair that complements the Nutella flavor beautifully.
Creative Ways to Present
Serve these bites on a decorative platter arranged with whole hazelnuts and chocolate shavings for an impressive dessert spread. Alternatively, place each mini cheesecake in clear cups layered with whipped cream and berries for a stunning parfait effect that’s perfect for parties or special occasions.
Make Ahead and Storage
Storing Leftovers
If you happen to have any leftovers, store them in an airtight container in the refrigerator for up to 4 days. Keeping them chilled ensures the creamy filling maintains its perfect texture without becoming too soft or runny.
Freezing
You can freeze these mini cheesecakes wrapped individually in plastic wrap and sealed in a freezer bag. They’ll keep well for up to 2 months. When you’re ready to enjoy, thaw them overnight in the refrigerator for the best texture.
Reheating
Since this is a no bake cheesecake, reheating is not recommended. It’s best enjoyed chilled for that signature creamy, refreshing bite that only a well-set cheesecake can deliver.
FAQs
Can I use a different cookie for the crust?
Absolutely! While Oreos are classic here, you can substitute with graham crackers, digestive biscuits, or any chocolate cookie you love. Just crush them finely and mix with butter as usual.
Is it necessary to use brick-form cream cheese?
Yes, using brick-form cream cheese is important because it has a denser texture ideal for cheesecake. Tub cream cheese contains additional ingredients that can affect firmness and taste.
What if I don’t have Nutella? Can I use another spread?
You can use other chocolate-hazelnut spreads or even peanut butter, but this will change the flavor profile. Nutella provides a perfect balance of sweetness and nuttiness that defines this recipe.
How long should I chill the cheesecakes before serving?
At least 4 hours is ideal, but overnight chilling yields the best flavor and texture. It allows the filling to set fully and flavors to meld beautifully.
Can these cheesecakes be made vegan or dairy-free?
With substitutions like vegan cream cheese, dairy-free butter, and coconut cream, you can create a similar dessert, though texture and flavor may vary slightly from the original Mini No Bake Nutella Cheesecake Recipe.
Final Thoughts
I can’t recommend this Mini No Bake Nutella Cheesecake Recipe enough—it’s one of those sweet treats that feels like a special occasion every time you take a bite. The ease of making these mini cheesecakes, combined with their rich, silky flavor, means they’re sure to become a staple dessert for you and everyone lucky enough to try them. Give it a go and watch how quickly they disappear!
Print
Mini No Bake Nutella Cheesecake Recipe
- Prep Time: 20 minutes
- Cook Time: 0 minutes
- Total Time: 4 hours (including chilling time)
- Yield: 12 mini cheesecakes
- Category: Dessert
- Method: No-Cook
- Cuisine: American
Description
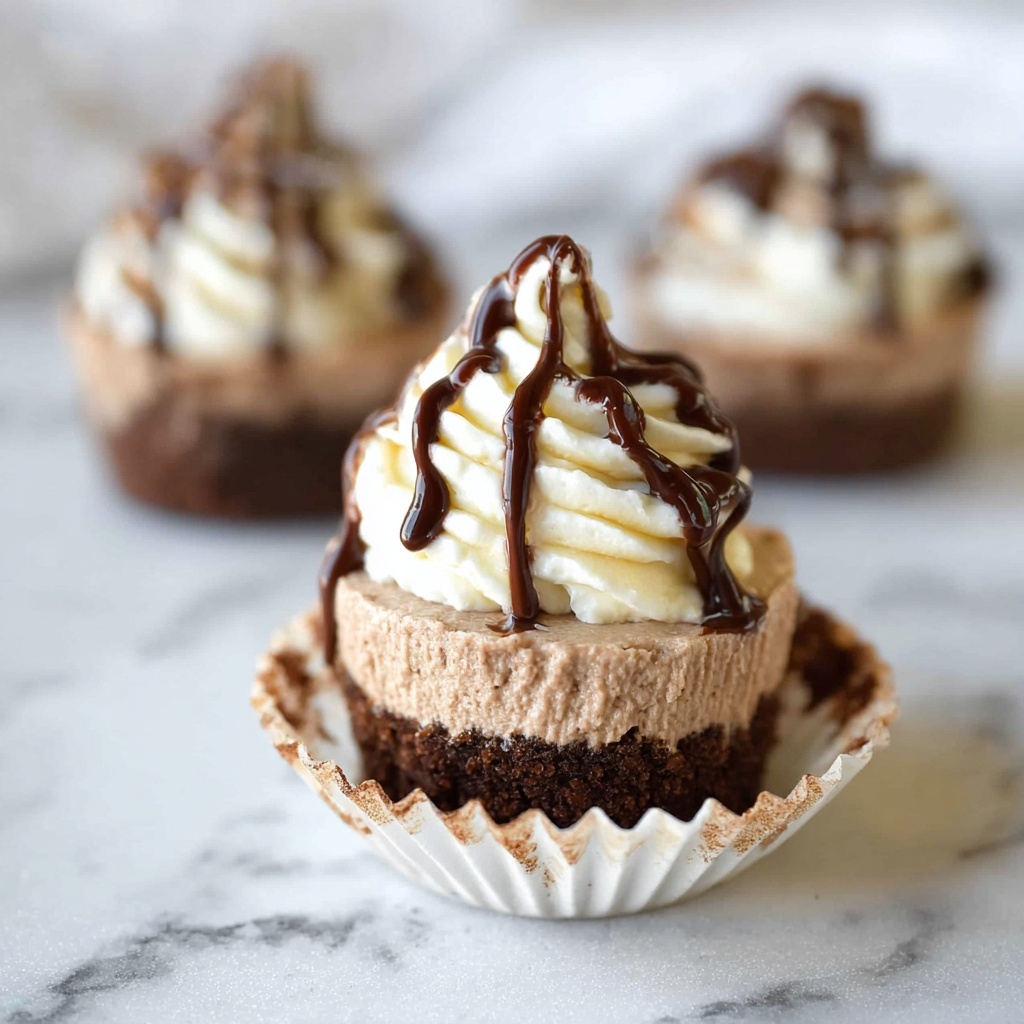
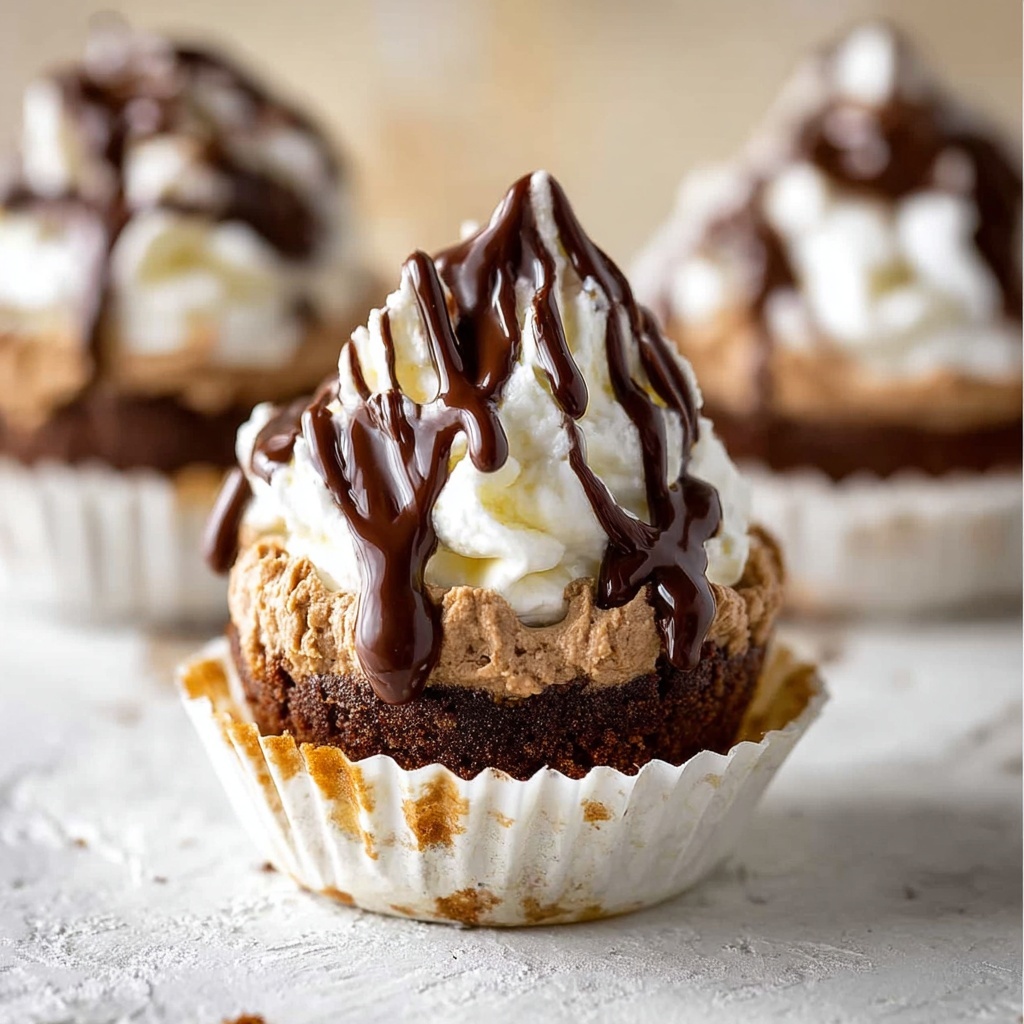
These Mini No Bake Nutella Cheesecakes are a delicious and easy-to-make dessert perfect for any occasion. With a rich Oreo crust and a creamy Nutella-infused cheesecake filling, these bite-sized treats require no baking and come together quickly in the refrigerator. Topped with a luscious Nutella whipped cream, they offer a perfect balance of creamy, crunchy, and chocolate-hazelnut flavors.
Ingredients
Crust
- 1 (4.8 oz / 137g) packet Oreo cookies
- 3 tbsp / 45 g unsalted butter, melted
Cheesecake Filling
- 8 oz / 250 g Philadelphia cream cheese (brick form, softened)
- 3/4 cup + 2 tbsp / 240 g Nutella (or hazelnut spread)
- 1/4 cup / 65 ml heavy cream
- 1/2 cup / 30 g icing sugar (confectioners/powdered sugar)
- 1/2 tsp vanilla extract (optional)
Nutella Whipped Cream Topping
- 1/3 cup / 80 g Nutella
- 3/4 cup / 185 ml heavy cream
- 2 tbsp / 25 g sugar
Instructions
- Prepare the Muffin Tin: Line a standard 12-hole muffin tin with paper muffin liners to easily hold and shape the cheesecakes.
- Make the Oreo Crust: Use a food processor to pulse Oreo cookies into fine crumbs or place them in a ziplock bag and crush with a rolling pin until finely ground. Mix the crumbs with melted butter until well combined.
- Form the Crust Base: Divide the Oreo crust mixture evenly between the muffin tin holes. Press firmly into the bottom to form an even crust layer.
- Prepare the Cheesecake Filling: Beat softened cream cheese until smooth. Gradually add icing sugar, Nutella, and vanilla extract (if using), blending well. Add the 1/4 cup of heavy cream and beat for 2 to 3 minutes until the mixture is fluffy and light like frosting.
- Fill the Cheesecakes: Spoon the cheesecake mixture over the prepared crusts in the muffin tin. Smooth the tops flat with the back of a spoon or a spatula. Refrigerate the cheesecakes in the muffin tin until set and firm, preferably for several hours or overnight.
- Prepare Nutella Whipped Cream: In a clean mixing bowl, combine 3/4 cup heavy cream with 2 tbsp sugar and beat until soft peaks form. Gently fold in 1/3 cup Nutella until well blended and smooth.
- Top and Serve: Once the cheesecakes have firmed up, pipe or spoon the Nutella whipped cream on top of each cheesecake. Return to the fridge briefly to set the topping if needed. Serve chilled and enjoy!
Notes
- Use the brick form cream cheese for better texture; tub cream cheese is too soft and watery.
- If heavy cream is not available, whipping cream can be used as a substitute.
- Refrigerate the cheesecakes for at least 4 hours or overnight to allow them to set properly.
- You can use a piping bag for a neat topping with the Nutella whipped cream or simply spoon it on top.
- These cheesecakes can be stored in the refrigerator for up to 3 days.