
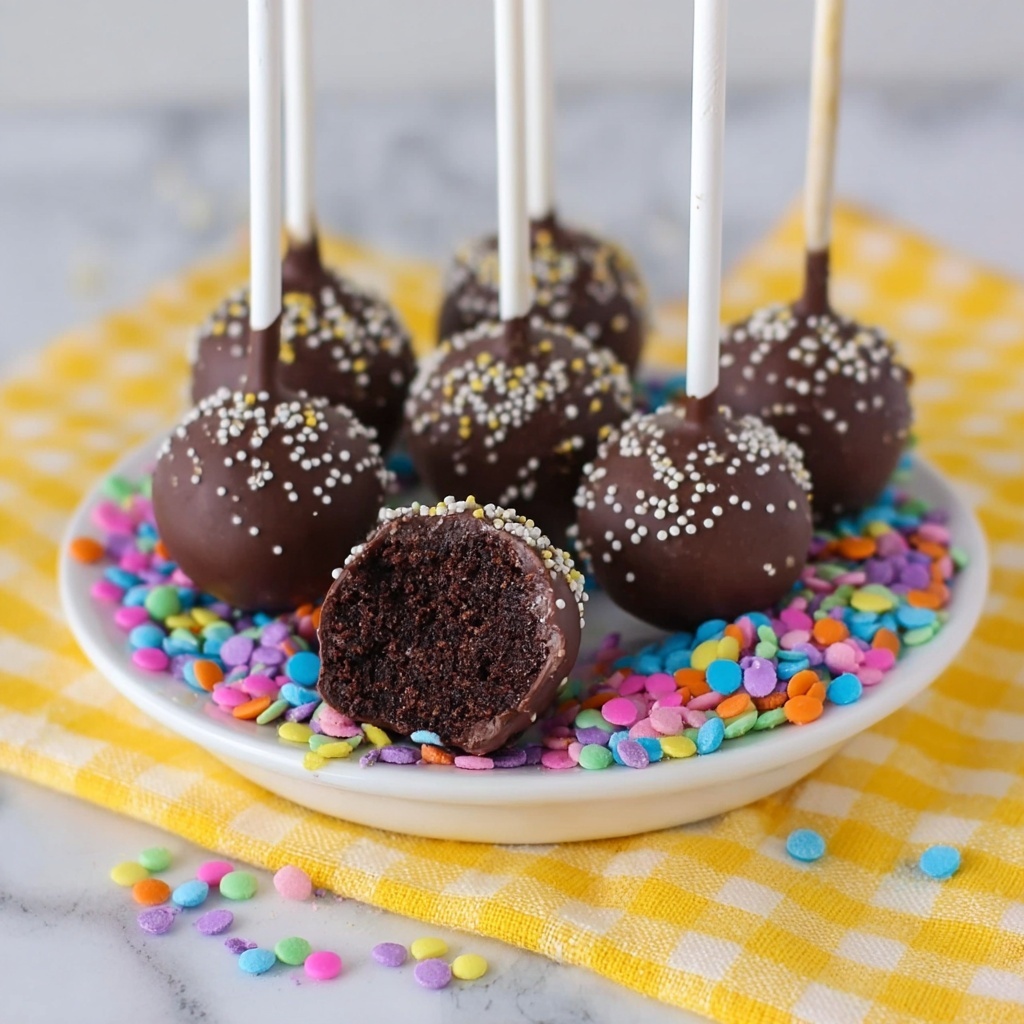
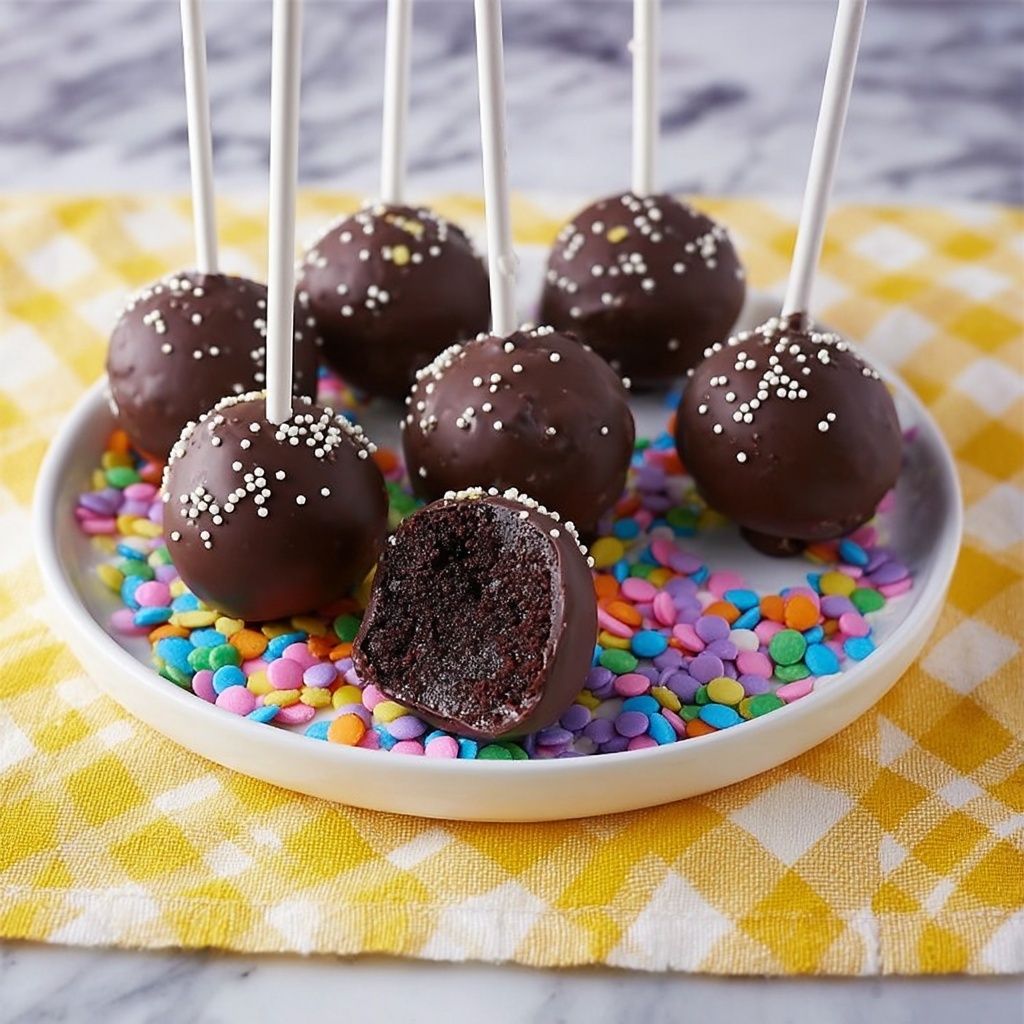
If you’ve ever found yourself enchanted by Starbucks’ delightful treats, then you will absolutely love recreating this Copycat Starbucks Chocolate Cake Pops Recipe at home. These little bites are pure magic—moist chocolate cake blended with luscious frosting, coated in a smooth, rich chocolate shell, and finished with a fun sprinkle of white nonpareils. Whether you’re looking to impress guests or just treat yourself, this recipe captures every bit of that iconic Starbucks charm while making it super accessible and fun to prepare right in your own kitchen.
Ingredients You’ll Need
This Copycat Starbucks Chocolate Cake Pops Recipe uses a handful of simple ingredients, each playing a vital role. From the cake mix that forms the moist base to the chocolate candy melts that create the irresistible coating, every component is essential for nailing that perfect balance of taste, texture, and presentation.
- Chocolate Cake Mix: Provides the rich and tender cake foundation; Pillsbury works wonderfully for an easy start.
- Chocolate Frosting: Binds the cake crumbs and adds creamy sweetness for that gooey inside.
- Wilton Chocolate Candy Melts: Perfect for a smooth, shiny coating that hardens beautifully around each pop.
- Crisco Shortening (1/2 tsp): Helps thin the candy melts for easier dipping and a glossy finish.
- White Nonpareils: Add a festive crunch and visual appeal to the cake pops.
- White Sticks: Essential for shaping your cake pops into convenient, grab-and-go treats.
How to Make Copycat Starbucks Chocolate Cake Pops Recipe
Step 1: Bake the Chocolate Cake
Start by preparing the chocolate cake mix according to the package instructions. Grease a 9×13-inch pan, pour in the batter, and bake at 350°F for about 25 minutes or until a toothpick inserted comes out clean. Cooling the cake completely is crucial to prevent melting later on, so place the pan on a wire rack and let it rest.
Step 2: Crumble and Mix with Frosting
Once cool, crumble the cake finely using a fork, making sure to scrape the bottom and sides of the pan for every last bit. Transfer the crumbs into a large bowl, then add the entire can of chocolate frosting. Use your hands to blend everything into one cohesive, slightly gooey cake mixture that’s easy to roll into balls.
Step 3: Shape the Cake Balls
Lay a large piece of parchment paper on a cookie sheet for easy cleanup and set it near your workspace. Roll the cake mixture into balls approximately 1 1/2 inches in diameter and place them on the parchment sheet. This is where the cake pops really start coming together and looking like the charming treats we crave.
Step 4: Melt Half the Candy Melts
Put half of the chocolate candy melts in a microwave-safe bowl. Heat in 10-second bursts, stirring in between until the mixture is silky smooth. Taking your time melting ensures even texture and prevents scorching, which is key for a flawless coating.
Step 5: Attach the Sticks
Dip each white stick into the melted candy melts, then immediately push it halfway into a cake ball. This helps secure the stick so your cake pops stay sturdy. Repeat with all cake balls until each one sports its own handle for easy dipping later.
Step 6: Chill the Cake Pops
Pop the cookie sheet with the cake pops into the freezer for 30 minutes. This chilling step is essential—it makes the cake mixture firmer and ensures the sticks adhere properly before you proceed to the coating stage.
Step 7: Melt Remaining Candy Melts and Dip
After chilling, melt the rest of the candy melts. Stir in 1/2 teaspoon of Crisco to the melted chocolate to improve fluidity and shine. Hold each cake pop by the stick, dip it fully into the chocolate, then stick it upright into Styrofoam to set. Before the coating hardens, sprinkle generously with white nonpareils for that extra touch of fun and texture.
Step 8: Let the Coating Set
Allow the cake pops to sit at room temperature for about an hour so the chocolate coating can harden perfectly. Once set, store them in an airtight container in the refrigerator until you’re ready to serve.
How to Serve Copycat Starbucks Chocolate Cake Pops Recipe
Garnishes
While the classic white nonpareils offer a lovely crunch and look, don’t hesitate to get creative with your garnishes! Try colorful sprinkles, crushed nuts, or even a drizzle of white chocolate for an eye-catching and delicious finish that makes these cake pops extra special.
Side Dishes
These cake pops steal the show on their own, but pairing them with a cup of perfectly brewed coffee or a frothy latte can transform your snack session into a mini café experience. Fresh berries or a small bowl of fruit salad also balance the richness and provide a refreshing contrast.
Creative Ways to Present
Present your cake pops in a foam block covered with decorative paper or a pretty vase filled with candy or beads to keep them upright. Wrapping each pop individually in clear cellophane tied with a ribbon turns them into delightful gifts or party favors. The possibilities are endless for making your cake pops as charming as they are tasty.
Make Ahead and Storage
Storing Leftovers
Store leftover cake pops in an airtight container in the refrigerator to keep them fresh and maintain the crispness of the chocolate coating. They should be good for up to a week, making them the perfect ready-to-go treat whenever you need a chocolate pick-me-up.
Freezing
For longer storage, you can freeze the cake pops. Place them on a baking sheet lined with parchment paper and freeze until solid, then transfer to a freezer-safe container. When you’re ready to enjoy, thaw them in the refrigerator for several hours or overnight to keep their moist texture intact.
Reheating
Unlike many baked goods, cake pops don’t require reheating—they’re perfect served cold or at room temperature. If you prefer them a bit softer, let them come to room temperature on the counter for about 15 minutes before digging in.
FAQs
Can I use homemade chocolate cake instead of a mix?
Absolutely! A homemade chocolate cake will work just as well, as long as it’s fully cooled before crumbling. This can add a personalized touch, but using a mix keeps things quick and foolproof if you’re in a hurry.
What type of sticks should I use for the cake pops?
White candy or sucker sticks are ideal because they’re sturdy and food-safe. You can find these at craft stores or baking supply shops. Avoid thin or flimsy sticks to prevent breaking during dipping or serving.
Why do I add shortening to the melted candy melts?
The shortening helps thin out the chocolate, making it easier to dip the cake pops smoothly and resulting in a shinier, more professional-looking finish.
Can I make these dairy-free or vegan?
Yes, with some adjustments. Use a dairy-free cake mix and frosting, and choose vegan-friendly chocolate melts. Just be sure all ingredients are compatible to maintain that rich chocolate flavor and perfect texture.
Why do the cake pops sometimes fall off the sticks?
This can happen if the cake mixture is too crumbly or if you skip the freezing step. Make sure to mix the cake crumbs and frosting thoroughly, shape the balls firmly, insert the sticks properly coated in melted candy, and freeze before dipping to secure everything in place.
Final Thoughts
Getting to make your very own Copycat Starbucks Chocolate Cake Pops Recipe is such a joyful experience that brings the magic of those iconic café treats right into your kitchen. These darling pops are perfect for celebrations, gifts, or simply a cozy night in with a sweet craving. I encourage you to try this recipe—you’ll not only delight your taste buds but also enjoy every moment of creating something delicious by hand. Happy baking!
Print
Copycat Starbucks Chocolate Cake Pops Recipe
- Prep Time: 15 minutes
- Cook Time: 25 minutes
- Total Time: 1 hour 40 minutes
- Yield: 24 cake pops
- Category: Dessert
- Method: Baking
- Cuisine: American
Description
These homemade Copycat Starbucks Chocolate Cake Pops offer a delightful treat that combines moist chocolate cake mixed with rich chocolate frosting, coated in a smooth candy shell, and decorated with white nonpareils. Perfect for parties or a fun dessert, these cake pops are easy to make and yield 24 delicious bite-sized sweets.
Ingredients
Chocolate Cake Base
- 1 Chocolate Cake Mix (e.g., Pillsbury)
- Ingredients needed to prepare the cake mix as per box instructions (usually eggs, oil, and water)
Mix-in
- 1 can Chocolate Frosting
Coating and Decoration
- 1 bag Wilton Chocolate Candy Melts
- 1/2 tsp Crisco Shortening
- White Nonpareils for sprinkling
- White sticks for making suckers or candies
Instructions
- Prepare the Cake: Grease a 9 x 13-inch baking dish and prepare the chocolate cake mix according to the package directions. Pour the batter into the dish. Bake the cake at 350°F (175°C) for about 25 minutes or until a toothpick inserted in the center comes out clean. Remove from oven and allow the cake to cool completely on a wire rack.
- Create Cake Crumbs and Mix: Once the cake is cool, use a fork to break it into fine crumbs, scraping the bottom and sides of the baking dish. Transfer crumbs into a large bowl. Add the entire can of chocolate frosting and mix thoroughly using your hands until you form a well-mixed, gooey cake mixture.
- Form Cake Balls: Lay a large piece of parchment paper on a cookie sheet near the mixing bowl. Roll the cake mixture into 1 1/2-inch balls and place them on the parchment-lined sheet. Continue until all mixture is used.
- Melt the Candy Melts – First Portion: In a microwave-safe bowl, melt about half the chocolate candy melts in 10-second intervals, stirring after each, until smooth.
- Insert Sticks: Dip the white sticks into the melted candy melts, then immediately insert each stick into a cake ball. Repeat until each cake ball has a stick inserted.
- Freeze the Cake Pops: Place the cake pops on the parchment-lined tray in the freezer for 30 minutes to firm and help the sticks adhere.
- Melt Remaining Candy Melts: Remove cake pops from freezer. Melt the remaining candy melts in the microwave until smooth. Stir in 1/2 teaspoon of Crisco shortening to create a smooth, glossy coating.
- Coat and Decorate Cake Pops: Holding the sticks, dip each cake pop into the melted candy melts to fully cover. Place the dipped cake pops upright into a large piece of Styrofoam to set. While wet, sprinkle with white nonpareils for decoration. Repeat for all cake pops.
- Set and Store: Allow the coated cake pops to sit for about 1 hour to let the candy coating harden completely. Store in an airtight container in the refrigerator for best freshness. Serve and enjoy your homemade chocolate cake pops!
Notes
- Ensure the cake is completely cool before mixing with frosting to prevent melting the frosting.
- Freezing the cake pops with sticks inserted helps the sticks adhere firmly in the cake balls.
- Add Crisco shortening to the melted candy melts for a smoother, shinier coating.
- White sticks can be found in craft or baking supply stores; they help create the classic cake pop shape.
- Store finished cake pops in the refrigerator and consume within 3-4 days for optimal taste and texture.


