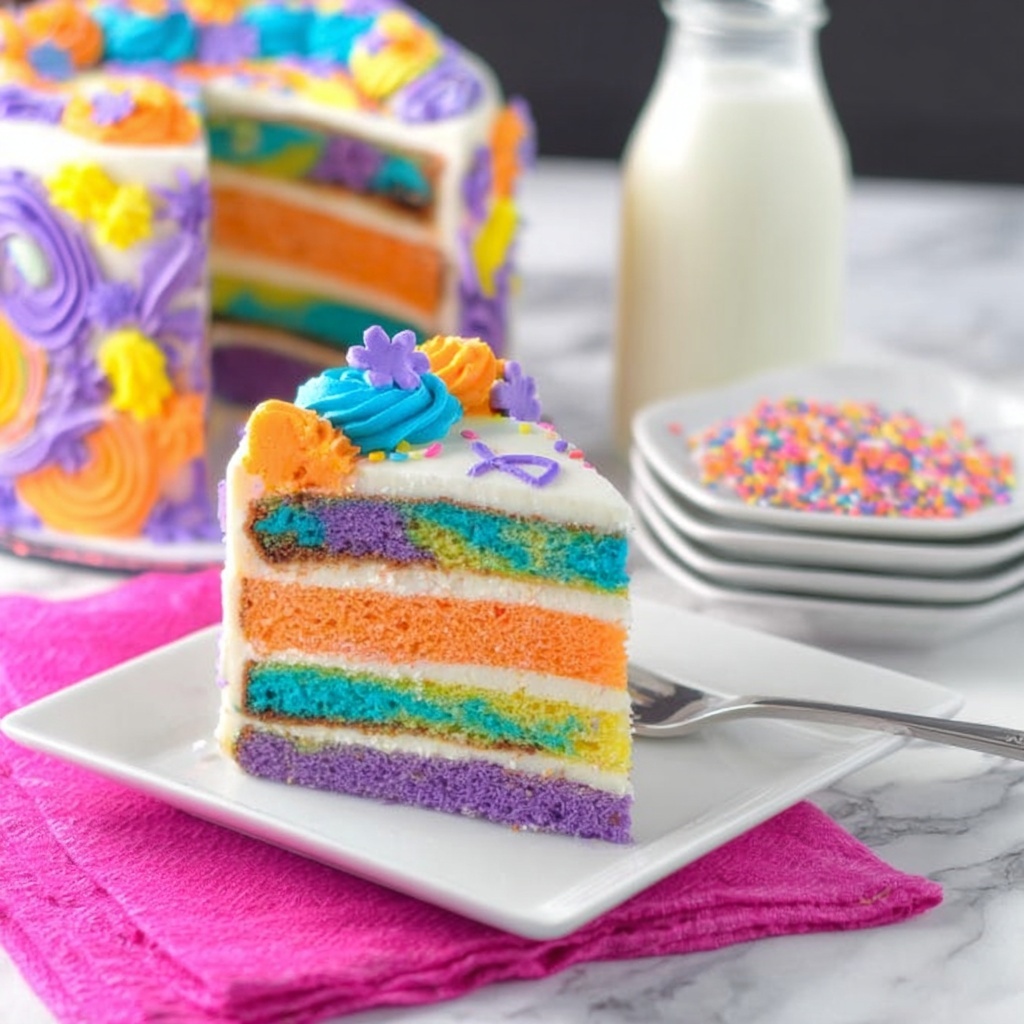
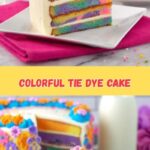
If you’re craving a cake that’s as joyful and vibrant as a summer festival, the Hippie Tie Dye Cake Recipe is exactly what you need in your baking repertoire. This cake is a stunning, colorful masterpiece that tastes just as delightful as it looks, featuring swirls of bright hues and a moist, fluffy crumb. Every bite bursts with playful energy, making it perfect for birthdays, gatherings, or any occasion where you want to spread happiness through dessert. The magic lies not only in the palette of colors but also in the rich vanilla flavor balanced by a creamy, buttery frosting that ties all those colors together beautifully.
Ingredients You’ll Need

Ingredients You’ll Need
Simple ingredients come together to create something truly special here. Each component plays a crucial role, from the soft cake layers to the luscious frosting and vibrant colors that bring this Hippie Tie Dye Cake Recipe to life.
- 2 boxes of white cake mix: Provides a reliable, fluffy base that lets colors shine brightly.
- 6 large egg whites: Adds structure and lightness without extra richness.
- 2 cups water: Keeps the batter moist and perfect for mixing the colors evenly.
- 1 cup canola oil: Ensures tenderness and keeps the cake moist after baking.
- Gel food coloring (sky blue, purple, pink, green, yellow): These vibrant gels are essential for achieving those iconic tie dye swirls without thinning your batter.
- Pam baking spray: Prevents sticking so your layers come out perfectly smooth.
- 2 cups unsalted butter (softened): The heart of your buttercream, providing creamy richness.
- 5 cups powdered sugar: Creates that classic sweet and fluffy frosting texture that can be colored delightfully.
- 2 tsp pure vanilla extract: Adds depth and warmth to the frosting’s flavor.
- 3–6 tbsp heavy whipping cream: Adjusts frosting consistency to spread easily or pipe beautifully.
- Gel food coloring (sky blue, purple, pink, green, yellow, and black): For tinting the frosting to match or contrast with the cake layers, plus black for detail.
- 1 package of Wilton flower icing transfers: Adds a decorative, professional touch without extra fuss.
How to Make Hippie Tie Dye Cake Recipe
Step 1: Prepare Your Colorful Batter
Start by preheating your oven according to the cake mix instructions and greasing your pans with the Pam baking spray. Combine the white cake mix, egg whites, water, and canola oil in a large bowl, mixing until smooth. This is the base of your masterpiece, so get it perfectly creamy. Now comes the fun part — divide the batter evenly into separate bowls for each color. Add a few drops of gel food coloring to each bowl and gently fold until you get bright, even hues. Don’t overmix to keep the colors vibrant and ready for that swirling magic.
Step 2: Create the Tie Dye Effect
Now, drop spoonfuls of each colored batter into your prepared pans in a random, overlapping pattern. You want the colors to layer but also blend gently, mimicking the signature tie dye look. Use a skewer or the back of a spoon to swirl the colors lightly for that marbled, psychedelic effect. The batter might look wild and messy, but that’s exactly the beautiful chaos that makes this cake so special.
Step 3: Bake and Cool
Pop your pans into the oven and bake for about 25 minutes, or until a toothpick inserted comes out clean. While baking, your kitchen will start to fill with the sweet scent of vanilla and butter, building anticipation. Once baked, allow the layers to cool completely — this is crucial to keep your frosting from melting and losing those vivid colors.
Step 4: Whip Up the Rainbow Buttercream
Beat the softened butter until it’s creamy and pale. Gradually add powdered sugar and vanilla extract, mixing until light and fluffy. Slowly incorporate heavy whipping cream until your frosting reaches a spreadable consistency. Divide the frosting into separate bowls and tint each with gel food coloring — choose whichever shades inspire you based on your batter colors. This multicolored frosting will add another layer of fun to your Hippie Tie Dye Cake Recipe.
Step 5: Assemble and Decorate
Layer your cooled cake rounds with alternating colors of buttercream in between, then generously frost the outside of the cake. Use the Wilton flower icing transfers on the cake’s sides or top to add delicate floral accents that complement the tie dye swirls. This final touch elevates the cake from party-ready to show-stopping.
How to Serve Hippie Tie Dye Cake Recipe
Garnishes
For a killer presentation, add edible glitter or colorful sprinkles on top for sparkle and whimsy. Fresh edible flowers or tiny candy beads can also decorate the edges, amplifying that carefree, hippie vibe. A dusting of powdered sugar can give a soft, dreamy finish to your vibrant creation.
Side Dishes
This cake pairs wonderfully with simple accompaniments that won’t steal the show. Think fresh whipped cream, a scoop of vanilla bean ice cream, or a vibrant berry compote to echo the colorful theme. Light fruit salads with citrus notes bring a refreshing contrast that balances the sweetness beautifully.
Creative Ways to Present
Slice the Hippie Tie Dye Cake Recipe into generous wedges that reveal the eye-catching swirl inside — it’s almost like a surprise party on a plate. For gatherings, serve in clear glass cake domes to showcase the vivid layers, or let guests decorate their slices with extra sprinkles and edible flowers for an interactive celebration.
Make Ahead and Storage
Storing Leftovers
Because the Hippie Tie Dye Cake Recipe is coated in buttercream, store leftovers in an airtight container at room temperature for up to two days or in the refrigerator for up to four days. Keep the cake covered to prevent the frosting from drying out or absorbing fridge odors.
Freezing
You can freeze this cake for longer storage by wrapping it tightly in plastic wrap and then foil to avoid freezer burn. Freeze for up to two months. When you’re ready to enjoy again, thaw it overnight in the refrigerator before letting it come to room temperature.
Reheating
The cake is best enjoyed cool or at room temperature, so reheating isn’t necessary. If your cake has been refrigerated, simply allow it to rest outside the fridge for 30-60 minutes before serving to bring back the perfect texture and flavor.
FAQs
Can I use homemade cake batter instead of box mix?
Absolutely! Using homemade white cake batter is a fantastic way to personalize your Hippie Tie Dye Cake Recipe further. Just make sure your batter is thick enough to hold its shape so the colors don’t bleed together too much during baking.
What kind of gel food coloring works best?
Gel food coloring is ideal because it delivers vibrant colors without diluting the batter. Brands like Wilton or AmeriColor are popular choices, offering intense shades necessary to capture the true tie dye effect.
How do I prevent colors from bleeding together?
The key is to avoid overmixing the colors once they’re in the pan, and to use a thick batter that holds its form well. Swirling gently with a skewer instead of vigorously helps maintain distinct, beautiful streaks.
Can I make this cake dairy-free?
Yes, you can substitute the butter with dairy-free margarine and use a dairy-free milk alternative for the batter and frosting. Just check that your cake mix and food coloring are also free from dairy ingredients.
How do I get the frosting colors as vibrant as the cake?
Use gel food coloring rather than liquid, as it provides concentrated color that won’t change the texture of your buttercream. Adding color gradually lets you control the intensity exactly how you want it.
Final Thoughts
Making the Hippie Tie Dye Cake Recipe is not just baking; it’s creating a slice of happiness filled with color, flavor, and a little bit of magic. It’s an absolute joy to share with friends and family, and I promise it will be the highlight of any celebration. So gather your ingredients, break out those gel colors, and get ready to bake a cake that’s as fun to make as it is to eat!
Print
Hippie Tie Dye Cake Recipe
- Prep Time: 10 minutes
- Cook Time: 25 minutes
- Total Time: 35 minutes
- Yield: 12 servings
- Category: Dessert
- Method: Baking
- Cuisine: American
Description
This vibrant Hippie Tie Dye Cake is a fun and colorful twist on classic white cake. Featuring multiple layers of brightly colored batter and topped with creamy buttercream frosting, it’s perfect for celebrations that need a pop of color. The use of gel food coloring ensures vivid hues without altering the batter’s consistency. Decorated with Wilton flower icing transfers, this cake is as visually appealing as it is delicious.
Ingredients
Cake Batter
- 2 boxes of white cake mix
- 6 large egg whites
- 2 cups water
- 1 cup canola oil
- Sky Blue, Purple, Pink, Green, Yellow gel food coloring
Buttercream Frosting
- 2 cups unsalted butter, softened
- 5 cups powdered sugar
- 2 teaspoons pure vanilla extract
- 3–6 tablespoons heavy whipping cream
- Sky Blue, Purple, Pink, Green, Yellow, and Black gel food coloring
- Pam baking spray (for greasing pans)
- 1 package of Wilton flower icing transfers (for decoration)
Instructions
- Prepare the cake batter: Preheat your oven to the temperature recommended on the cake mix boxes. In a large bowl, combine the white cake mixes, egg whites, water, and canola oil. Mix until smooth and well combined.
- Divide and color the batter: Evenly divide the batter into 5 separate bowls. Add a different gel food coloring to each bowl (Sky Blue, Purple, Pink, Green, and Yellow) and stir each until vibrant and uniformly colored.
- Prepare the pans: Spray your cake pans thoroughly with Pam baking spray to prevent sticking. You can use multiple round pans or bake in batches if you have fewer pans.
- Create the tie dye effect: Spoon the colored batters into the prepared pans in random blobs or swirls, alternating colors to create a tie dye pattern. Do not fully mix the colors, as the marbling effect is the goal.
- Bake the cakes: Place the pans in the oven and bake according to the package instructions, typically around 25 minutes, or until a toothpick inserted into the center comes out clean. Remove from the oven and allow to cool completely.
- Make the buttercream frosting: In a large mixing bowl, beat the softened butter until creamy. Gradually add the powdered sugar and continue beating. Mix in the vanilla extract. Slowly add heavy whipping cream, 1 tablespoon at a time, until the frosting reaches a spreadable consistency.
- Color the frosting: Divide the buttercream into separate bowls and add gel food coloring (Sky Blue, Purple, Pink, Green, Yellow, and Black) to create various colored frostings for decorating.
- Assemble the cake: Level the cooled cake layers if necessary. Spread a layer of colored buttercream between each cake layer. Once stacked, cover the entire cake with a base coat of buttercream in your preferred color.
- Decorate: Use the colored buttercreams and piping bags to create decorative patterns on the cake. Finish by applying Wilton flower icing transfers for a beautiful floral finish matching the tie dye theme.
- Serve and enjoy: Allow the cake to set at room temperature for a bit before slicing to get clean cuts. Serve your Hippie Tie Dye Cake and enjoy the colorful celebration!
Notes
- Use gel food coloring to achieve vibrant colors without thinning the batter or frosting.
- Ensure cake layers are completely cool before frosting to prevent melting.
- The amount of heavy cream can be adjusted to achieve desired frosting texture.
- You can substitute canola oil with vegetable oil if preferred.
- This cake stores well covered in the refrigerator for up to 3 days; bring to room temperature before serving.
