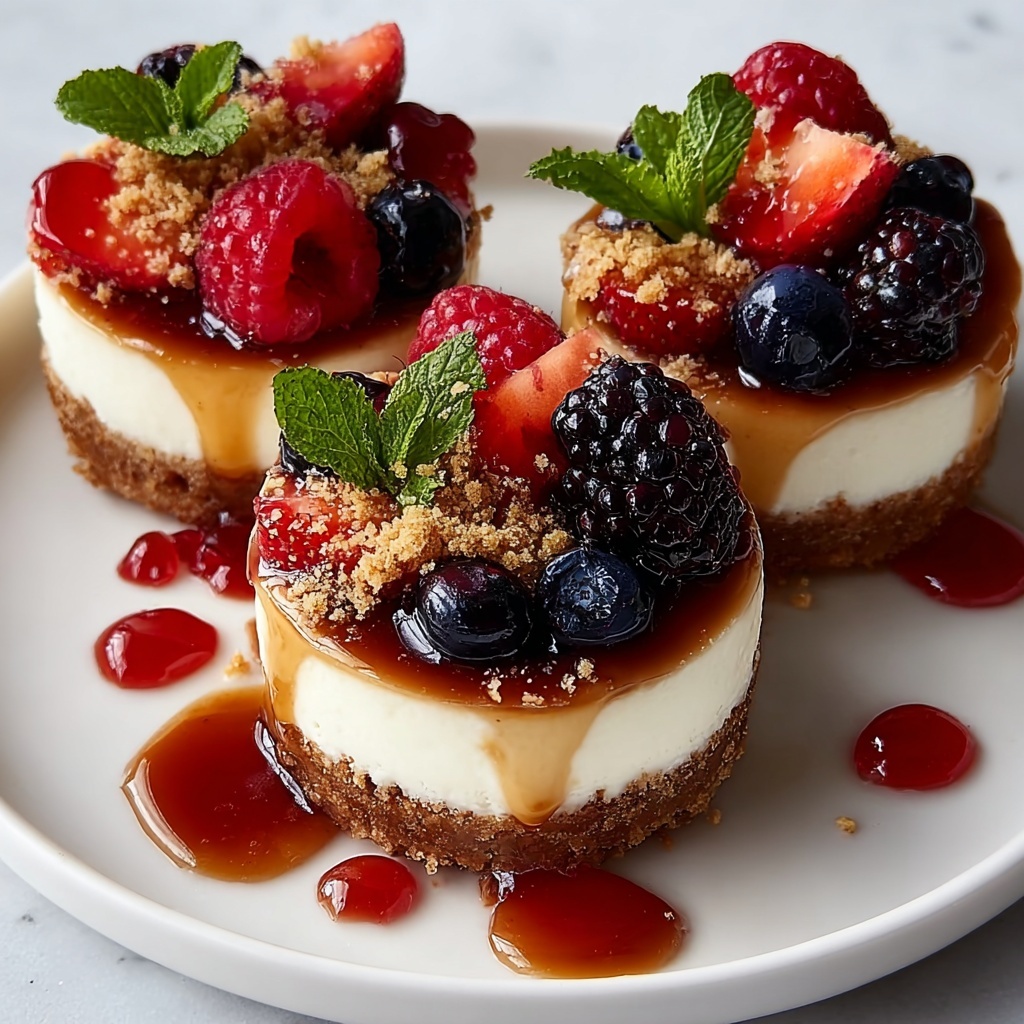
If you’re searching for a show-stopping dessert that feels both indulgent and perfectly shareable, let me introduce you to the Mini Cheesecake Board Recipe. This delightful treat combines creamy, dreamy mini cheesecakes with a variety of colorful toppings artfully arranged on a board, creating a feast for both the eyes and the palate. It’s fun to make, easier than you might think, and ideal for any occasion where you want to impress guests or simply treat yourself to a little slice of heaven. Trust me, once you try this Mini Cheesecake Board Recipe, it will become your new favorite go-to dessert for gatherings, celebrations, or even a cozy night in.
Ingredients You’ll Need
Gathering the right ingredients is the first step to assembling your perfect Mini Cheesecake Board Recipe. Each component plays a vital role, from the buttery, crunchy crust that grounds every bite, to the silky cream cheese filling that melts in your mouth, and the fresh, varied toppings that bring bursts of flavor and color.
- Graham cracker crumbs: The base of your crust, providing a sweet, crunchy texture that balances the creamy cheesecake.
- Unsalted butter, melted: Helps bind the graham cracker crumbs into a firm crust with a rich buttery flavor.
- Cream cheese, softened: The star of the filling, delivering that classic velvety smoothness.
- Granulated sugar: Sweetens the filling just enough without overpowering the tang of the cream cheese.
- Vanilla extract: Adds a warm, aromatic note that enhances the overall flavor profile.
- Large eggs: Provide structure and richness to the cheesecake batter.
- Sour cream: Introduces a subtle tang and silky texture, helping the cheesecake stay moist and tender.
- Assorted toppings: Fresh berries, chocolate chips, nuts, or fruit preserves add texture, flavor diversity, and vibrant pops of color.
How to Make Mini Cheesecake Board Recipe
Step 1: Prepare the Oven and Crust
Begin by preheating your oven to 325°F (163°C) to ensure even baking. While it warms up, mix the graham cracker crumbs with melted butter until the mixture is evenly coated. This combination forms a buttery, crumbly crust once pressed into your mini cheesecake pan—the essential foundation that offers a delightful crunch.
Step 2: Make the Cream Cheese Filling
In a large bowl, beat the softened cream cheese and granulated sugar together until you get a smooth, creamy texture. This step is crucial because no one wants lumps in their cheesecake. Then fold in the vanilla extract for that lovely, inviting flavor.
Step 3: Add Eggs and Sour Cream
Carefully add the eggs one at a time, mixing on low speed so the batter stays light and doesn’t become overworked. Overmixing can lead to cracks, and we definitely want to keep these mini cheesecakes perfect. Gently fold in the sour cream last; it balances the richness and helps create that luscious, tender bite.
Step 4: Bake Your Mini Cheesecakes
Pour the batter evenly over your prepared crusts, filling each mini pan. Bake for 15 to 18 minutes or until the centers are just set—no more jiggling, but still full of promise. After baking, let them cool at room temperature before chilling to firm up properly. This cooling phase transforms your mini cheesecakes from good to absolutely irresistible.
Step 5: Assemble Your Mini Cheesecake Board Recipe
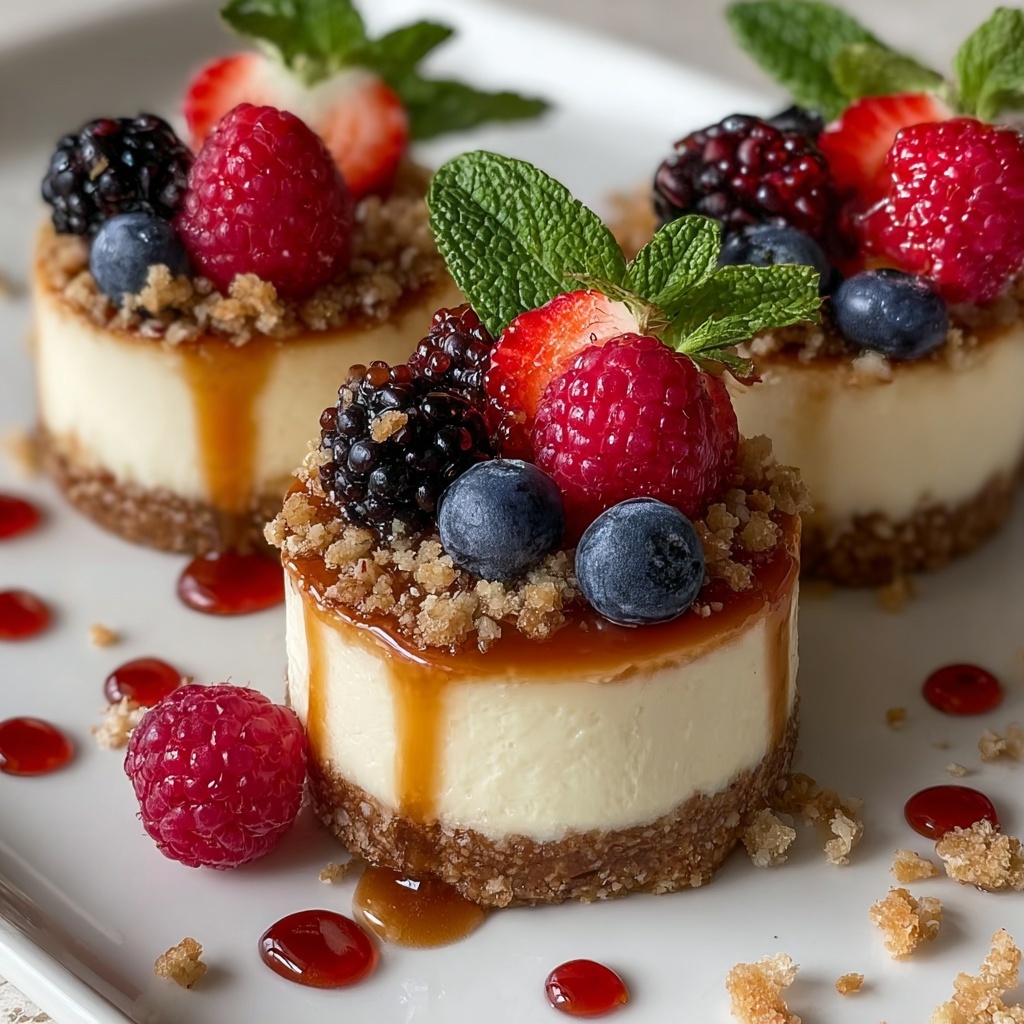
Once the cheesecakes are chilled and removed from their pans, arrange them artfully on a serving board. Surround them with an exciting medley of toppings like fresh berries, chocolate chips, nuts, or your favorite fruit preserves. This beautiful, colorful presentation is what makes the Mini Cheesecake Board Recipe such a crowd-pleaser and conversation starter.
How to Serve Mini Cheesecake Board Recipe

Garnishes
Garnishes are where you get to have fun and personalize your cheesecake board. Think vibrant fresh strawberries or blueberries, a sprinkle of toasted nuts for crunch, or a drizzle of luscious fruit preserves for sweetness. These little extras don’t just look lovely; they add layers of flavor and texture that keep every bite exciting.
Side Dishes
Pair your Mini Cheesecake Board Recipe with light, refreshing sides like mint tea, sparkling water with a twist of lemon, or even a fruity cocktail. These accompaniments cleanse your palate and complement the richness of the cheesecake beautifully, making the whole experience balanced and refreshing.
Creative Ways to Present
Don’t limit yourself to a plain board! Consider laying a rustic wooden serving tray or a slate platter as your base. Add edible flowers or small bowls of dipping sauces like chocolate ganache or caramel for additional flair. These thoughtful touches elevate your presentation, turning a simple dessert into a stunning centerpiece.
Make Ahead and Storage
Storing Leftovers
If you happen to have any leftovers from your Mini Cheesecake Board Recipe, which might be rare, keep the mini cheesecakes refrigerated in an airtight container for up to three days. This maintains their creamy texture and freshness so they’re just as delicious the next day.
Freezing
Want to prepare ahead of time or save some for later? These mini cheesecakes freeze wonderfully. Place them in a single layer on a tray to freeze initially, then transfer into a freezer-safe container or bag. They can be frozen for up to one month without compromising flavor or texture.
Reheating
To enjoy frozen mini cheesecakes, thaw them overnight in the fridge. Since cheesecakes are best served chilled, reheating isn’t necessary or recommended. Just bring them to room temperature for a few minutes before serving if you prefer a softer texture.
FAQs
Can I use a different crust for the Mini Cheesecake Board Recipe?
Absolutely! While graham cracker crust is classic, you can experiment with crushed cookies like Oreos or digestive biscuits. Just keep the crumb-to-butter ratio to ensure it holds together nicely.
Do I have to use sour cream in the recipe?
Sour cream adds a pleasant tang and creaminess, but you can substitute it with Greek yogurt. It will slightly change the flavor profile but will still keep the texture moist and tender.
Can I make the Mini Cheesecake Board Recipe dairy-free?
It’s a bit tricky because cream cheese is key to that creamy texture, but dairy-free cream cheese alternatives do exist. Make sure to pick a brand that bakes well; otherwise, the texture might differ from the traditional cheesecake.
How do I prevent cracks in mini cheesecakes?
The key is gentle mixing—don’t overbeat the eggs and batter—and baking at a moderate temperature. Also, avoid rapid cooling; letting cheesecakes cool gradually at room temperature before refrigerating helps minimize cracks.
Can I prepare the cheesecakes without a mini cheesecake pan?
You can use mini muffin tins or silicone molds, just be sure to line them well or use individual cupcake liners. The size may vary, so keep an eye on baking time since smaller cheesecakes might bake faster.
Final Thoughts
Making a Mini Cheesecake Board Recipe is one of those baking adventures that never fail to bring smiles, both during preparation and while sharing with loved ones. It’s an inviting, beautiful dessert that’s customizable, approachable, and utterly delicious. So go ahead, gather your ingredients, and create your own little cheesecake masterpieces—you’ll wonder why you didn’t try this delightful treat sooner!
Print
Mini Cheesecake Board Recipe
- Prep Time: 0h 20m
- Cook Time: 0h 18m
- Total Time: 2h 38m
- Yield: 12 mini cheesecakes
- Category: Dessert
- Method: Baking
- Cuisine: American
Description
This Mini Cheesecake Board features individual creamy cheesecakes with a buttery graham cracker crust, topped with an assortment of fresh berries, chocolate chips, nuts, and fruit preserves. Perfect for entertaining, these bite-sized treats combine smooth texture and delightful flavors, all arranged beautifully on a serving board.
Ingredients
Crust
- 1 cup graham cracker crumbs
- 3 tablespoons unsalted butter, melted
Cheesecake Filling
- 16 oz cream cheese, softened
- 1/2 cup granulated sugar
- 1 teaspoon vanilla extract
- 2 large eggs
- 1/2 cup sour cream
Toppings
- Assorted fresh berries
- Chocolate chips
- Nuts (such as chopped pecans or almonds)
- Fruit preserves
Instructions
- Preheat Oven: Preheat your oven to 325°F (163°C) to ensure it reaches the perfect temperature for baking the mini cheesecakes evenly.
- Prepare Crust: In a medium bowl, combine the graham cracker crumbs with the melted butter until the mixture is uniform. Press this mixture firmly into the bottoms of the mini cheesecake pans to form the crust base.
- Beat Cream Cheese and Sugar: In a large bowl, beat the softened cream cheese together with the sugar until the mixture is smooth and creamy, eliminating any lumps for a silky texture.
- Add Vanilla Extract: Stir in the vanilla extract thoroughly, enhancing the flavor depth of your cheesecake batter.
- Incorporate Eggs: Add eggs one at a time, mixing on low speed gently just until combined. Avoid overmixing to prevent cracking or air bubbles in the cheesecake.
- Fold in Sour Cream: Gently fold the sour cream into the batter until fully incorporated; this adds moisture and a slight tanginess to the filling.
- Fill Pans: Pour the cheesecake batter evenly over the prepared crusts in the mini pans, filling each about three-quarters full.
- Bake Cheesecakes: Bake in the preheated oven for 15-18 minutes or until the centers are set and no longer jiggle when gently shaken.
- Cool and Chill: Let the cheesecakes cool at room temperature for about 15 minutes, then transfer to the refrigerator to chill for at least 2 hours to fully set.
- Unmold Cheesecakes: Carefully remove the mini cheesecakes from their pans once chilled, maintaining their shape for presentation.
- Arrange and Decorate: Arrange the mini cheesecakes on a serving board and decorate around them with fresh berries, chocolate chips, nuts, and fruit preserves to create a visually appealing dessert display.
- Serve: Serve the mini cheesecakes chilled and enjoy these delightful bite-sized treats with family and friends.
Notes
- Ensure cream cheese is fully softened to avoid lumps in the batter.
- Do not overmix the batter after adding eggs to keep the cheesecake smooth and prevent cracks.
- Chilling the cheesecakes is crucial for the best texture and ease of removal from pans.
- Feel free to customize toppings according to season or preference.
- Use non-stick or silicone mini cheesecake pans for easier unmolding.


