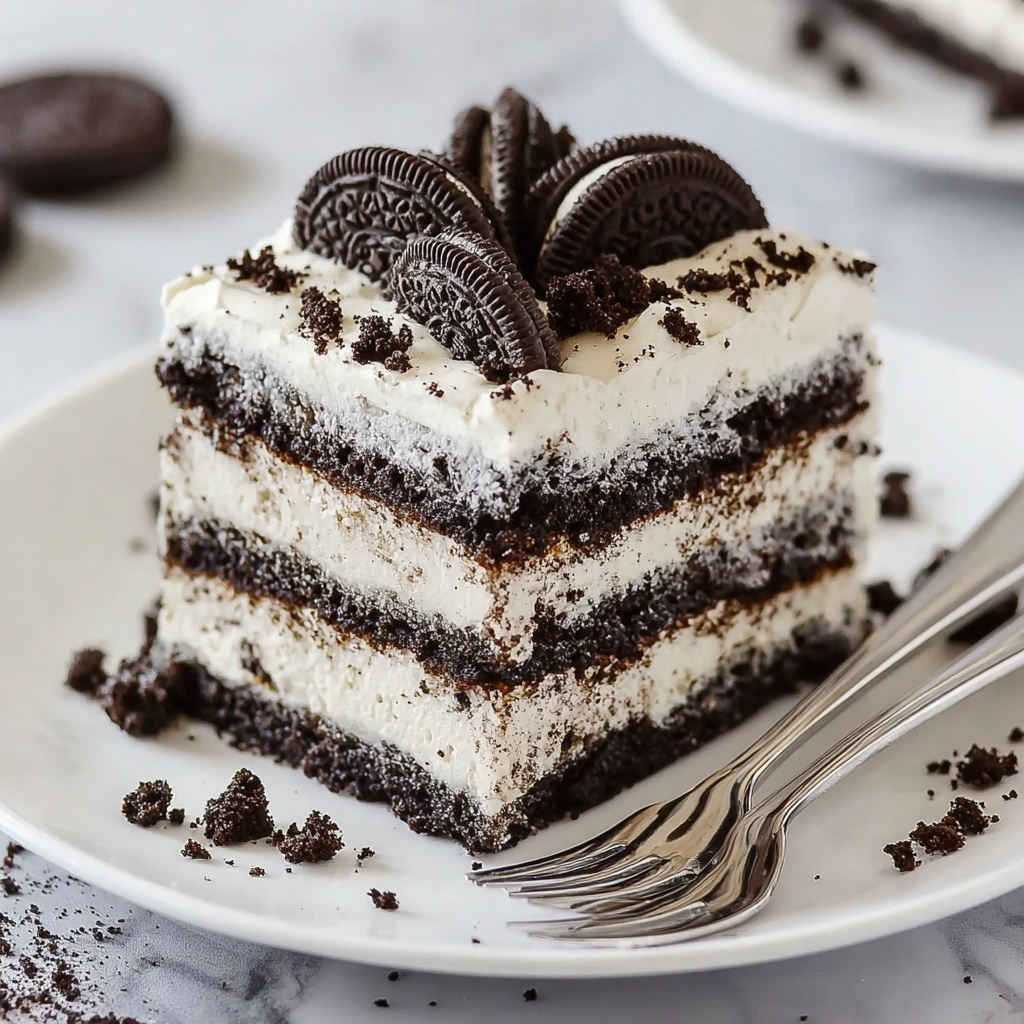
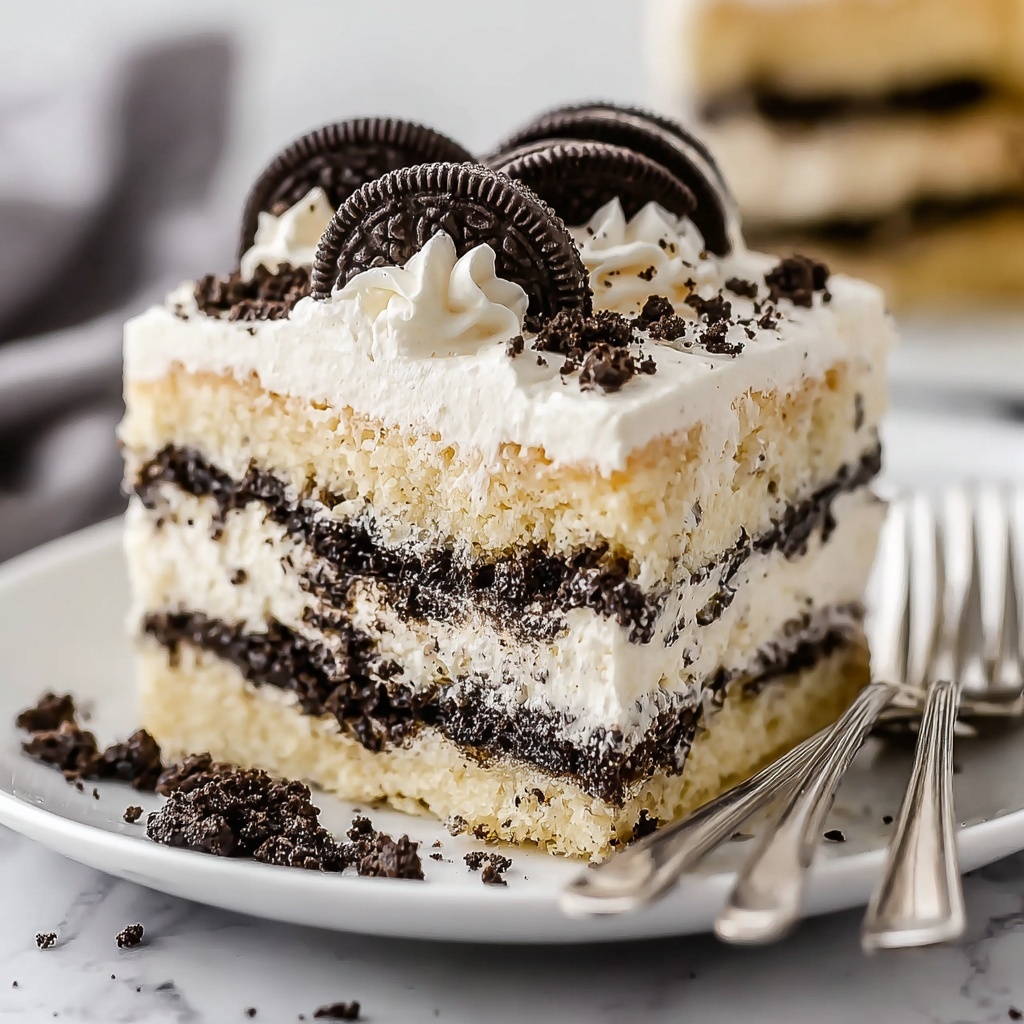
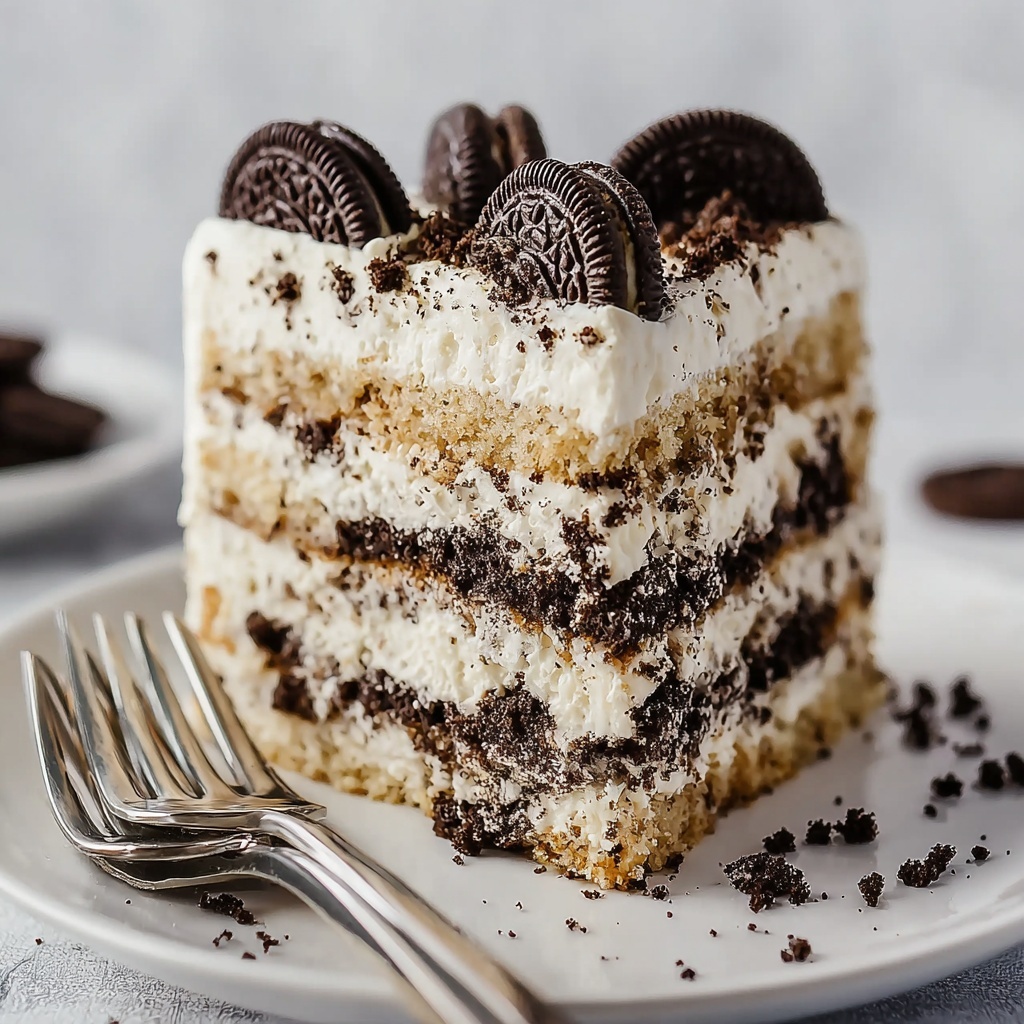
If you have a soft spot for simple yet irresistibly delightful desserts, this Oreo Icebox Cake Recipe is an absolute must-try. Imagine luscious layers of fluffy whipped cream nestled between whole Oreo cookies, chilling together until the cookies soften slightly, turning into a cake-like texture that melts in your mouth. This no-bake wonder is as easy to assemble as it is stunning to serve, making it perfect for last-minute gatherings or a sweet treat to brighten any day. Whether you’re an Oreo fanatic or simply love classic, creamy desserts, this recipe will quickly become a cherished favorite.
Ingredients You’ll Need
These ingredients are straightforward but each one plays a crucial role in building the rich, creamy texture and classic flavor that make the Oreo Icebox Cake Recipe so memorable. From the rich heaviness of whipping cream to the crunchy, chocolaty Oreo magic, you just can’t go wrong here!
- 2 cups heavy whipping cream: The star ingredient that makes the cake irresistibly creamy and fluffy when whipped to perfection.
- 1 cup powdered sugar: Adds the perfect amount of sweetness and ensures the whipped cream holds its shape beautifully.
- 1 tablespoon vanilla extract: Infuses gentle warmth and depth into the whipped cream for a subtle but essential flavor boost.
- 30 whole Oreos: These form the delightful, chocolatey layers that soften perfectly and create that classic icebox cake texture.
- 12 crushed Oreos (for garnish): Provides extra crunch and a pretty finishing touch on top, inviting everyone to dive in.
How to Make Oreo Icebox Cake Recipe
Step 1: Whip the Cream
Start by pouring the heavy whipping cream into a large mixing bowl. Add the powdered sugar and vanilla extract, then whip on medium-high speed until stiff peaks form. This means your whipped cream should hold its shape firmly without collapsing when you lift the whisk. Getting this just right is key to a light, airy filling that evenly coats the Oreos.
Step 2: Layer the Oreos
Grab an 8×8 baking dish and lay a single layer of whole Oreos across the bottom. These cookies serve as the sturdy foundation for your cake layers, soaking up luscious cream and softening gently in the fridge.
Step 3: Spread Half the Whipped Cream
Take half of your freshly whipped cream and spread it evenly over the Oreo layer. This creamy layer acts as a luscious cushion that will transform the crunchy cookies into soft, irresistible layers once chilled.
Step 4: Add Another Oreo Layer and the Remaining Cream
Top the whipped cream with another full layer of Oreo cookies. Then, spread the remaining whipped cream on top, smoothing it out so the cake ends with a creamy, inviting finish.
Step 5: Chill Thoroughly
Cover your cake tightly and refrigerate for at least 8 hours or overnight. This chilling time is crucial because it allows the cookies to soak up moisture and become delectably soft, binding the layers into one cohesive dessert.
Step 6: Garnish Before Serving
Just before serving, sprinkle the crushed Oreos evenly over the top. This adds a nice contrast in texture and a visually appealing finish that signals the deliciousness inside.
How to Serve Oreo Icebox Cake Recipe
Garnishes
Besides the crushed Oreos, you can add a drizzle of chocolate syrup or a few fresh berries to brighten up the look and add subtle layers of flavor. A mint leaf on each slice can also add a refreshing pop of color and aroma.
Side Dishes
Pair this rich dessert with a scoop of vanilla ice cream or a simple fresh fruit salad. The creaminess from the ice cream complements the Oreo layers perfectly, while the fruit adds a fresh, tangy balance to the sweetness.
Creative Ways to Present
For an eye-catching twist, serve the Oreo Icebox Cake Recipe in individual clear cups or mason jars, layering cookies and cream for a fun, portable portion. You could also turn the layers horizontal for a trifle-style effect, adding your favorite mix-ins like chocolate chips or nuts between layers.
Make Ahead and Storage
Storing Leftovers
This cake keeps wonderfully in the fridge for up to 3 days, covered tightly to prevent it from absorbing any fridge odors. The flavors actually meld together more over time, so leftovers can taste even better!
Freezing
You can freeze the Oreo Icebox Cake Recipe for up to 2 weeks. Wrap it securely in plastic wrap and then foil to maintain freshness. Thaw in the fridge overnight before serving to preserve that signature creamy texture.
Reheating
Because this is a no-bake chilled dessert, reheating is not recommended. It’s best enjoyed cold and fresh from the fridge to savor its delicate texture and refreshing creaminess.
FAQs
Can I use reduced-fat whipped cream for this recipe?
While you can use reduced-fat cream, full-fat heavy whipping cream is ideal for achieving the stable, fluffy peaks and rich texture that define this icebox cake.
Do the Oreos get soggy in the cake?
The cookies will soften after chilling but won’t become mushy. They transform into delightfully tender layers that melt in your mouth, enhancing the overall creamy experience.
Can I make this cake gluten-free?
Absolutely! Use gluten-free Oreo cookies or a similar gluten-free chocolate cookie to keep the texture and flavor intact while catering to gluten-sensitive friends.
Is it necessary to whip the cream to stiff peaks?
Yes, whipping to stiff peaks ensures the cream holds its shape and supports the cookie layers well, giving the cake its signature fluffy texture.
How long does the cake last once assembled?
Store it in the refrigerator for up to 3 days. It’s best eaten within that timeframe for optimal freshness and flavor.
Final Thoughts
There’s something truly magical about an Oreo Icebox Cake Recipe that combines simplicity with decadent flavor. It’s effortless to make yet impressive enough to wow any crowd. If you want a dessert that tastes like a special occasion every time, give this recipe a go—you might just find yourself making it again and again!
Print
Oreo Icebox Cake Recipe
- Prep Time: 20 minutes
- Cook Time: 0 minutes
- Total Time: 8 hours 20 minutes
- Yield: 9 servings
- Category: Dessert
- Method: No-Cook
- Cuisine: American
Description
A delightful and easy no-bake Oreo Icebox Cake recipe featuring layers of whole Oreos and rich, fluffy whipped cream. This chilled dessert is perfect for any occasion, offering a creamy texture combined with the classic crunch and chocolate flavor of Oreos. Refrigeration allows the cookies to soften slightly, creating a cake-like consistency that melts in your mouth.
Ingredients
Whipped Cream
- 2 cups heavy whipping cream
- 1 cup powdered sugar
- 1 tablespoon vanilla extract
Cookies
- 30 whole Oreos
- 12 crushed Oreos (for garnish)
Instructions
- Whip the Cream: In a mixing bowl, whip the heavy whipping cream, powdered sugar, and vanilla extract together using an electric mixer until stiff peaks form, which usually takes about 7-8 minutes. This will create a light and fluffy cream base for the cake.
- Layer Oreos: Arrange a layer of 30 whole Oreos evenly on the bottom of an 8×8 inch baking dish to form the base layer of the cake.
- Spread Cream: Spread half of the whipped cream mixture evenly over the layer of whole Oreos, ensuring all cookies are covered.
- Add Second Oreo Layer: Add another layer of whole Oreos on top of the whipped cream layer, distributing them evenly across the dish.
- Top with Remaining Cream: Spread the remaining whipped cream over the second Oreo layer, covering all cookies completely.
- Refrigerate: Cover the dish with plastic wrap or a lid and refrigerate the cake for at least 8 hours or preferably overnight. This allows the Oreos to soften and absorb moisture from the cream, creating a cake-like texture.
- Garnish and Serve: Before serving, sprinkle the 12 crushed Oreos on top to add extra crunch and visual appeal. Slice into squares and enjoy chilled.
Notes
- This dessert needs a long refrigeration time to achieve the perfect texture, so plan ahead.
- Use cold heavy cream straight from the fridge for best whipping results.
- For a different flavor twist, try adding a layer of chocolate ganache or peanut butter between layers.
- To make individual servings, assemble the layers in small jars or glasses.
- Store leftovers covered in the refrigerator and consume within 2-3 days for best freshness.


