
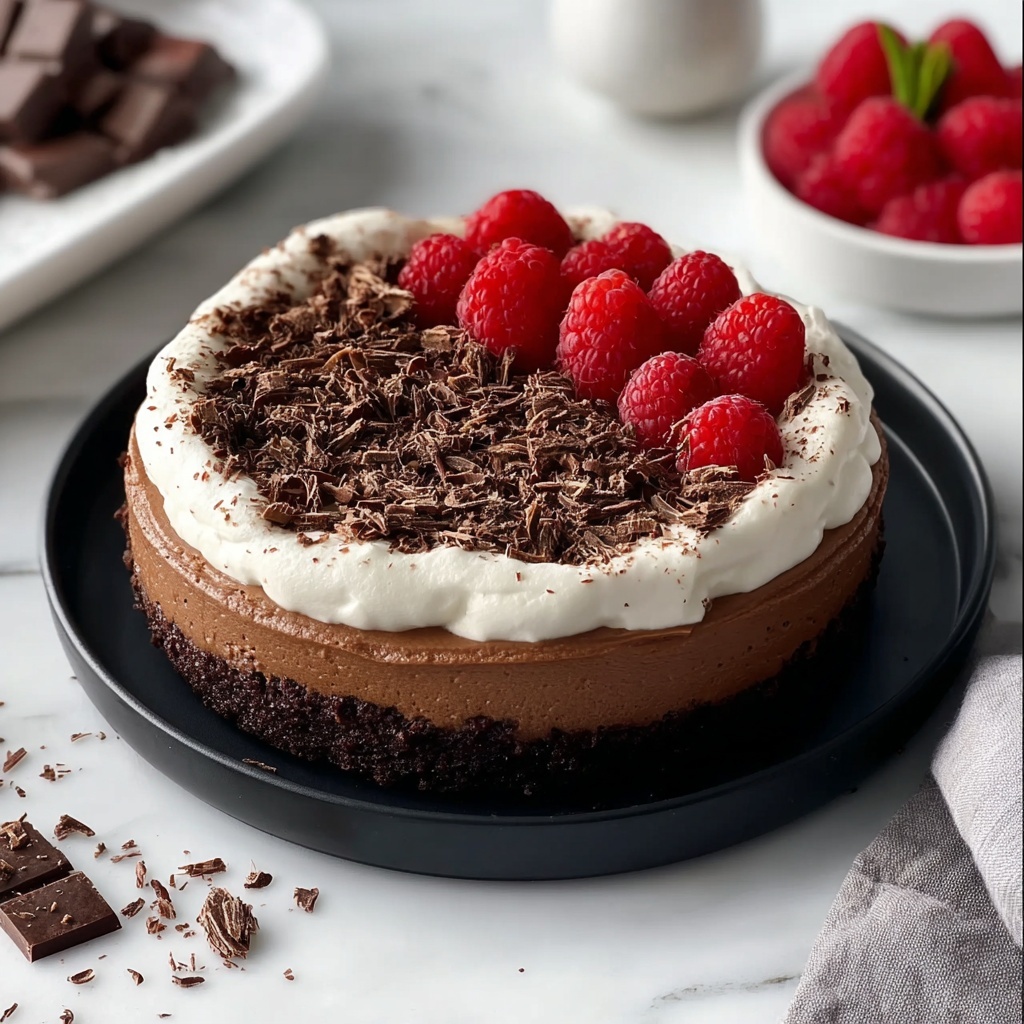
If you have a craving for something rich, creamy, and irresistibly chocolatey without having to turn on the oven, this No-Bake Chocolate Cheesecake Recipe is exactly what you need. Picture a velvety smooth chocolate cream cheese filling that melts in your mouth, resting on a perfectly firm chocolate wafer crust. It’s the kind of dessert that feels fancy yet comes together with ease, making it a total crowd-pleaser for any occasion. Trust me, once you try this luscious treat, it will become one of your favorite go-to recipes for chocolate indulgence.
Ingredients You’ll Need
Getting this No-Bake Chocolate Cheesecake Recipe right starts with simple but essential ingredients that each bring their own magic. From the crisp chocolate wafer cookies that form a sturdy, chocolaty base to the luscious cream cheese and silky melted chocolate that build the decadent filling, every component works in harmony to create that perfect texture and flavor.
- Chocolate wafer cookies: These crushed cookies form a crunchy, chocolaty crust that adds the perfect foundation and texture contrast.
- Unsalted butter: Melted butter binds the cookie crumbs together and adds richness without overpowering the chocolate flavor.
- Cream cheese: Softened cream cheese gives the cheesecake its creamy, tangy base that balances sweetness beautifully.
- Powdered sugar: Finely ground sugar dissolves easily, ensuring a smooth and sweet filling.
- Vanilla extract: A touch of vanilla boosts and deepens the chocolate’s flavor profile.
- Sour cream: Adds subtle tang and moisture, giving the filling a luxurious softness.
- Heavy cream: Blended in for extra creaminess and a silky texture that’s pure indulgence.
- Semi-sweet chocolate: Melted to provide rich, intense chocolate flavor that’s not too bitter or too sweet.
How to Make No-Bake Chocolate Cheesecake Recipe
Step 1: Prepare Your Pan
Start by lightly greasing a 9-inch springform pan with butter or lining it with parchment paper. This step might seem small, but it’s key to making sure your cheesecake releases easily and stays intact when you’re ready to serve.
Step 2: Crush the Cookies
Crush the chocolate wafer cookies finely using a food processor or by sealing them in a plastic bag and rolling over them with a rolling pin until they resemble sandy crumbs. This fine texture helps the crust stick together perfectly.
Step 3: Combine Crumbs and Butter
Pour the melted unsalted butter over the crushed cookies and mix thoroughly until every crumb is coated. This buttery coating is what helps your crust hold its shape and adds extra richness.
Step 4: Press the Crust
Firmly press the cookie-butter mixture into the bottom of your springform pan with the back of a spoon or a flat tool. Compacting it well ensures your crust is sturdy and won’t crumble when you slice into the cheesecake.
Step 5: Chill the Crust
Place the crust in the refrigerator for at least 30 minutes to allow it to harden slightly. This cooling step is essential for providing a solid base for the creamy filling.
Step 6: Make the Cheesecake Filling
In a large bowl, combine the softened cream cheese, powdered sugar, and vanilla extract, then beat it with an electric mixer until smooth and creamy. Scrape the sides of the bowl as needed to get everything perfectly mixed and silky.
Step 7: Mix in Sour Cream and Heavy Cream
In a separate bowl, whisk together the sour cream and heavy cream until smooth. These ingredients add a luscious creaminess and a little tang to balance the sweetness.
Step 8: Melt and Cool the Chocolate
Melt your semi-sweet chocolate gently in 30-second bursts in the microwave, stirring between each until luscious and smooth. Let it cool slightly before adding it into your cream cheese mixture so it incorporates evenly without curdling.
Step 9: Combine Chocolate and Cream Cheese Mixture
Add the cooled melted chocolate into the cream cheese mixture and beat until it is fully blended, creating a rich, chocolatey filling that’s just begging to be spread over the crust.
Step 10: Add Sour Cream Mixture
Pour the combined sour cream and heavy cream into the chocolate filling and continue beating on medium speed until the entire mixture becomes a smooth, velvety masterpiece.
Step 11: Assemble and Chill
Take your crust out of the refrigerator and pour the chocolate filling evenly over it. Smooth the top with a spatula to create a pretty, even layer. Cover the cheesecake with plastic wrap or foil, then chill in the fridge for at least 4 hours, or better yet, overnight. This resting period is what lets the flavors meld and the cheesecake set perfectly.
Step 12: Serve and Enjoy
When your cheesecake is fully chilled and set, release it carefully from the springform pan and transfer it to a serving plate. Slice generous pieces and get ready to indulge in a slice of pure chocolate bliss.
How to Serve No-Bake Chocolate Cheesecake Recipe

Garnishes
Top your cheesecake with whipped cream, chocolate shavings, or fresh raspberries for an extra touch of elegance and flavor. A sprinkle of toasted nuts or a dusting of cocoa powder can also add a lovely texture and visual appeal.
Side Dishes
This cheesecake pairs wonderfully with fresh berries, a drizzle of raspberry or caramel sauce, or alongside a scoop of vanilla bean ice cream that cools and complements the rich chocolate perfectly.
Creative Ways to Present
Try serving your No-Bake Chocolate Cheesecake Recipe in individual mason jars for a fun, portable treat, or layer it with crushed cookies and whipped cream in a parfait glass for an elegant twist. Mini cheesecake bites on a stick also make for irresistible party snacks!
Make Ahead and Storage
Storing Leftovers
Store any leftover cheesecake covered tightly with plastic wrap or foil in the refrigerator. It will keep its creamy texture and flavor well for up to 4 days, making it perfect for enjoying over time.
Freezing
You can freeze the No-Bake Chocolate Cheesecake Recipe by wrapping it carefully in plastic wrap and aluminum foil to prevent freezer burn. It freezes well for up to 1 month. Thaw it overnight in the refrigerator before serving for best texture.
Reheating
This cheesecake is best served chilled, so reheating isn’t necessary. If you’d like the chocolate to soften slightly, let slices sit at room temperature for 10-15 minutes before enjoying.
FAQs
Can I use a different type of cookie for the crust?
Absolutely! While chocolate wafer cookies give a rich chocolate base, you can experiment with graham crackers or digestive biscuits for a different flavor and texture. Just keep the overall sweetness in mind.
Is it necessary to use a springform pan?
Using a springform pan makes it much easier to remove the cheesecake cleanly. If you don’t have one, line a regular round pan with parchment paper, leaving extra to lift the cheesecake out when ready.
Can I make this cheesecake dairy-free?
For a dairy-free version, look for dairy-free cream cheese and heavy cream substitutes. The texture might vary slightly, but you can still achieve a delicious creamy cheesecake.
How long does the cheesecake need to chill?
The cheesecake needs at least 4 hours to set properly, but chilling overnight ensures the best texture and flavor development, making slicing much easier.
Can I add flavors to the filling?
Definitely! You can incorporate a splash of espresso, a pinch of cinnamon, or even some chili powder for a spicy twist. Mix-ins like chopped nuts or espresso powder can add unique dimensions too.
Final Thoughts
This No-Bake Chocolate Cheesecake Recipe is one of those dreamy desserts that you’ll feel proud to serve yet excited to indulge in yourself. Its simple ingredients and fuss-free method make it a brilliant choice when you want amazing chocolate cheesecake without the heat or hassle. So go ahead, treat yourself and your loved ones to this wonderfully creamy, rich, and utterly delightful chocolate cheesecake. You’re going to love every single bite!
Print
No-Bake Chocolate Cheesecake Recipe
- Prep Time: 0h 20m
- Cook Time: 0h 0m
- Total Time: 4h 20m
- Yield: 8 servings
- Category: Dessert
- Method: No-Cook
- Cuisine: American
- Diet: Vegetarian
Description
This decadent No-Bake Chocolate Cheesecake is a creamy, rich dessert featuring a chocolate wafer cookie crust and smooth chocolate cream cheese filling. Perfect for those who want a luscious cheesecake without the oven, it sets beautifully in the refrigerator for a velvety texture.
Ingredients
Crust
- 1 1/2 cups chocolate wafer cookies, crushed
- 1/4 cup unsalted butter, melted
Filling
- 3 cups cream cheese, softened
- 1 cup powdered sugar
- 1 teaspoon vanilla extract
- 1/2 cup sour cream
- 1/4 cup heavy cream
- 8 ounces semi-sweet chocolate, melted
Instructions
- Prepare the pan: Start by preparing a 9-inch springform pan. Grease the bottom and sides lightly with butter or line it with parchment paper to ensure easy removal later.
- Crush cookies: Crush the chocolate wafer cookies into fine crumbs using a food processor, or place them in a resealable plastic bag and crush them with a rolling pin until they resemble sand-like texture.
- Mix crust ingredients: Transfer the crushed cookies into a medium-sized mixing bowl. Pour the melted unsalted butter over the crumbs and stir thoroughly until all the crumbs are coated with the butter.
- Form crust: Press the cookie and butter mixture firmly into the bottom of the prepared springform pan to create a smooth, even crust. Use the back of a spoon or a flat object to compact the crumbs to prevent them from falling apart later.
- Chill crust: Place the crust in the refrigerator to chill for at least 30 minutes, or until it hardens slightly.
- Start cheesecake filling: While the crust is chilling, begin preparing the cheesecake filling. In a large mixing bowl, combine the softened cream cheese, powdered sugar, and vanilla extract.
- Beat filling base: Beat the mixture with an electric mixer on medium speed until smooth and creamy. Scrape down the sides of the bowl as needed to ensure even mixing.
- Combine creams: In a separate small bowl, mix together the sour cream and heavy cream until smooth and well combined.
- Melt chocolate: Melt the semi-sweet chocolate in a microwave-safe bowl by heating it in 30-second intervals, stirring in between, until it’s fully melted and smooth. Allow it to cool slightly before using.
- Add chocolate to filling: Add the cooled melted chocolate to the cream cheese mixture and blend thoroughly until fully incorporated.
- Incorporate creams: Pour the sour cream and heavy cream mixture into the cream cheese and chocolate blend. Continue to beat on medium speed until the entire filling is smooth, rich, and creamy.
- Assemble cheesecake: Once the crust has chilled and the filling is ready, spread the cheesecake filling evenly over the prepared crust in the springform pan.
- Smooth top: Smooth the top of the cheesecake with a spatula to create an even layer.
- Refrigerate to set: Cover the cheesecake with plastic wrap or foil and refrigerate it for at least 4 hours, or preferably overnight, to allow it to set completely.
- Remove from pan: After the cheesecake has chilled and set, remove it from the springform pan. Place it on a serving platter.
- Serve: Slice the cheesecake into generous portions and serve chilled. Enjoy your delicious, creamy, no-bake chocolate cheesecake!
Notes
- Ensure the cream cheese is softened to room temperature for smooth blending.
- Using a springform pan makes it easier to remove the cheesecake without damaging it.
- Let the melted chocolate cool slightly before mixing to prevent curdling the cream cheese.
- Chilling time can be extended to overnight for best texture and flavor development.
- You can garnish with whipped cream or chocolate shavings before serving if desired.


