
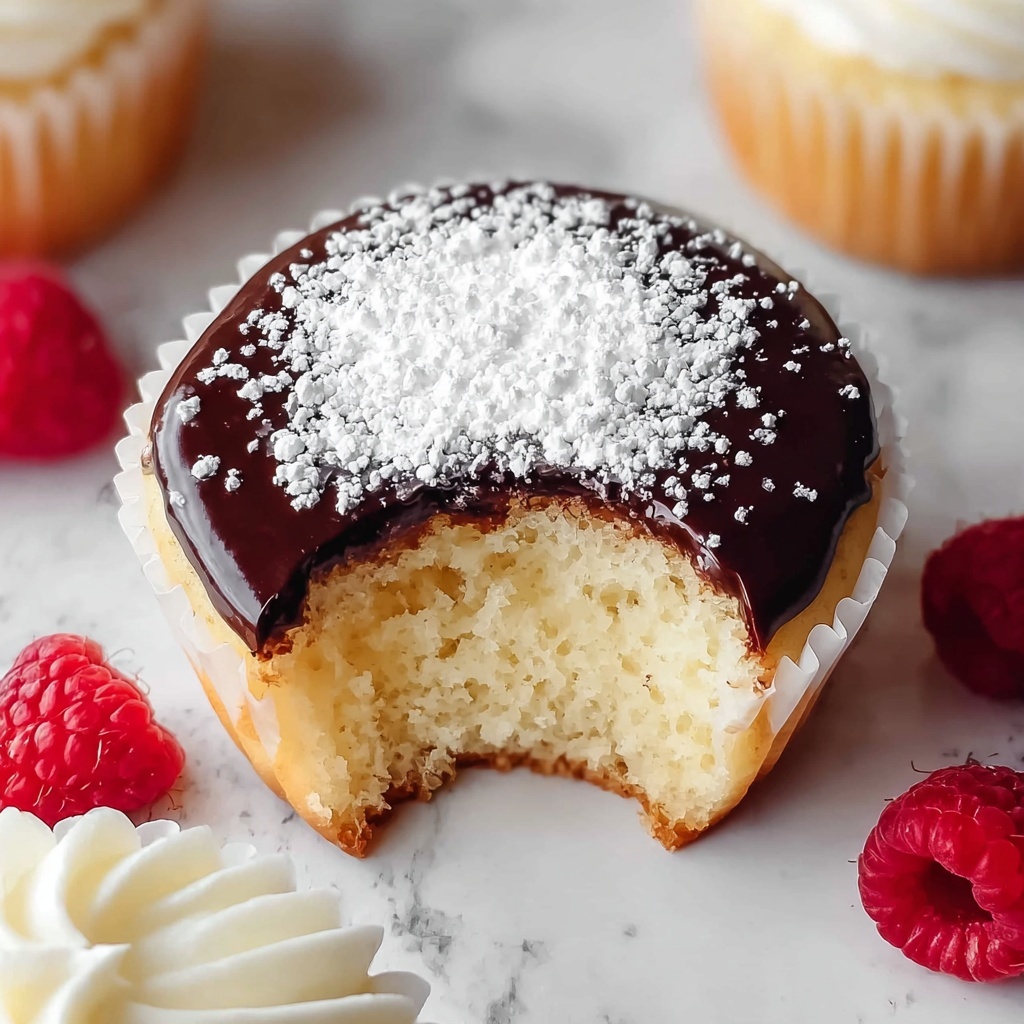
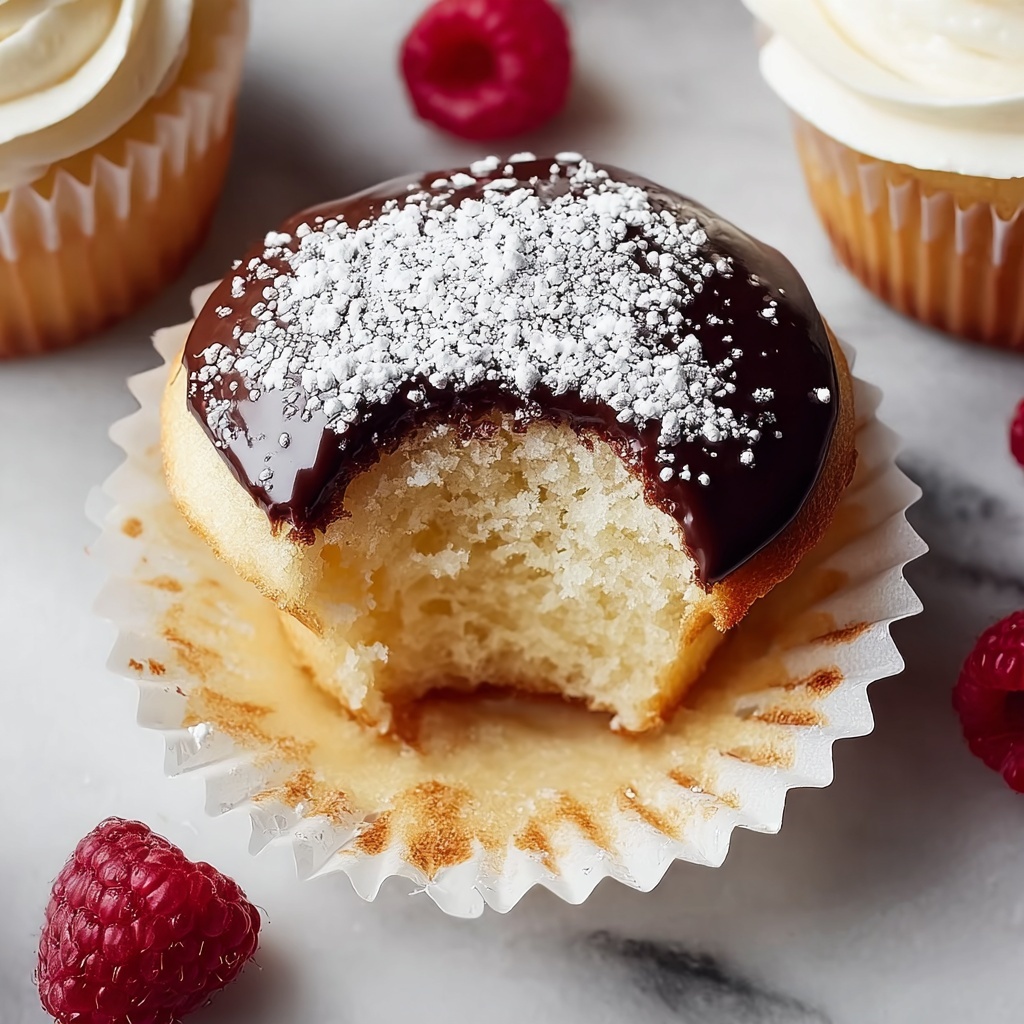
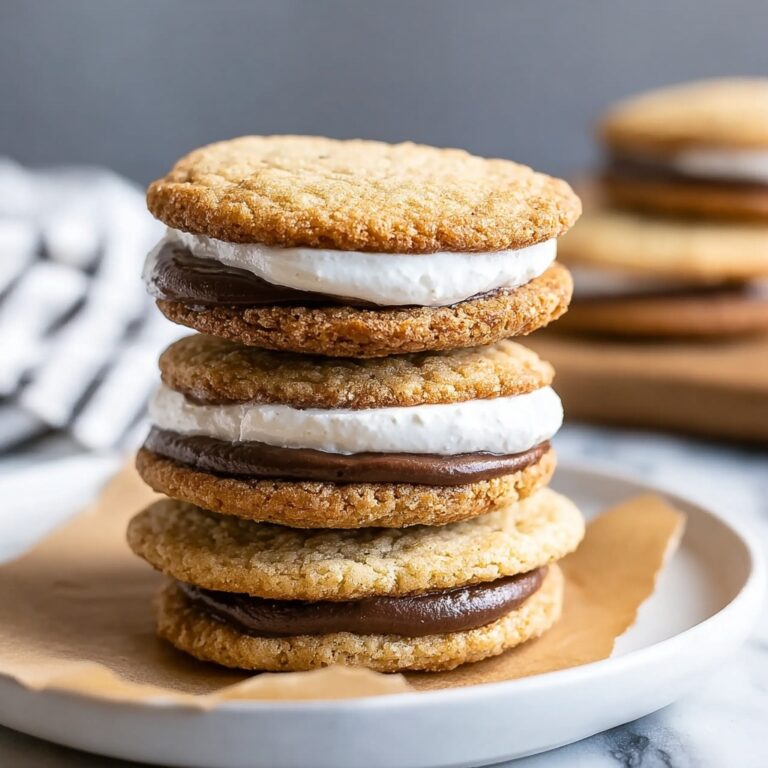
If you’re looking for a delightful treat that perfectly combines fluffy cake, luscious cream filling, and smooth chocolate topping, you’ve come to the right place. This Boston Cream Cupcakes Recipe is a charming twist on the classic Boston cream pie, where each bite delivers a burst of cream-filled happiness crowned with rich chocolate ganache. Whether you’re baking for a special occasion or simply craving a comforting dessert, these cupcakes bring elegance and warmth to your kitchen with every delicious crumb.
Ingredients You’ll Need
Gathering the right ingredients is key to nailing the perfect Boston Cream Cupcakes Recipe. Each component plays a crucial role: from the tender cupcake crumb to the airy cream filling and the silky chocolate glaze on top. Let’s break down these essentials that anyone can pull together with ease!
- 1 3/4 cups all-purpose flour: This creates the perfect soft yet sturdy base for the cupcakes.
- 1 teaspoon baking powder: Helps the cupcakes rise beautifully and stay light.
- 1/2 teaspoon baking soda: Works alongside baking powder to give an ideal texture.
- 1/2 teaspoon salt: Enhances all the flavors in the batter.
- 1/2 cup unsalted butter, softened: Adds richness and tenderness to the cake.
- 1 cup granulated sugar: Sweetens the cupcakes without overpowering them.
- 2 large eggs: Bind the ingredients together while adding moisture.
- 1 teaspoon vanilla extract: Infuses the batter with warm, familiar flavor notes.
- 1/2 cup whole milk: Keeps the crumb soft and moist.
- 1/2 cup heavy cream: Whipped into the filling to create luscious creaminess.
- 1/4 cup powdered sugar: Sweetens the whipped cream filling perfectly.
- 1/2 cup semi-sweet chocolate chips: Melts into a silky ganache topping that finishes the cupcakes elegantly.
How to Make Boston Cream Cupcakes Recipe
Step 1: Preheat and Prepare Your Pan
Start by preheating your oven to 350°F (175°C). Line a 12-cup muffin tin with cupcake liners or grease and flour the tin to ensure your cupcakes release easily after baking.
Step 2: Mix Dry Ingredients
In a medium bowl, whisk together the all-purpose flour, baking powder, baking soda, and salt. This blend forms the backbone of your cupcake batter, ensuring even rising and balanced flavor.
Step 3: Cream Butter and Sugar
In a large bowl, use an electric mixer to cream the softened butter and granulated sugar on medium speed. Beat until your mixture becomes light and fluffy, which is essential for a tender crumb.
Step 4: Add Eggs and Vanilla
Add the eggs one at a time, beating well after each addition to fully incorporate them. Then stir in the vanilla extract, which adds a lovely warmth and depth to the batter.
Step 5: Combine Wet and Dry Ingredients
Alternate adding the flour mixture and whole milk to your batter, starting and ending with the flour. Mix gently until just combined—overmixing can make the cupcakes tough, so keep it tender!
Step 6: Bake the Cupcakes
Divide the batter evenly among the liners, filling each about two-thirds full. Bake for 18 to 20 minutes, or until a toothpick inserted into the center comes out clean. Let them cool in the pan for 5 minutes before transferring to a wire rack to cool completely.
Step 7: Prepare the Cream Filling
While the cupcakes cool, whisk the heavy cream with powdered sugar in a medium bowl until soft peaks form. This light whipped cream is the secret behind the delightful filling that makes these cupcakes unforgettable.
Step 8: Fill the Cupcakes
Once fully cooled, core out the center of each cupcake to make space for the cream filling. Fill each cavity gently with the whipped cream, making sure every bite is filled with that luscious surprise.
Step 9: Make the Chocolate Ganache
Place the chocolate chips in a heatproof bowl and melt them over simmering water, stirring until smooth and glossy. This ganache will give your cupcakes a shiny, rich finish that looks as fantastic as it tastes.
Step 10: Top and Set
Drizzle or spoon the melted chocolate ganache over the filled cupcakes. Let the chocolate set for a few minutes before serving to ensure a perfect, melt-in-your-mouth texture.
How to Serve Boston Cream Cupcakes Recipe
Garnishes
Lightly dusting these cupcakes with powdered sugar or adding a small dollop of whipped cream beside the ganache adds an elegant touch. For a twist, sprinkle a few chocolate shavings or use a fresh berry to brighten the plate.
Side Dishes
These cupcakes shine as a dessert following a light meal. Pair them with a cup of freshly brewed coffee or a creamy latte to complement the rich chocolate and cream flavors perfectly.
Creative Ways to Present Boston Cream Cupcakes Recipe
Consider placing the cupcakes on a tiered dessert stand for parties or arranging them with edible flowers for a beautiful, fresh look. You can also pipe the cream filling in a swirl atop the cupcakes before adding ganache for an extra wow factor.
Make Ahead and Storage
Storing Leftovers
Store your Boston Cream Cupcakes in an airtight container in the refrigerator for up to three days. This keeps the cream filling fresh and the cupcake moist without drying out.
Freezing
These cupcakes freeze well if wrapped individually. Place them in a freezer-safe container, and they will keep for up to two months. Thaw in the fridge overnight before serving for the best texture.
Reheating
Because of the cream filling and ganache, reheating is best avoided. Instead, take them out of the fridge about 20 minutes before serving to allow flavors and textures to soften naturally.
FAQs
Can I substitute the whipped cream filling with pastry cream?
Absolutely! Pastry cream adds a richer texture and authentic Boston cream pie flavor, but whipped cream keeps things lighter and more airy. Both options are delicious, depending on your preference.
What type of chocolate works best for the ganache?
Semi-sweet chocolate chips offer the perfect balance of sweetness and richness. You can also use bittersweet chocolate for a deeper flavor or milk chocolate if you prefer a sweeter topping.
Can I make this recipe dairy-free?
Yes! Use plant-based butter, non-dairy milk like almond or oat, and substitute coconut cream whipped with powdered sugar for the filling. Just be sure to pick dairy-free chocolate chips for the ganache.
How do I prevent my cupcakes from sinking in the middle?
Make sure not to overmix your batter and bake at the recommended temperature. Also, avoid opening the oven door during the first 15 minutes of baking to maintain consistent heat.
Can I double the recipe for a larger batch?
Definitely. Just remember to use two muffin tins or bake in batches. Keep an eye on baking time as it may vary slightly with larger batches or different ovens.
Final Thoughts
Making this Boston Cream Cupcakes Recipe is such a rewarding baking adventure that brings a classic dessert into a fun, portable form. Sharing these cupcakes with friends and family is pure joy, and once you try them, you’ll have a new favorite to make again and again. So go ahead, bake a batch, and watch these creamy, chocolatey treats disappear fast!
Print
Boston Cream Cupcakes Recipe
- Prep Time: 20 minutes
- Cook Time: 18 minutes
- Total Time: 38 minutes
- Yield: 12 cupcakes
- Category: Dessert
- Method: Baking
- Cuisine: American
Description
Boston Cream Cupcakes are decadent treats inspired by the classic Boston cream pie. These moist vanilla cupcakes are filled with a luscious whipped cream filling and topped with smooth, glossy chocolate ganache, creating a delightful dessert perfect for any occasion.
Ingredients
Cupcakes
- 1 3/4 cups all-purpose flour
- 1 teaspoon baking powder
- 1/2 teaspoon baking soda
- 1/2 teaspoon salt
- 1/2 cup unsalted butter, softened
- 1 cup granulated sugar
- 2 large eggs
- 1 teaspoon vanilla extract
- 1/2 cup whole milk
Whipped Cream Filling
- 1/2 cup heavy cream
- 1/4 cup powdered sugar
Chocolate Ganache
- 1/2 cup semi-sweet chocolate chips
Instructions
- Preheat Oven: Preheat your oven to 350°F (175°C).
- Prepare Pan: Line a 12-cup muffin tin with cupcake liners or grease and flour the tin.
- Mix Dry Ingredients: In a medium-sized bowl, whisk together the all-purpose flour, baking powder, baking soda, and salt.
- Cream Butter and Sugar: In a separate large bowl, cream together the softened unsalted butter and granulated sugar using an electric mixer on medium speed until light and fluffy.
- Add Eggs: Add the eggs, one at a time, beating well after each addition.
- Add Vanilla: Mix in the vanilla extract until fully combined.
- Combine Wet and Dry: Gradually add the flour mixture to the wet ingredients, alternating with the whole milk, beginning and ending with the flour mixture.
- Mix Batter: Mix until just combined, being careful not to overmix.
- Fill Cupcake Liners: Divide the batter evenly among the cupcake liners, filling each about two-thirds full.
- Bake Cupcakes: Bake the cupcakes in the preheated oven for 18 to 20 minutes, or until a toothpick inserted into the center comes out clean.
- Cool in Tin: Remove the cupcakes from the oven and allow them to cool in the tin for 5 minutes.
- Cool Completely: Transfer the cupcakes to a wire rack to cool completely.
- Prepare Whipped Cream Filling: While the cupcakes cool, whisk together the heavy cream and powdered sugar in a medium bowl until soft peaks form.
- Core Cupcakes: Once the cupcakes are completely cool, use a small knife or cupcake corer to remove the center of each cupcake, creating a small well in the middle.
- Fill Cupcakes: Fill each well with the whipped cream mixture.
- Prepare Chocolate Ganache: Place the semi-sweet chocolate chips in a small heatproof bowl.
- Melt Chocolate: Heat a small amount of water in a saucepan over medium heat, then place the bowl with chocolate chips over the saucepan, ensuring the bowl doesn’t touch the water. Stir the chocolate chips as they melt, until smooth and glossy.
- Top Cupcakes: Spoon or drizzle the melted chocolate over the top of each filled cupcake.
- Set Chocolate: Allow the chocolate to set for a few minutes before serving.
Notes
- Ensure the cupcakes are completely cool before filling to prevent the whipped cream from melting.
- You can substitute semi-sweet chocolate chips with dark or milk chocolate chips depending on your preference.
- For a firmer cream filling, chill the whipped cream before filling the cupcakes.
- Use a cupcake corer or sharp knife carefully to avoid breaking the cupcakes when hollowing out the centers.
- Store cupcakes in the refrigerator if not consumed immediately due to the whipped cream filling.


