“`html
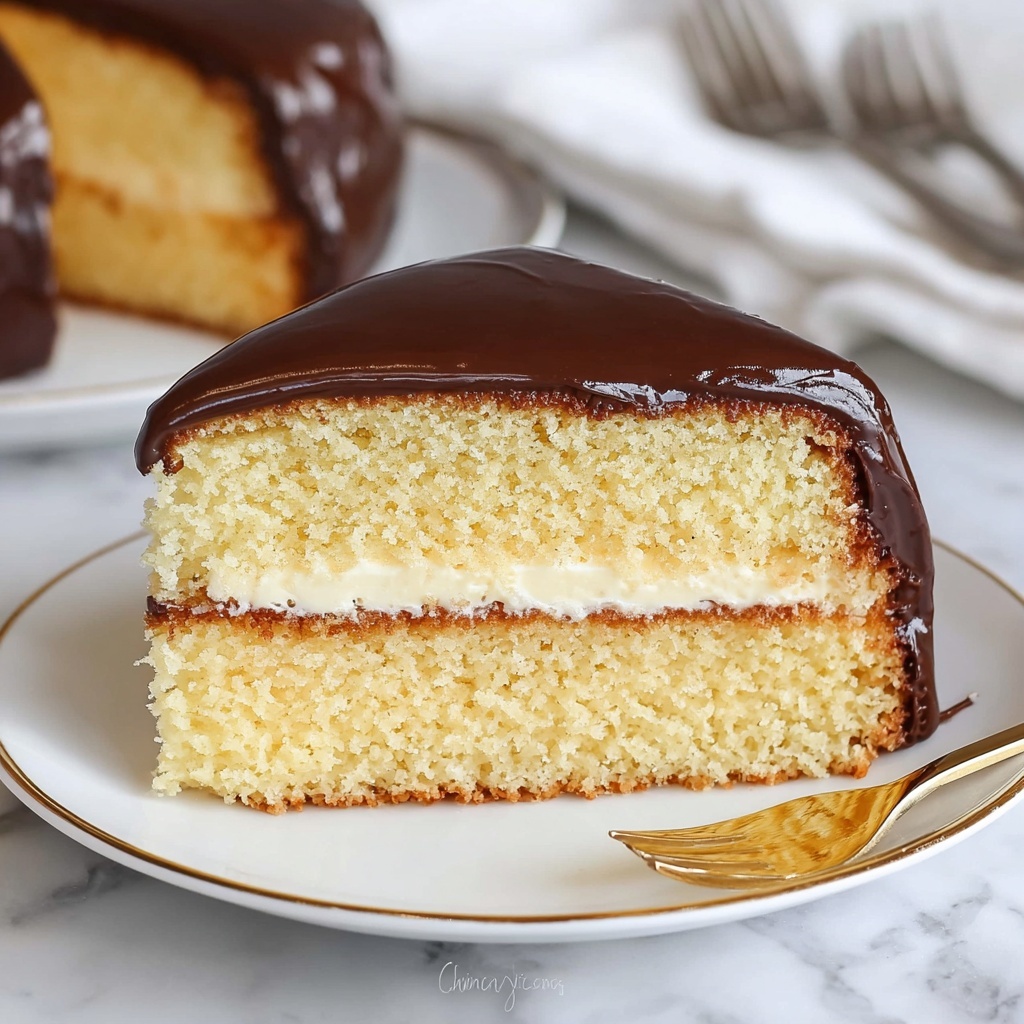
If you’ve ever dreamed of biting into a cake that somehow tastes like both a perfectly baked cake and a silky smooth custard-filled pie, then you are going to adore this Boston Cream Pie Cake Recipe. This delightful treat brings together tender layers of buttery cake, a luscious vanilla custard filling, and a glossy chocolate glaze that’s simply irresistible. It is a timeless classic reinvented into a celebration-worthy cake that’s sure to impress your friends and family with every bite.
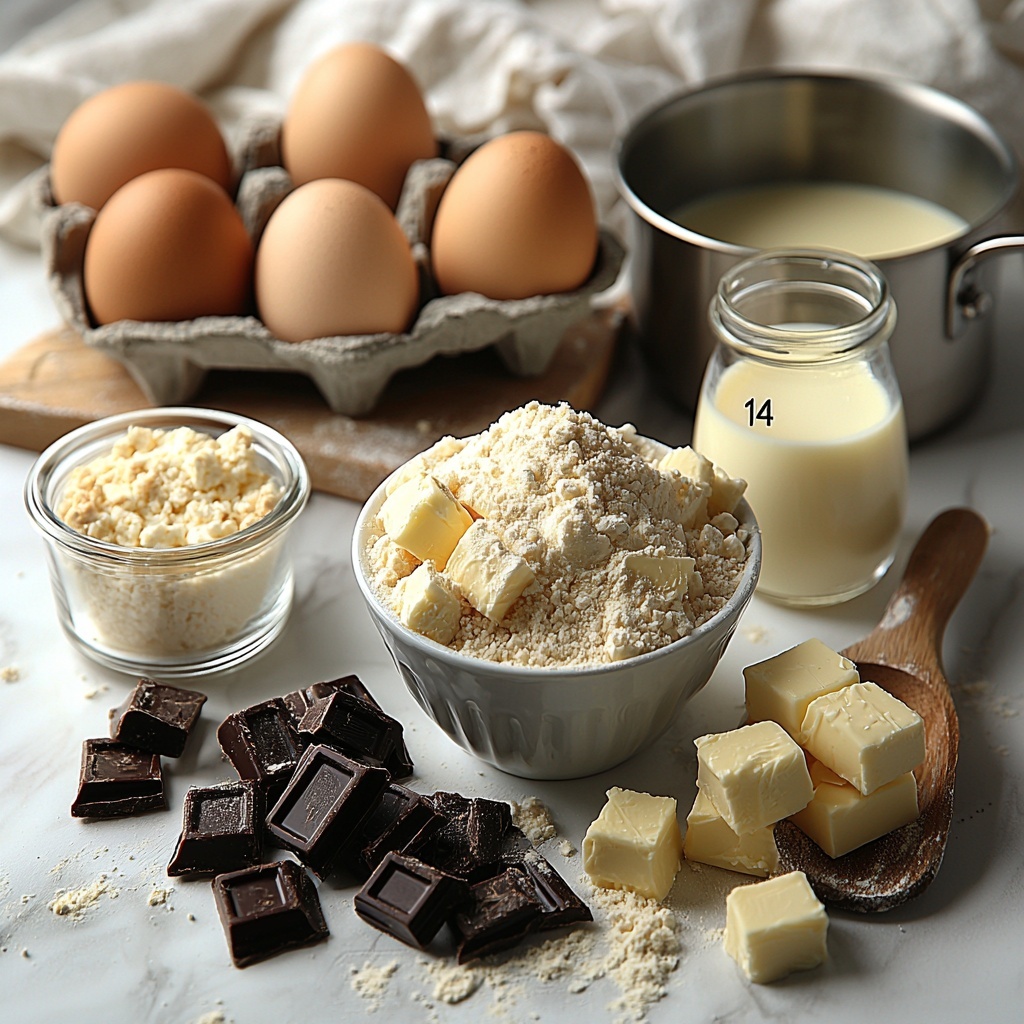
Ingredients You’ll Need
This Boston Cream Pie Cake Recipe calls for simple, pantry-friendly ingredients that come together to create an extraordinary dessert. Each component plays a vital role—flour and baking powder form a soft crumb, butter and sugar add richness and sweetness, while the custard and chocolate glaze bring the luscious creaminess and decadence that make this recipe a standout.
- 1 ¾ cups all-purpose flour: The foundation for your tender, moist cake layers that hold everything together perfectly.
- 1 cup granulated sugar: Adds the just-right sweetness and helps create a light, airy texture.
- 2 tsp baking powder: The magic ingredient that gives your cake that lovely rise and fluffiness.
- ½ cup unsalted butter, room temperature: Provides a rich, buttery flavor and moist texture that’s essential.
- 1 cup whole milk: Adds moisture and enhances tenderness in the cake layers.
- 3 large eggs: Bind everything together and contribute to the cake’s golden color.
- 2 cups whole milk (for custard filling): The creamy base for the smooth, dreamy custard filling.
- ¼ cup cornstarch (for custard filling): Thickens the custard without any lumps.
- 1 tsp pure vanilla extract (for custard filling): Gives the custard a warm, inviting aroma and flavor.
- 1 cup semisweet chocolate chips (for chocolate glaze): Melts into a glossy, rich glaze that crowns the cake beautifully.
- ½ cup heavy cream (for chocolate glaze): Creates the silky texture for the chocolate glaze that melts in your mouth.
How to Make Boston Cream Pie Cake Recipe
Step 1: Prepare Your Cake Pans and Preheat the Oven
Start by preheating your oven to 350°F (175°C). Greasing two round cake pans with butter and lining them with parchment paper is a crucial step to ensure your cakes come out perfectly without sticking or crumbling. This prep work saves you from frustration later and guarantees clean edges on your beautiful cake layers.
Step 2: Mix the Batter for a Light, Fluffy Cake
In a large mixing bowl, beat the room-temperature butter and sugar together until the mixture is fluffy and pale. This step incorporates air, giving your cake its light texture. Add the eggs one at a time, making sure each one is fully mixed before adding the next. Then, gently mix in the dry ingredients along with the milk until just combined—overmixing can lead to a dense cake, so be gentle!
Step 3: Bake to Golden Perfection
Divide the batter evenly between your two prepared pans. Bake for 25 to 30 minutes until a toothpick inserted into the center comes out clean. The kitchen will fill with a heavenly aroma that’s already winning hearts. After baking, let the cakes cool for about ten minutes before carefully turning them out onto wire racks to cool completely—this cooling phase is key for the next steps.
Step 4: Whip Up the Silky Custard Filling
While your cakes are cooling, it’s time to prepare the custard filling. In a saucepan over medium heat, whisk together 2 cups of whole milk, cornstarch, sugar, and vanilla extract until the mixture thickens to a creamy consistency. This velvety custard is the heart of your Boston Cream Pie Cake Recipe and will add a luscious layer of flavor and smooth texture.
Step 5: Assemble Your Cake Layers
Once completely cooled, slice each cake layer horizontally into two even layers, creating four thin layers total. Spread a generous layer of the vanilla custard between each cake layer, creating a beautiful tiered effect of cake and creamy custard. This layering step transforms your simple cake into a spectacular Boston Cream Pie Cake Recipe that balances moist cakiness and rich filling.
Step 6: Add the Decadent Chocolate Glaze
For that iconic finishing touch, gently heat the heavy cream until it just begins to simmer. Pour it over the semisweet chocolate chips and stir until a glossy, smooth chocolate glaze forms. Drizzle this luscious glaze over the top and sides of your assembled cake, allowing it to cascade down elegantly, sealing in the custard and cake layers for a flawless finish.
How to Serve Boston Cream Pie Cake Recipe
Garnishes
Though the cake shines on its own, a few thoughtful garnishes can make it even more eye-catching. Lightly dusting powdered sugar on top adds a delicate sparkle. Fresh berries like raspberries or strawberries offer a tart contrast and a burst of color, while a sprinkle of toasted almonds gives a delightful crunch that complements the cake’s softness.
Side Dishes
Pair your Boston Cream Pie Cake Recipe with a scoop of vanilla bean ice cream or a dollop of freshly whipped cream for an indulgent dessert experience. A cup of rich coffee or black tea works beautifully to balance the sweetness, making each bite feel like a cozy, comforting moment.
Creative Ways to Present
For special occasions, consider serving individual mini versions of this cake in clear glass jars or cups to showcase those stunning layers. Alternatively, layering the custard and glaze in a trifle bowl creates a unique and shareable dessert with the same classic flavors. Whichever you choose, this Boston Cream Pie Cake Recipe lends itself to beautiful, crowd-pleasing presentations.
Make Ahead and Storage
Storing Leftovers
Once assembled, cover the cake tightly with plastic wrap or store it in an airtight container. Keep it refrigerated to maintain the freshness of the custard filling and chocolate glaze. Your Boston Cream Pie Cake Recipe will stay deliciously moist and flavorful for up to three days—perfect for treating yourself over a few days.
Freezing
If you want to enjoy this cake later, slice it into portions and freeze individual pieces wrapped tightly in plastic wrap and foil. While freezing may slightly affect the texture of the custard, it’s still a wonderful way to keep this dessert on hand. When you’re ready, thaw in the fridge overnight to retain the best flavor and consistency.
Reheating
This cake is best enjoyed chilled, but if you prefer a slightly warmer slice, allow it to come to room temperature for 30 minutes before serving. Reheating in a microwave or oven isn’t recommended as it may melt the custard and glaze, altering the texture. The creamy layers shine brightest when served cool but not icy.
FAQs
Can I use a different type of chocolate for the glaze?
Absolutely! While semisweet chocolate is traditional and balances sweetness nicely, you can experiment with milk chocolate for a sweeter glaze or dark chocolate for a richer, more intense chocolate flavor. Just make sure it melts smoothly with the cream.
Is this Boston Cream Pie Cake Recipe suitable for beginners?
Definitely! The recipe uses straightforward steps and common ingredients. The most involved part is making the custard, but with gentle whisking and attention, even novice bakers will find success and end up with a stunning dessert.
Can I make the custard filling ahead of time?
Yes! The custard can be made a day in advance. Just cover it with plastic wrap pressed directly onto the surface to prevent a skin from forming and refrigerate until you’re ready to assemble the cake.
Why is it called a Boston Cream Pie if it’s a cake?
Great question! Historically, this classic dessert was called a “pie” because it was baked in pie tins. Over time, it evolved into the layered cake version we know today. The name stuck as a nod to its origins and rich custard filling.
Can I substitute the milk in the cake with a dairy alternative?
Yes, you can use dairy-free milk alternatives such as almond, oat, or soy milk for the cake batter. Just keep in mind the flavor and texture might vary slightly. For the custard and glaze, whole milk and cream are preferred to get that traditional creamy texture, but you can experiment with substitutes if needed.
Final Thoughts
This Boston Cream Pie Cake Recipe is truly one of those desserts that feels like a warm hug in every bite. From the tender cake layers to the rich custard and glossy chocolate glaze, it’s a showstopper for celebrations or just making an ordinary day extraordinary. I wholeheartedly encourage you to try making this little slice of heaven soon—you’ll be so glad you did!
“`
Print
Boston Cream Pie Cake Recipe
- Prep Time: 30 minutes
- Cook Time: 30 minutes
- Total Time: 1 hour
- Yield: 12 servings
- Category: Dessert
- Method: Baking
- Cuisine: American
Description
This classic Boston Cream Pie Cake features tender vanilla layers filled with rich, creamy custard and topped with a luscious chocolate glaze. Perfect for celebrations or any special dessert craving, it combines moist cake, smooth pastry cream, and decadent chocolate for a timeless treat.
Ingredients
Cake
- 1 ¾ cups all-purpose flour
- 1 cup granulated sugar
- 2 tsp baking powder
- ½ cup unsalted butter, room temperature
- 1 cup whole milk
- 3 large eggs
Custard Filling
- 2 cups whole milk
- ¼ cup cornstarch
- 1 cup granulated sugar
- 1 tsp pure vanilla extract
Chocolate Glaze
- 1 cup semisweet chocolate chips
- ½ cup heavy cream
Instructions
- Preheat and prepare pans: Preheat the oven to 350°F (175°C) and grease two round cake pans. Line the bottoms with parchment paper to ensure easy removal of the cakes after baking.
- Make the cake batter: In a mixing bowl, beat the unsalted butter and granulated sugar together until the mixture is light and fluffy. Add the eggs one at a time, beating well after each addition. Then, mix in the all-purpose flour, baking powder, and whole milk until just combined to form a smooth batter.
- Bake the cake layers: Divide the batter evenly between the prepared pans and smooth the tops. Bake for 25-30 minutes or until a toothpick inserted into the center comes out clean. Let the cakes cool in the pans for 10 minutes before transferring to wire racks to cool completely.
- Prepare the custard filling: In a saucepan over medium heat, whisk together 2 cups whole milk, cornstarch, granulated sugar, and vanilla extract. Cook while continuously stirring until the mixture thickens into a smooth custard. Remove from heat and allow to cool slightly.
- Assemble the cake layers: Slice each cooled cake layer horizontally in half to create four thin layers. Spread a layer of custard filling between each layer, stacking carefully to maintain even edges.
- Make and drizzle the chocolate glaze: Heat the heavy cream in a saucepan until it just starts to simmer. Pour the hot cream over the semisweet chocolate chips in a bowl and stir until the chocolate is fully melted and the glaze is smooth. Drizzle the glaze evenly over the assembled cake, allowing it to drip down the sides.
Notes
- For best results, use room temperature butter and eggs to achieve a smooth batter.
- Allow the custard filling to cool sufficiently before layering to prevent melting the cake.
- Chocolate glaze can be adjusted in thickness by altering the cream amount slightly; more cream makes it thinner.
- The cake is best enjoyed the day it is assembled but can be refrigerated for up to 2 days.
- Ensure the cake layers are completely cool before slicing to avoid crumbling.

