There is nothing quite as magical as transforming simple cookies into whimsical works of art, and with this Easy Royal Icing Recipe for Irresistibly Decorated Cookies Recipe, you’ll have the perfect secret weapon. This luscious, glossy icing is incredibly simple to whip up yet delivers that flawless finish every decorated cookie dreams of. Whether you’re a beginner or a seasoned baker looking for a reliable go-to icing, this recipe brings together smooth texture, shining brilliance, and just the right amount of sweetness to elevate your cookie decorating game to new heights.

Ingredients You’ll Need
Gathering just a handful of simple ingredients, this recipe makes sure you can easily create stunning royal icing without any fuss. Each ingredient plays a crucial role, whether it’s adding sweetness, creating the perfect texture, or giving your icing that irresistible shine.
- 2 cups powdered sugar: Make sure it’s sifted for a silky smooth base that whips up effortlessly.
- 2 tbsp milk or warm water: Provides moisture and brings the icing to the perfect consistency; almond milk works beautifully for a dairy-free twist.
- 1 tbsp corn syrup: This is the magic ingredient that adds a beautiful shine and helps the icing harden to that classic royal icing finish.
- ½ tsp vanilla or almond extract: Adds cozy warmth to every bite, enhancing the flavor with a subtle depth.
- Gel food coloring (optional): Use this to create vibrant, bold colors without watering down your icing’s perfect texture.
- Squeeze bottles: Not technically an ingredient, but essential for easy, precise decorating and beautiful designs.
How to Make Easy Royal Icing Recipe for Irresistibly Decorated Cookies Recipe
Step 1: Mix the Base Ingredients
Start by combining the sifted powdered sugar, milk or warm water, corn syrup, and your choice of vanilla or almond extract in a large bowl. Use a whisk to blend everything until the mixture is smooth and creamy. This step lays down the foundation for velvety icing that is easy to pipe and spread.
Step 2: Add Color if Desired
If you want your cookie decorations to pop with vibrant hues, now’s the time to stir in gel food coloring. A little goes a long way, so add drops gradually and mix until you reach your perfect shade. The gel colors preserve the thick texture of the icing, so your designs stay crisp and vivid.
Step 3: Prepare for Decorating
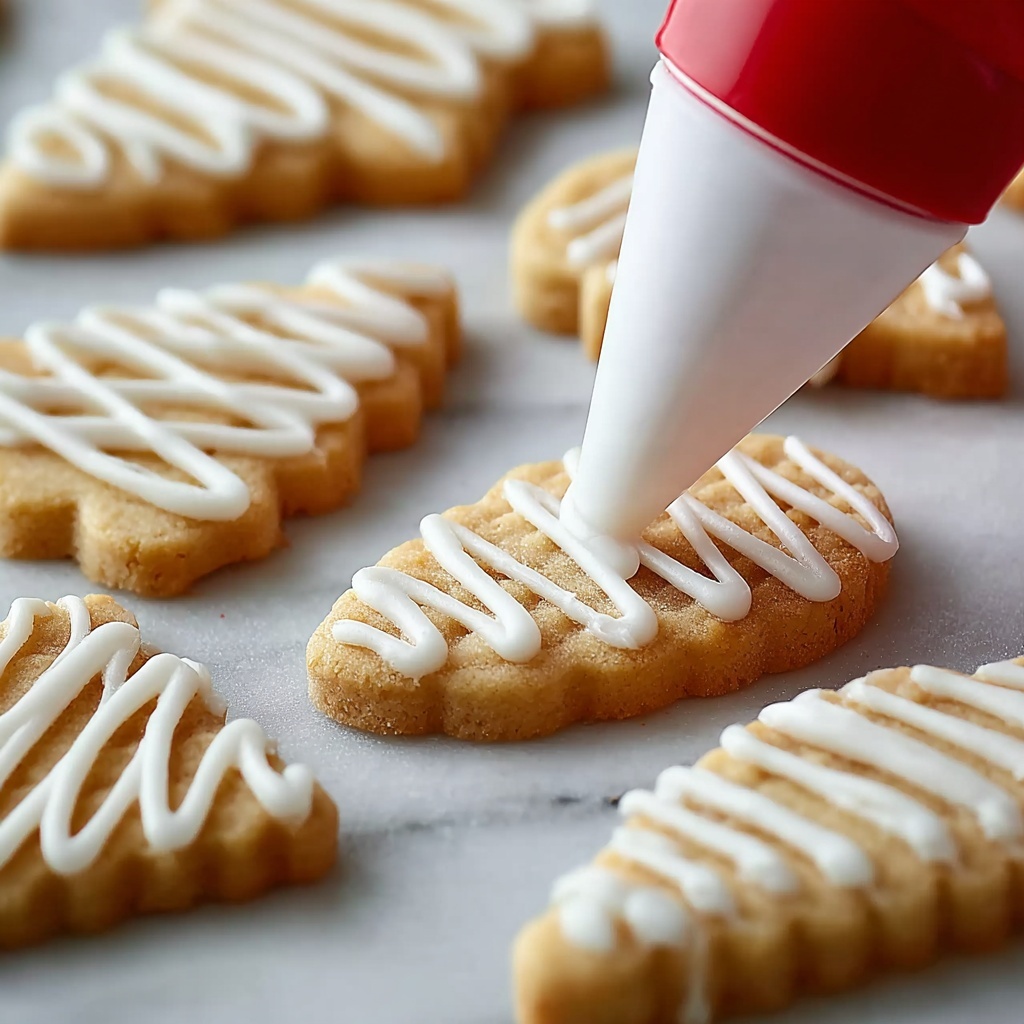
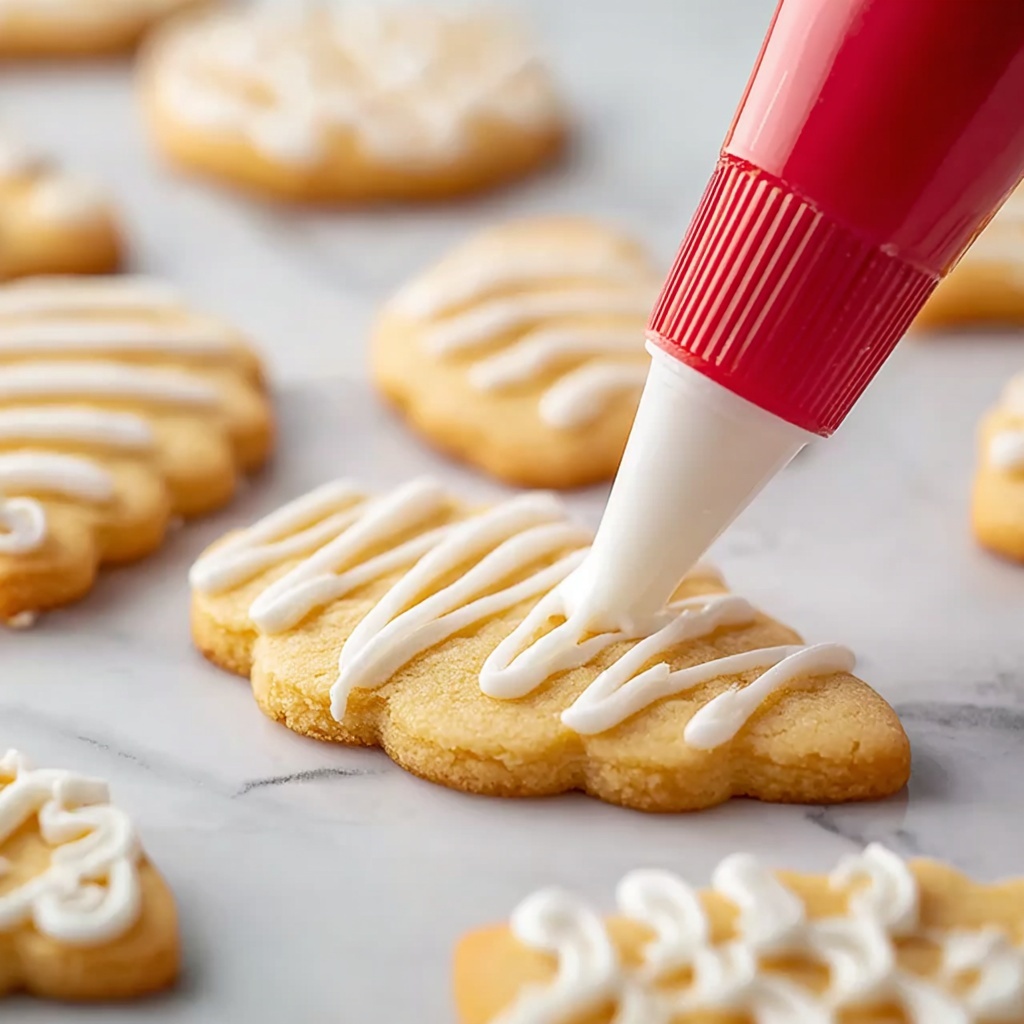
Using a spatula, carefully transfer the icing into squeeze bottles. These bottles give you unmatched control, letting you create everything from delicate lines to broad strokes with ease. Having your icing ready in a bottle means less mess and more fun decorating.
Step 4: Adjust Consistency as Needed
If the icing seems too thick to pipe smoothly, add a tiny splash of water—just a few drops at a time—and stir until it’s pourable but still holds its shape. Getting the right consistency is key to making your cookie decorations look professionally done and absolutely irresistible.
How to Serve Easy Royal Icing Recipe for Irresistibly Decorated Cookies Recipe
Garnishes
Once your cookies are iced and fully dried, sprinkle on edible glitter, small candies, or pearl sprinkles to add sparkle and extra charm. These little touches bring life and dimension to your decorated cookies, turning them into edible jewels that catch everyone’s eye.
Side Dishes
Pair your decorated cookies with a cozy cup of tea, rich hot chocolate, or fresh-brewed coffee to create a delightful treat time. Sweet and warm drinks perfectly complement the smooth sweetness and gentle crunch of royal icing, making every bite feel like a special celebration.
Creative Ways to Present
Consider arranging your iced cookies on tiered serving trays or wrapping them in cellophane with colorful ribbons for festive gifts. Displaying your hand-decorated beauties with care heightens the anticipation and shows off all the stunning work your Easy Royal Icing Recipe for Irresistibly Decorated Cookies Recipe helped you achieve.
Make Ahead and Storage
Storing Leftovers
If you have any leftover icing, store it in an airtight container at room temperature for up to 24 hours. When you’re ready to use it again, give it a quick stir to bring back its smooth texture. This way, you waste no icing and always have some on hand for last-minute decorating.
Freezing
While freezing royal icing isn’t commonly recommended because of its delicate texture, you can freeze any extra squeeze bottles for up to a month. Thaw completely overnight in the refrigerator and stir well before use to restore consistency.
Reheating
When your icing thickens after sitting, gently warm it by placing the container in a warm water bath. Avoid microwaving directly, as overheating can alter the texture. Warming a little helps loosen the icing and makes decorating smooth again.
FAQs
Can I use regular milk instead of almond milk?
Absolutely, regular milk works perfectly in this recipe, but almond milk is a great dairy-free alternative that won’t compromise the texture or flavor of your royal icing.
How long does royal icing take to dry?
Depending on humidity, royal icing typically dries hard within 4 to 6 hours, but for the best results, let your decorated cookies sit overnight to fully set.
Can I make this icing ahead of time?
Yes! You can prepare the icing in advance and store it properly. Just keep it covered tightly to prevent it from drying out, and stir gently before you decorate.
What’s the best way to get smooth, lump-free icing?
Sifting your powdered sugar before mixing is crucial, and whisking thoroughly until smooth ensures your icing will be lump-free and silky every time.
Is corn syrup necessary?
Corn syrup is key for that beautiful shine and hard texture typical of royal icing. While you can omit it, the finish may be less glossy and a bit softer.
Final Thoughts
Now that you have this easy, fail-proof Easy Royal Icing Recipe for Irresistibly Decorated Cookies Recipe in your baking arsenal, decorating cookies has never been more fun or approachable. Whether you’re crafting festive treats for a party or simply enjoying a cozy day at home, this icing turns every cookie into a celebration. So, grab your whisk and squeeze bottles and start creating those irresistibly decorated cookies that everyone will rave about!
Print
Easy Royal Icing Recipe for Irresistibly Decorated Cookies Recipe
- Prep Time: 10 minutes
- Cook Time: 0 minutes
- Total Time: 10 minutes
- Yield: 1.5 cups
- Category: Dessert
- Method: No-Cook
- Cuisine: American
- Diet: Gluten Free
Description
This Easy Royal Icing Recipe is perfect for creating irresistibly decorated cookies with a smooth, shiny finish. The icing combines powdered sugar, milk or warm water, corn syrup for shine and hardness, and vanilla or almond extract for warmth. Optional gel food coloring allows for vibrant, colorful designs. The recipe is quick to prepare, requiring no cooking, and ideal for precise cookie decoration using squeeze bottles.
Ingredients
Royal Icing Ingredients
- 2 cups powdered sugar (sifted)
- 2 tbsp milk or warm water (use almond milk for a dairy-free option)
- 1 tbsp corn syrup (adds shine and a hard texture)
- ½ tsp vanilla or almond extract (infuses warm flavor)
- Gel food coloring (optional for vibrant colors)
- Squeeze bottles (for easy decorating)
Instructions
- Combine Ingredients: In a large bowl, combine the sifted powdered sugar, milk or warm water, corn syrup, and vanilla or almond extract. Whisk the mixture vigorously until it becomes smooth and creamy, ensuring there are no lumps for a perfect icing texture.
- Add Color: If you desire colorful cookie designs, incorporate gel food coloring into the icing. Stir thoroughly until you achieve your desired shade, adding more color gradually if needed for vibrant hues.
- Prepare for Decorating: Use a spatula to carefully transfer the icing into squeeze bottles. This allows for precise and controlled decorating, perfect for piping detailed designs onto cookies.
- Adjust Consistency: If the icing feels too thick to pipe easily, add a tiny splash of water gradually. Continue mixing until the icing reaches a pourable and workable consistency that suits your decorating needs.
Notes
- Use almond milk instead of regular milk for a dairy-free alternative.
- Gel food coloring is preferred over liquid to avoid thinning the icing.
- Store unused icing in an airtight container to prevent drying out.
- For harder icing, allow decorated cookies to dry overnight at room temperature.
- If icing thickens upon standing, stir in a small amount of water to restore consistency.


