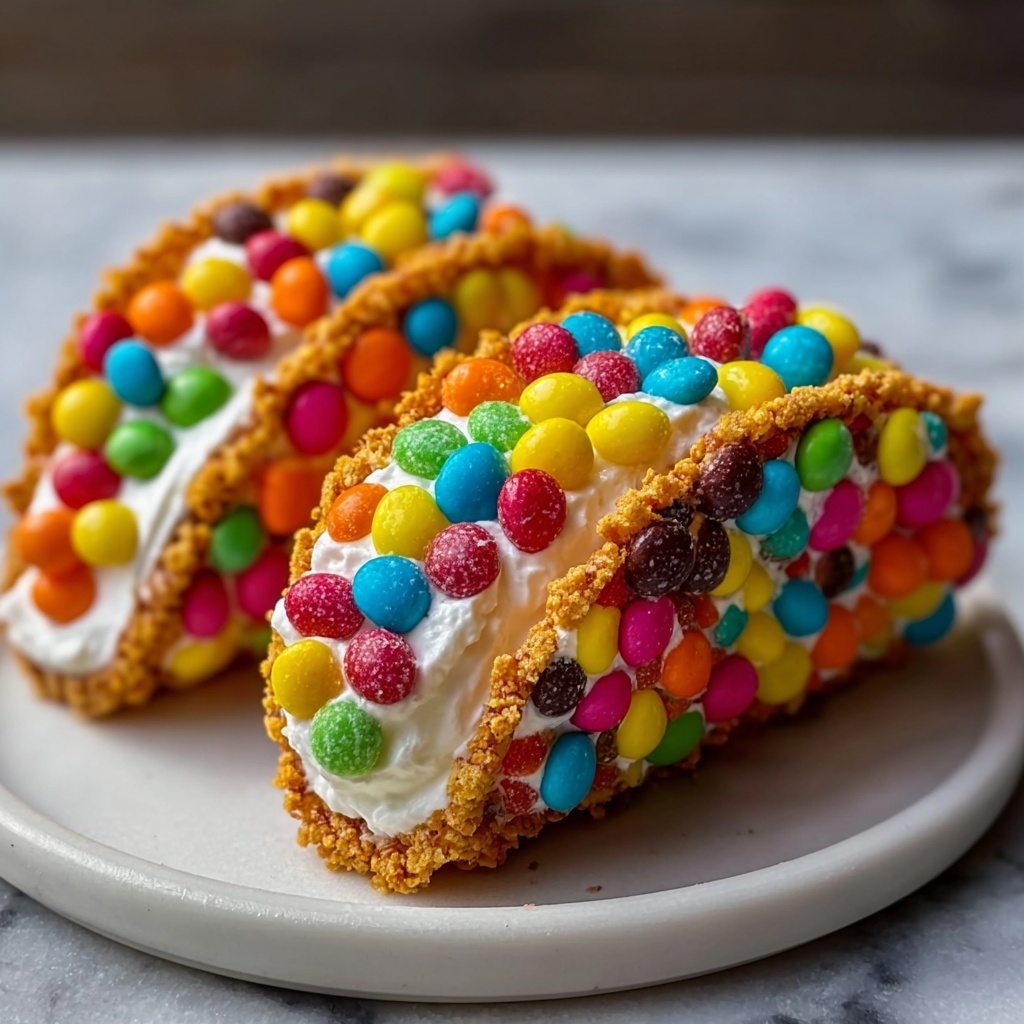
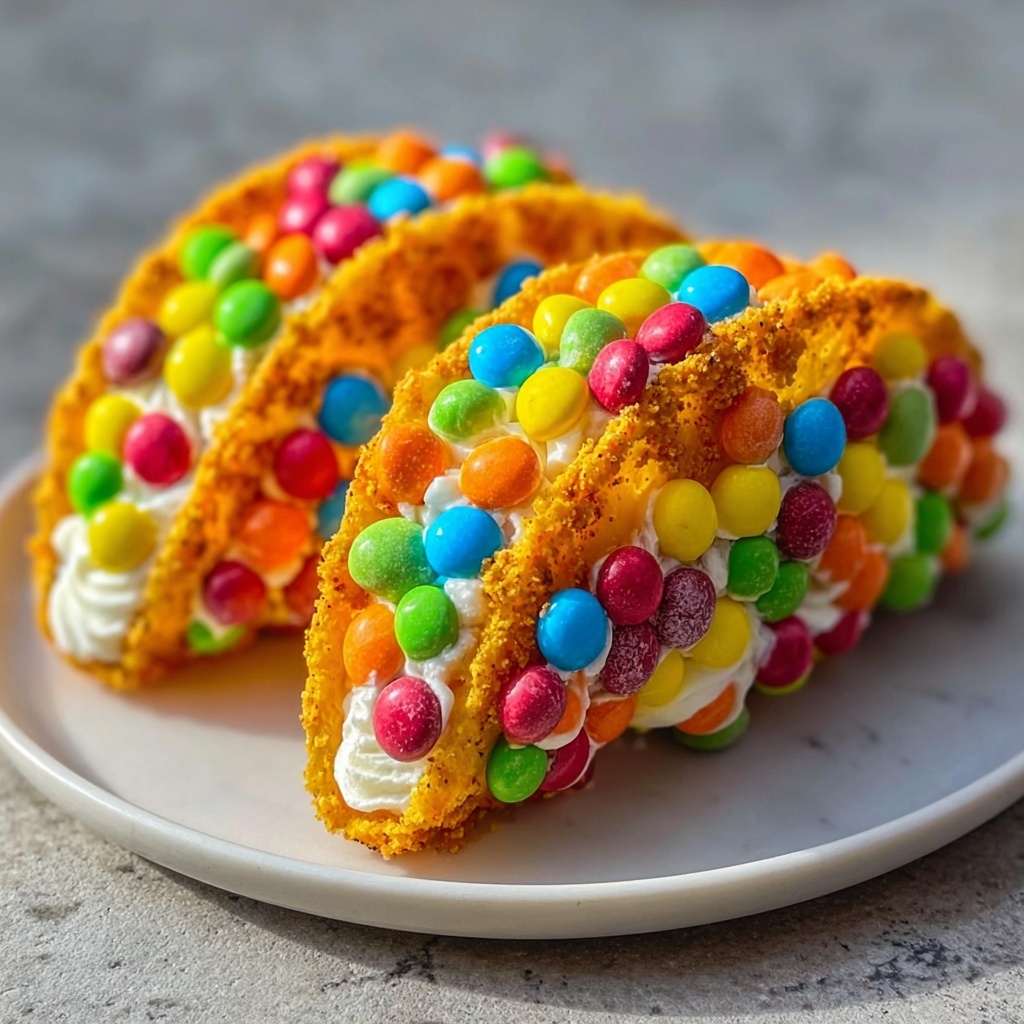
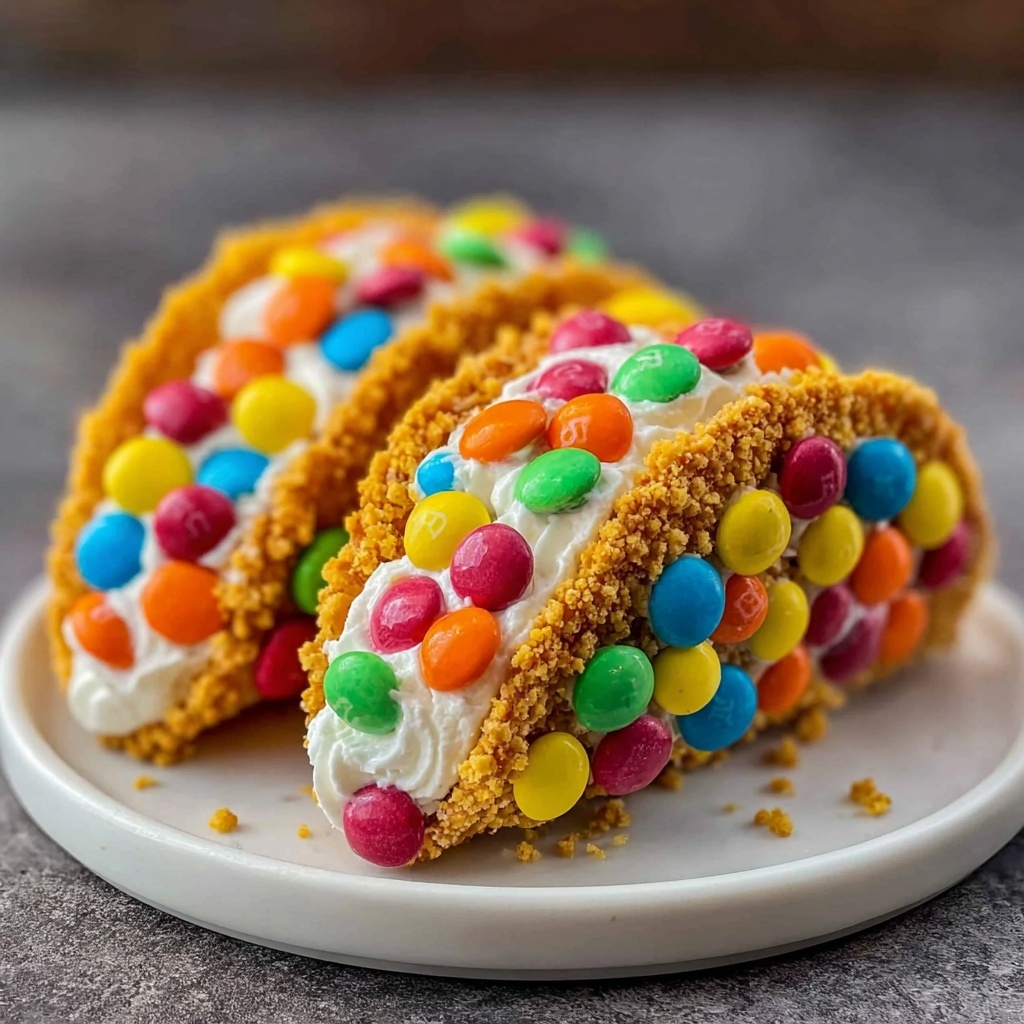
If you are searching for a dessert that’s bursting with color, flavor, and a playful twist, you’re definitely going to adore this Fruity Pebbles Cheesecake Tacos Recipe. Imagine crunchy, rainbow-hued cereal shells cradling a luscious, silky cheesecake filling—each bite a delightful balance of sweet creaminess and crisp texture. It’s like your favorite childhood cereal met a gourmet dessert, resulting in a fun and irresistible treat that’s perfect for parties, family gatherings, or simply to brighten up your day.
Ingredients You’ll Need
The beauty of this Fruity Pebbles Cheesecake Tacos Recipe lies in its simplicity. Each ingredient plays a starring role, either contributing to the vibrant colors, the creamy texture, or the buttery crunch that makes this dessert so special.
- 3 cups Fruity Pebbles cereal: The colorful and crispy base that creates the festive taco shell and adds nostalgic sweetness.
- 1/2 cup unsalted butter (melted): Acts as the binding agent, giving structure and richness to the taco shells.
- 8 oz cream cheese (softened): Provides the smooth, tangy foundation of the cheesecake filling for that perfect velvety mouthfeel.
- 1/2 cup powdered sugar (sifted): Adds just enough sweetness without overpowering the cream cheese’s natural tang.
- 1 tsp pure vanilla extract: Enhances the flavor profile with warm, sweet notes that tie everything together.
- 1 cup whipped cream (freshly whipped): Lightens the cheesecake filling to an airy, fluffy consistency that melts in your mouth.
- Additional Fruity Pebbles cereal: For garnish—adds that extra pop of color and crunch to finish off each taco beautifully.
How to Make Fruity Pebbles Cheesecake Tacos Recipe
Step 1: Prepare the Colorful Taco Shells
Start by combining your 3 cups of Fruity Pebbles cereal with the melted butter in a large mixing bowl. Stir thoroughly until every piece shines with a glossy coating of butter and sticks together slightly. This sticky, colorful mixture is the foundation of your taco shells, so make sure it’s well mixed for the best results.
Step 2: Shape and Chill the Shells
Next, press the buttery cereal mixture firmly into taco-shaped molds or muffin tins. Compact the mixture well to form sturdy, crisp shells, then pop them into the refrigerator. Letting them chill for at least 30 minutes ensures the shells set perfectly and hold their shape when filled. This step is crucial for that satisfying crunch.
Step 3: Whip Up the Cream Cheese Filling
While the shells chill, it’s time to tackle the cheesecake filling. Beat the softened cream cheese with a hand mixer until it’s light and fluffy. Slowly add the sifted powdered sugar and vanilla extract, blending until smooth and creamy. The filling should be rich but not heavy, a dreamy contrast to the crunchy shell.
Step 4: Fold in the Whipped Cream
Gently fold the freshly whipped cream into the cream cheese mixture. This step is where your filling transforms from dense to heavenly light, so take your time. Use a spatula and a gentle hand to keep the airiness intact—this will give your cheesecake tacos that melt-in-your-mouth texture everyone will swoon over.
Step 5: Fill and Adorn the Tacos
Once your cereal shells are solid and chilled, spoon generous amounts of the cheesecake filling into each one. Don’t be shy—the filling is the heart of the dish, and every bite deserves to be creamy and indulgent. Just before serving, sprinkle extra Fruity Pebbles on top to add a burst of extra color and crunch that makes these tacos truly pop.
How to Serve Fruity Pebbles Cheesecake Tacos Recipe
Garnishes
Adding colorful and playful garnishes takes these cheesecake tacos to the next level. Aside from the extra Fruity Pebbles sprinkled on top, consider a light dusting of powdered sugar, a drizzle of honey, or even some tiny edible flowers to surprise and delight your guests. Garnishes bring visual appeal and an exciting crunch that complements the creaminess inside.
Side Dishes
Since these Fruity Pebbles Cheesecake Tacos are a dessert, pair them with refreshing sides that balance their richness. Fresh fruit salad with berries or citrus segments works beautifully to cleanse the palate. For adults, a small glass of sweet dessert wine or sparkling lemonade also complements the cheery flavors of the tacos.
Creative Ways to Present
Presentation makes any recipe feel special and memorable. Try serving the tacos in a colorful taco holder for easy grabbing at your next party. You could also artistically arrange them on a platter with fresh mint leaves and edible glitter for a whimsical touch. If you’re feeling extra festive, add small flags or themed picks for a personalized effect that’s sure to delight friends and family.
Make Ahead and Storage
Storing Leftovers
If you happen to have leftover Fruity Pebbles Cheesecake Tacos, store them in an airtight container in the refrigerator. Keep them chilled to maintain the cheesecake filling’s freshness and to prevent the cereal shells from becoming too soggy. Consume within 2 days for the best texture and flavor.
Freezing
Freezing these tacos isn’t recommended because the cereal shells can lose their crispness and the texture of the creamy filling might suffer upon thawing. The delicate balance of crunch and creaminess is best enjoyed fresh, so plan to make them for same-day consumption whenever possible.
Reheating
Since this recipe is served cold, reheating is not necessary. In fact, warming these tacos would compromise their texture. Simply remove them from the fridge about 10 minutes before serving if you’d like the filling to soften slightly.
FAQs
Can I use a different cereal instead of Fruity Pebbles?
Absolutely! While Fruity Pebbles gives this recipe its signature color and crunch, other colorful cereals like Trix or Fruity Cheerios can also work. Keep in mind that flavors and textures will vary, but the fun, festive vibe remains.
How do I make sure the taco shells stay crispy?
The key is pressing the cereal mixture firmly into the molds and chilling them well in the fridge. Avoid letting them sit at room temperature for too long before filling, as moisture from the filling can soften the shells.
Can I prepare the filling in advance?
Yes, you can make the cheesecake filling a day ahead and keep it covered in the refrigerator. Just fold in the whipped cream right before assembling the tacos so the texture stays light and fluffy.
What if I don’t have taco-shaped molds?
No worries! Use a muffin tin to form cups or gently shape the cereal mixture over a small cup or bowl lined with plastic wrap. The goal is to create a container-like shape to hold the cheesecake filling.
Is this recipe kid-friendly?
Definitely! Kids will love the playful colors and fun taco shape—plus, it’s a sweet treat that feels special but uses familiar ingredients. Just be mindful of allergies or dietary restrictions.
Final Thoughts
This Fruity Pebbles Cheesecake Tacos Recipe is such a joyful dessert to make and share. It brings together nostalgic flavors with a stylish twist that anyone can fall in love with. Whether you’re treating yourself or impressing guests, these colorful, creamy, and crunchy tacos are guaranteed to spark smiles all around. Give this recipe a try—you’ll find it hard to resist making it again and again!
Print
Fruity Pebbles Cheesecake Tacos Recipe
- Prep Time: 20 minutes
- Cook Time: 0 minutes
- Total Time: 50 minutes
- Yield: 6 tacos
- Category: Dessert
- Method: No-Cook
- Cuisine: American
- Diet: Vegetarian
Description
These Delicious Fruity Pebbles Cheesecake Tacos are a fun and colorful dessert featuring crunchy fruity cereal shells filled with a creamy, sweet cheesecake filling. Perfect for parties or a playful treat, these no-bake taco-shaped desserts combine fruity flavors with smooth cream cheese and whipped cream for a delightful bite every time.
Ingredients
For the Cereal Shells
- 3 cups fruity cereal (any brand)
- 1/2 cup unsalted butter (melted)
For the Cheesecake Filling
- 8 oz cream cheese (softened to room temperature)
- 1/2 cup powdered sugar (sifted)
- 1 tsp pure vanilla extract
- 1 cup whipped cream (freshly whipped)
- Additional fruity cereal (for garnish)
Instructions
- Prepare the Cereal Mixture: In a mixing bowl, stir together 3 cups of fruity cereal and 1/2 cup melted butter until each piece is evenly coated. The mixture should feel sticky and colorful!
- Form the Taco Shells: Press the cereal mixture firmly into taco-shaped molds or muffin tins. Make sure to compact it well, then chill in the refrigerator for at least 30 minutes until the shells are set.
- Make the Cheesecake Filling: Beat 8 oz softened cream cheese with a hand mixer until light and fluffy. Gradually blend in 1/2 cup sifted powdered sugar and 1 tsp vanilla extract until the mixture is smooth and creamy.
- Fold in the Whipped Cream: Gently fold 1 cup of whipped cream into the cream cheese mixture using a spatula. Be careful not to overmix; you want it to stay light and airy!
- Assemble the Tacos: Once the cereal shells are firm, generously spoon the cheesecake filling into each shell. Let every bite be a surprise of creamy sweetness!
- Garnish and Serve: Sprinkle additional fruity cereal over the filled shells for a burst of color and crunch just before serving. It enhances both the look and texture!
Notes
- Be sure to compact the cereal mixture firmly into the molds to ensure the shells hold their shape.
- If you don’t have taco-shaped molds, muffin tins or small bowls can be used to shape the shells.
- Keep the assembled tacos refrigerated until ready to serve for best texture and freshness.
- Feel free to use any colorful fruity cereal to customize the flavor and appearance.
- Use freshly whipped cream for best texture in the filling, or carefully fold in store-bought whipped topping.


