If you’re looking for a cozy dessert that tastes like a warm hug from the inside out, this Homemade Classic Apple Crisp Recipe is your new best friend. It perfectly balances tender, cinnamon-kissed apples with a buttery, crisp oat topping that’s just begging to be enjoyed with a scoop of vanilla ice cream. Simple ingredients come together to create a timeless dish that’s perfect for chilly nights, holiday gatherings, or whenever you want to savor a little bit of homemade comfort.
Ingredients You’ll Need
Gathering the right ingredients is key to making this dessert sing. Each component plays an essential role—from the tartness of the apples to the crunchy oat topping, these simple staples will give you a perfect balance of flavors and textures.
- 6 medium apples (Granny Smith or Honeycrisp): Peeled, cored, and sliced to create the sweet-tart base of the crisp.
- 1 cup granulated sugar: Adds sweetness that complements the natural apple tartness; adjust to your liking.
- 1 cup brown sugar (packed): Brings a deep caramel note to the crumbly topping, enriching every bite.
- 1 teaspoon cinnamon (ground): Infuses warm spice into the apples, making this crisp irresistibly fragrant.
- ½ cup all-purpose flour: Helps bind the topping to create a perfect golden crust.
- 1 cup old-fashioned oats: Adds hearty texture and nutty flavor to the crumble.
- ½ cup unsalted butter (melted): Provides richness and helps the topping brown beautifully in the oven.
- A pinch of salt: Balances the sweetness and enhances the overall flavor.
How to Make Homemade Classic Apple Crisp Recipe
Step 1: Preheat and Prepare
Begin by preheating your oven to a cozy 350°F (175°C). This steady temperature is just right for cooking the apples thoroughly while allowing the crumb topping to turn perfectly golden and crisp.
Step 2: Get Your Apples Ready
Peeling, coring, and slicing your apples into thin wedges sets the stage for a tender, melt-in-your-mouth filling. Granny Smith offers a tart punch while Honeycrisp provides a sweetness—either choice yields a delicious base.
Step 3: Mix the Apple Filling
In a large mixing bowl, toss the sliced apples gently with granulated sugar, cinnamon, and a pinch of salt. This mixture coats each slice evenly, ensuring every bite bursts with balanced sweet and spice flavors.
Step 4: Transfer to Baking Dish
Grease a 9×13-inch baking dish lightly, then spread your apple mixture evenly inside. This step sets the foundation, allowing each layer to bake beautifully without sticking or burning.
Step 5: Prepare the Topping
In a separate bowl, combine the flour, oats, brown sugar, and melted butter until crumbly. This mixture creates the signature crumbly topping that crisps up and contrasts delightfully with the softness of the apples.
Step 6: Add the Crumble on Top
Sprinkle the oat topping evenly over the layered apples, making sure every corner is covered. This ensures consistent browning and that beautiful golden crust we all crave.
Step 7: Bake to Perfection
Place the dish in your preheated oven and bake for 45 to 50 minutes. You’ll know it’s ready when the topping turns a gorgeous golden brown and the apples start bubbling around the edges.
Step 8: Cool Slightly
Once out of the oven, allow the crisp to rest for 10 to 15 minutes. This cooling time helps the juices thicken and the dessert to set just enough for easy serving.
Step 9: Serve and Enjoy!
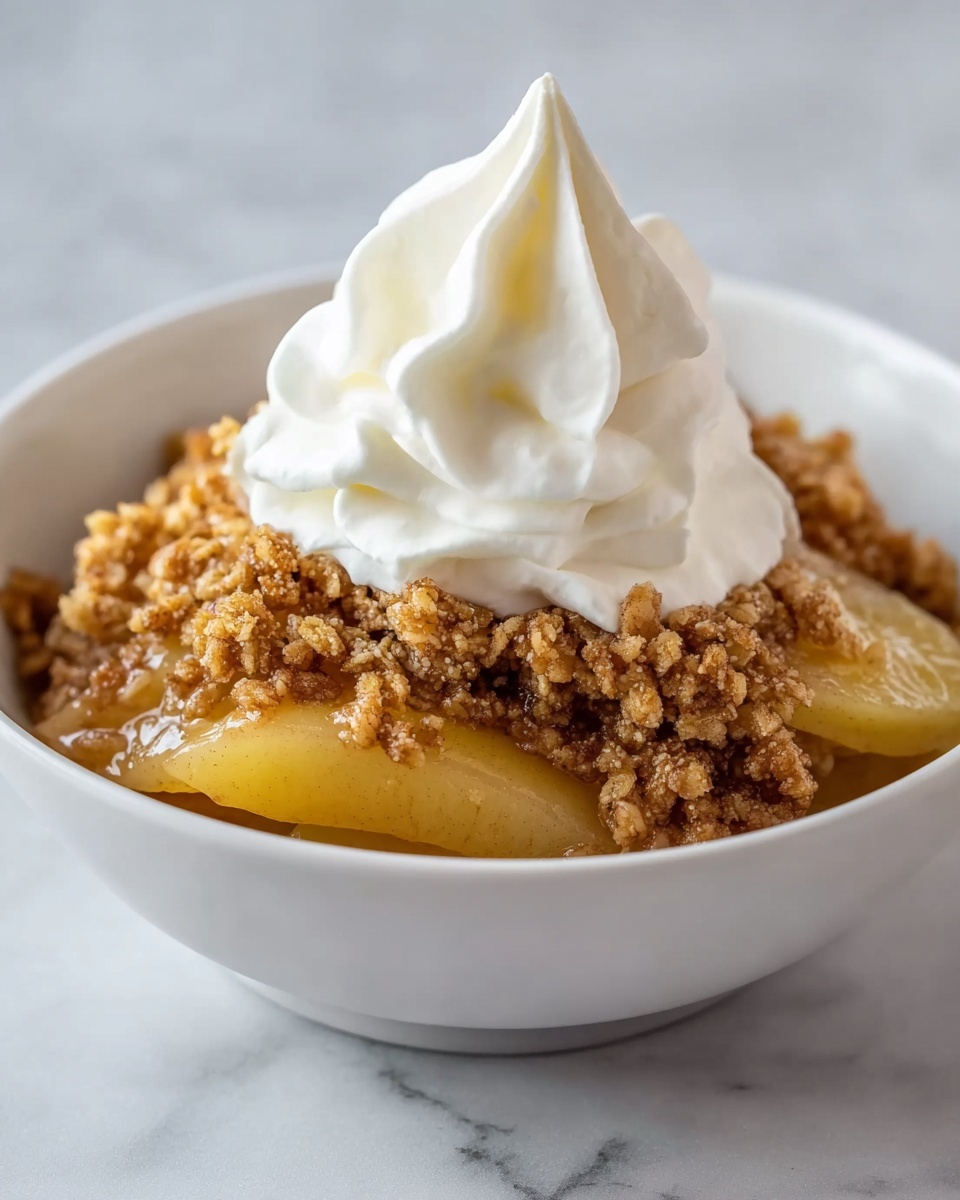
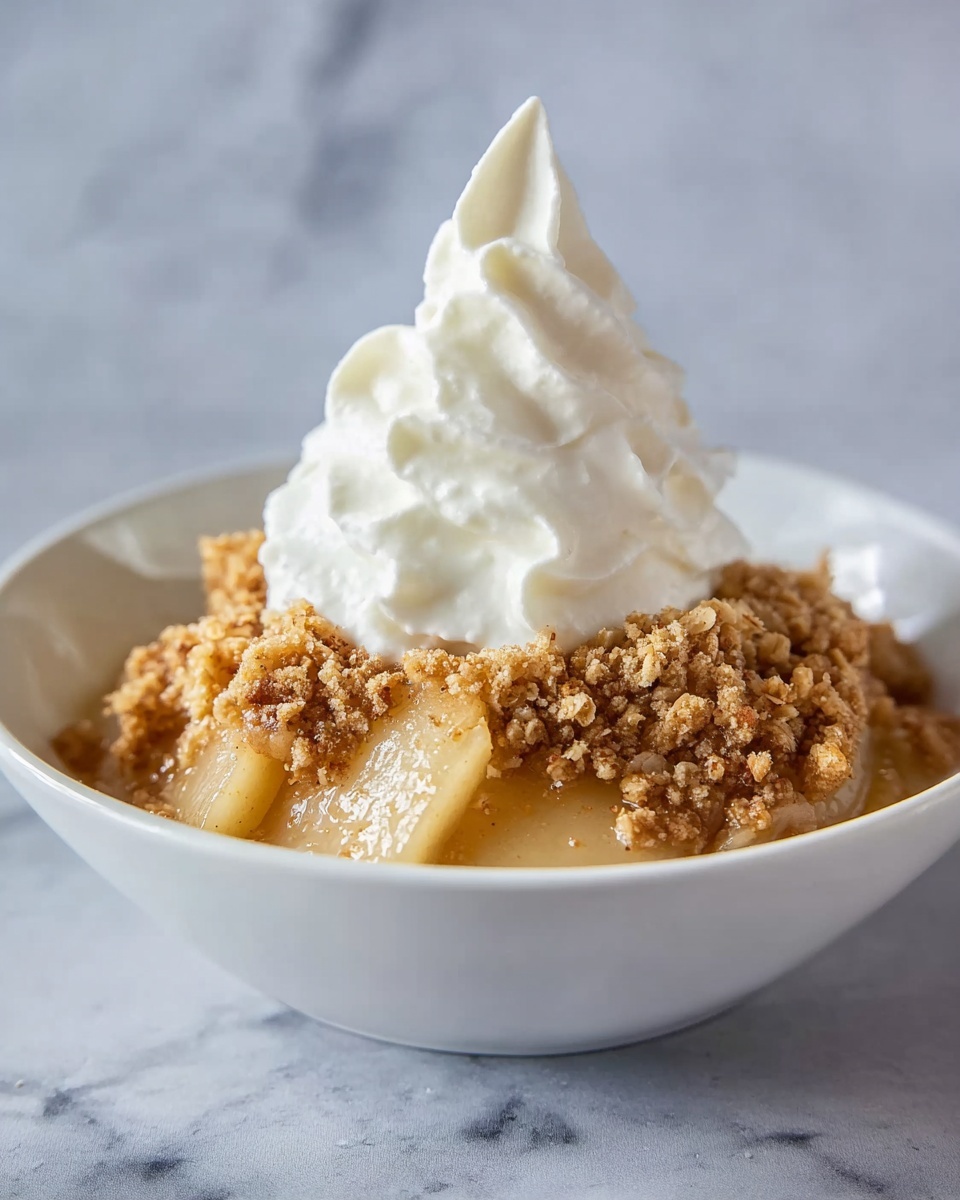
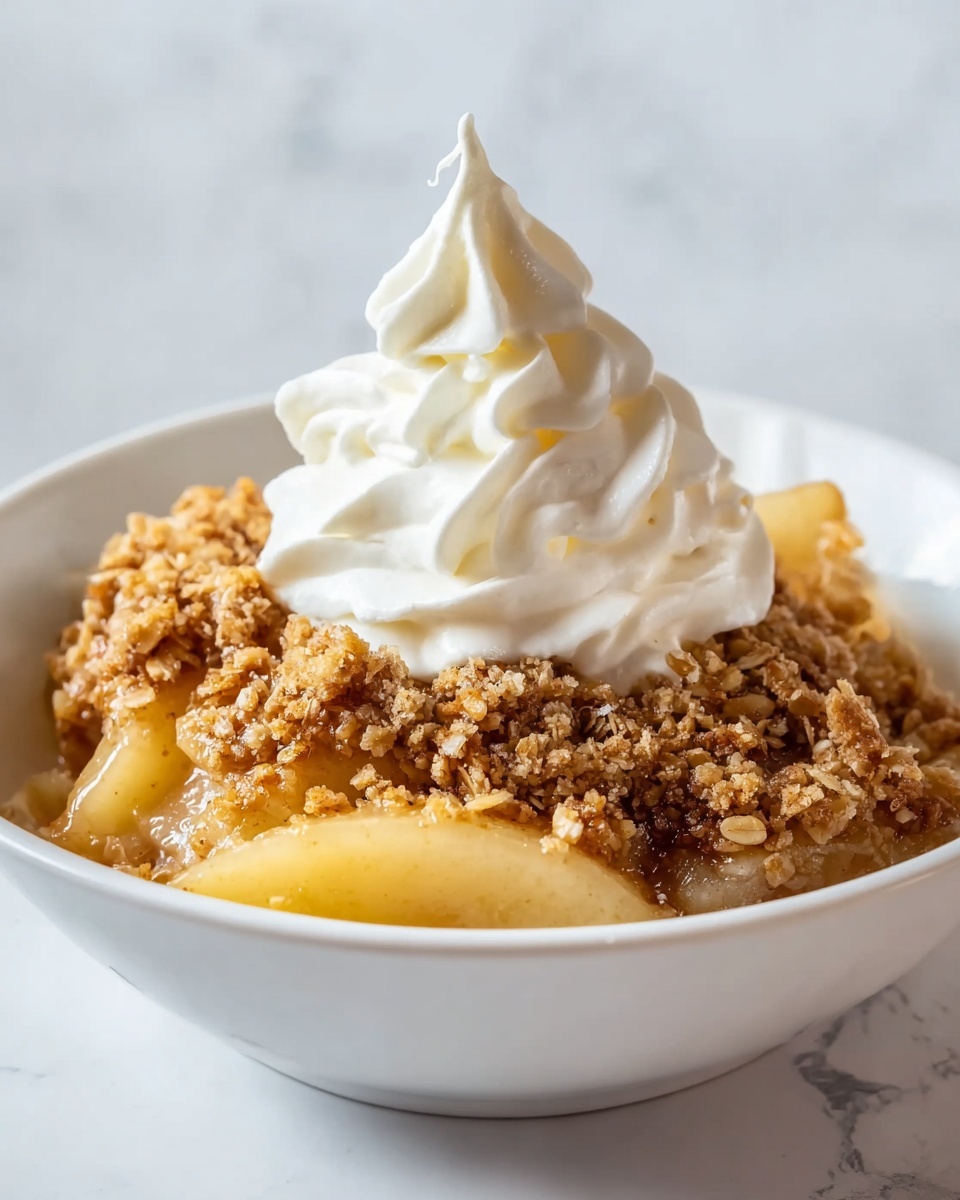
Serve your Homemade Classic Apple Crisp Recipe warm. It’s incredible on its own, but a scoop of vanilla ice cream or a dollop of whipped cream turns it into a dreamy treat that everyone will love.
How to Serve Homemade Classic Apple Crisp Recipe
Garnishes
A simple dusting of powdered sugar can add a lovely touch to your apple crisp, but decadent options like vanilla bean ice cream or creamy whipped cream really elevate this dessert. For a crunchy element, sprinkle some toasted nuts on top right before serving.
Side Dishes
Looking for something to complement your apple crisp? A cup of hot spiced tea or freshly brewed coffee pairs wonderfully. For a brunch twist, serve alongside a scoop of Greek yogurt or a slice of sharp cheddar cheese for a delightful sweet-savory combo.
Creative Ways to Present
Try serving the apple crisp in individual ramekins for a charming portioned dessert or layer it in a trifle dish alternating with whipped cream for a stunning presentation. You could even place it inside warm cinnamon-sugar-coated baked apples for a fun twist!
Make Ahead and Storage
Storing Leftovers
Leftover apple crisp can be covered tightly with foil or plastic wrap and stored in the refrigerator for up to 3 days. The flavors often deepen overnight, making reheated portions just as delightful as freshly baked.
Freezing
If you want to save some for later, this apple crisp freezes beautifully. Wrap it snugly or store in an airtight container, then freeze for up to 2 months. Thaw overnight in the fridge before reheating for best results.
Reheating
To reheat, warm individual servings in the microwave for about a minute, or place the entire dish in a 350°F oven for 15-20 minutes until heated through and the topping regains its crispness.
FAQs
Can I use other types of apples in this recipe?
Absolutely! While Granny Smith and Honeycrisp are recommended for their balance of tartness and sweetness, you can mix in other firm apples like Fuji or Braeburn. Just make sure they hold their shape well during baking.
Is it possible to make this recipe gluten-free?
Yes, simply replace the all-purpose flour with a gluten-free flour blend, and make sure your oats are certified gluten-free. This swap keeps the crumble just as delicious and safe for gluten-sensitive friends.
Can I add nuts to the topping?
Definitely! Chopped walnuts, pecans, or almonds stir into the oat topping add lovely texture and a nutty flavor that pairs perfectly with the apples and cinnamon.
How can I make the topping extra crispy?
For an even crispier topping, try adding a tablespoon of cornstarch or finely ground almond flour to the oat mixture. Also, ensuring the butter is fully melted and mixing the topping well helps create a golden, crunchy crust.
What’s the best way to peel and slice apples quickly?
Using a handheld peeler for the skin and a sharp paring knife or apple corer/slicer tool speeds up the process. Slicing evenly-sized wedges ensures they cook uniformly and taste delicious in every bite.
Final Thoughts
There’s something truly special about making and sharing this Homemade Classic Apple Crisp Recipe. It’s a dessert that’s both nostalgic and effortlessly comforting, made from simple ingredients that come together to create magic. I can’t wait for you to try it and discover your own love for this timeless treat!
Print
Homemade Classic Apple Crisp Recipe
- Prep Time: 15 minutes
- Cook Time: 50 minutes
- Total Time: 1 hour 5 minutes
- Yield: 8 servings
- Category: Dessert
- Method: Baking
- Cuisine: American
Description
This Homemade Classic Apple Crisp is a warm, comforting dessert featuring tender, cinnamon-spiced apples baked beneath a crunchy oat and brown sugar topping. Perfect for cozy gatherings, it combines tart Granny Smith or Honeycrisp apples with a buttery, crumbly crumble that is golden and bubbly when baked to perfection.
Ingredients
Apples
- 6 medium Apples (Granny Smith or Honeycrisp, peeled, cored, and sliced)
Apple Mixture
- 1 cup Granulated Sugar (adjust to taste)
- 1 teaspoon Cinnamon (ground)
- 1 pinch Salt
Topping
- 0.5 cup All-Purpose Flour
- 1 cup Old-Fashioned Oats
- 1 cup Brown Sugar (packed)
- 0.5 cup Unsalted Butter (melted)
Instructions
- Preheat Oven: Preheat your oven to 350°F (175°C) to ensure it reaches the perfect temperature for even baking.
- Prepare Apples: Peel, core, and slice the apples into thin wedges to create an ideal texture that softens evenly during baking.
- Mix Apple Filling: In a large mixing bowl, combine the sliced apples with granulated sugar, ground cinnamon, and a pinch of salt. Toss gently to evenly coat the apples with the spices and sugar.
- Transfer to Baking Dish: Grease a 9×13-inch baking dish and spread the apple mixture evenly inside.
- Prepare Topping: In a separate bowl, mix together the all-purpose flour, old-fashioned oats, brown sugar, and melted unsalted butter until the mixture becomes crumbly and well combined.
- Assemble Crisp: Sprinkle the crumbly oat topping evenly over the apple filling in the baking dish.
- Bake: Place the dish in the preheated oven and bake for 45-50 minutes until the topping is golden brown and the apples are bubbly and cooked through.
- Cool: Remove from oven and allow the apple crisp to cool for 10-15 minutes to set and enhance flavors before serving.
- Serve: Serve the apple crisp warm, optionally topped with a scoop of vanilla ice cream or a dollop of whipped cream for an extra indulgent treat.
Notes
- Use tart apples like Granny Smith or Honeycrisp for a well-balanced sweetness and texture.
- Adjust granulated sugar quantity based on the sweetness of your apples and personal preference.
- For a gluten-free version, substitute the all-purpose flour with a gluten-free flour blend.
- Serve warm for best flavor and texture; cold leftovers can be gently reheated.
- Optional toppings such as vanilla ice cream or whipped cream beautifully complement the warm apple crisp.


