If you’ve ever been enchanted by that perfect, nooks-and-crannies texture of a bakery English muffin, you are in for a real treat with this Homemade English Muffins Recipe. This recipe captures that classic beauty right in your own kitchen, using straightforward ingredients and a simple process to bring you muffins that are crispy on the outside, tender and airy inside. There’s a special kind of joy in gently toasting these beauties and watching butter melt into every little pocket, making breakfast, brunch, or even a cozy snack feel like a celebration.
Ingredients You’ll Need
Every ingredient in this Homemade English Muffins Recipe plays a starring role, coming together to build texture, flavor, and a subtle richness that feels just right. These pantry-friendly items are simple yet essential, ensuring your muffins rise with a perfect crumb and develop that nostalgic flavor.
- All-Purpose Flour: The foundation of structure and chewiness in your muffins.
- Active Dry Yeast: Key for that wonderful rise and those signature air pockets.
- Sugar: Adds just a touch of sweetness and helps activate the yeast.
- Salt: Balances flavors and enhances the overall taste.
- Milk (warm): Contributes to tenderness and richness.
- Butter (melted): Adds moisture and a subtle creamy flavor.
- Warm Water: Activates the yeast and marries the ingredients.
- Cornmeal: Dusts the muffins for that authentic texture and prevents sticking.
- Baking Soda: Helps lighten the muffins and contributes to browning.
- Egg (large): Provides structure and richness.
- White Vinegar: Reacts with baking soda to give a tender crumb and slight tang.
How to Make Homemade English Muffins Recipe
Step 1: Warm Up Your Cooking Surface
Before you dive into mixing the dough, get your skillet or griddle warming on low heat. This gentle warming ensures it’s just right for cooking the muffins later, providing even heat to develop that perfect crust without burning.
Step 2: Activate the Yeast and Mix the Dough
In a bowl, stir together your warm water, milk, sugar, and yeast. Let this mixture sit until it becomes frothy—this signals the yeast is alive and ready to work its magic. Then, add in melted butter, the egg, vinegar, flour, and salt. Mix everything to form a sticky, slightly wet dough that’s full of promise.
Step 3: Prepare Your Cooking Surface with Cornmeal
Lightly oil your skillet or griddle, then sprinkle cornmeal liberally. This cornmeal layer gives your homemade English muffins that signature rustic crunch on the bottom and prevents sticking, so your muffins will flip out beautifully.
Step 4: Rise and Shape the Dough
Cover your dough and let it rise for about 1½ hours. Once it’s puffed up and airy, divide it into 8 to 10 pieces. Shape each piece into a disc about the size of a classic muffin, then coat both sides with more cornmeal for added texture and flavor.
Step 5: Cook the Muffins Low and Slow
Place the discs onto your warmed skillet over low heat. Cover them with a lid to trap the heat and cook each side for 7 to 8 minutes until golden brown. This slower cooking process ensures they’re cooked through while developing that golden crust.
Step 6: Cool and Fork-Split
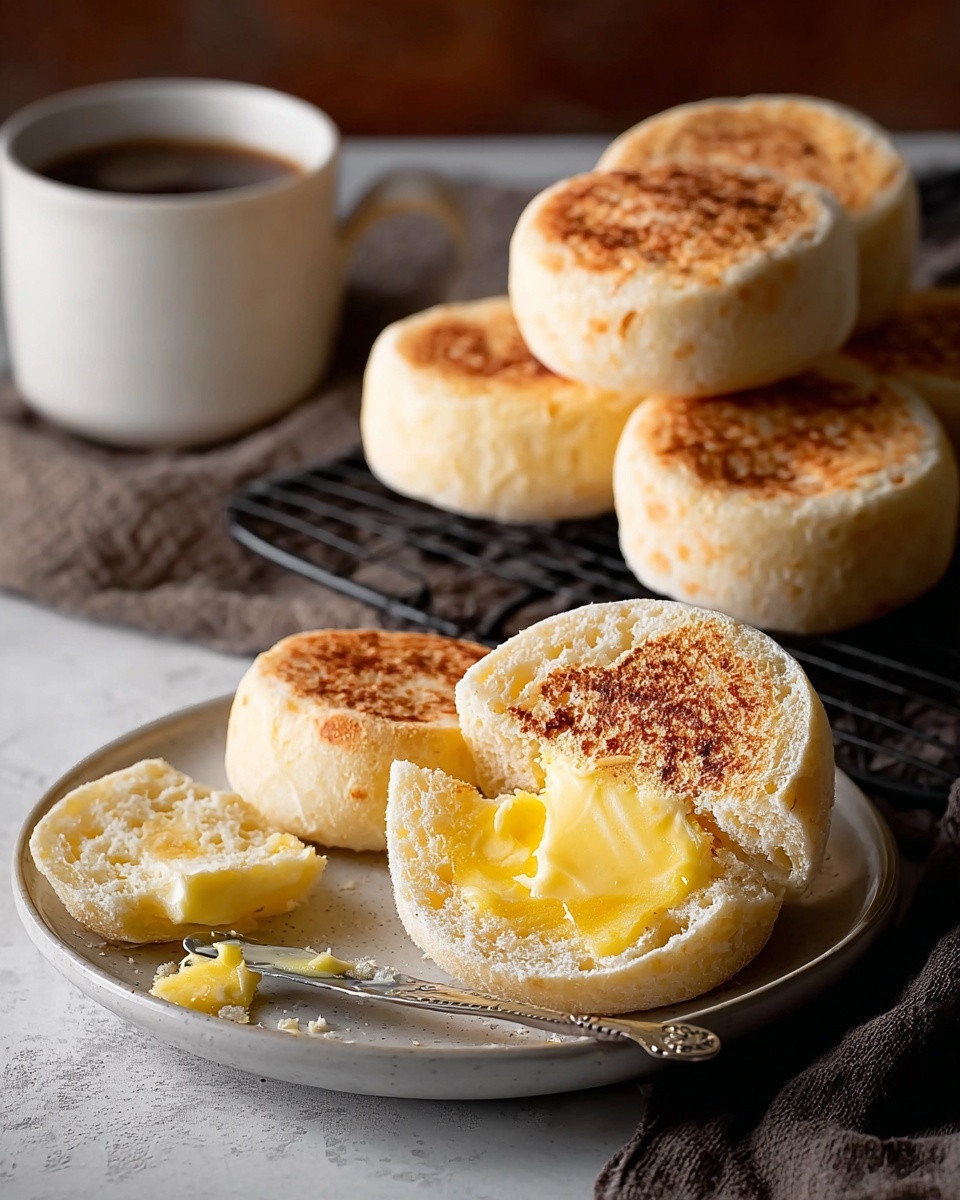
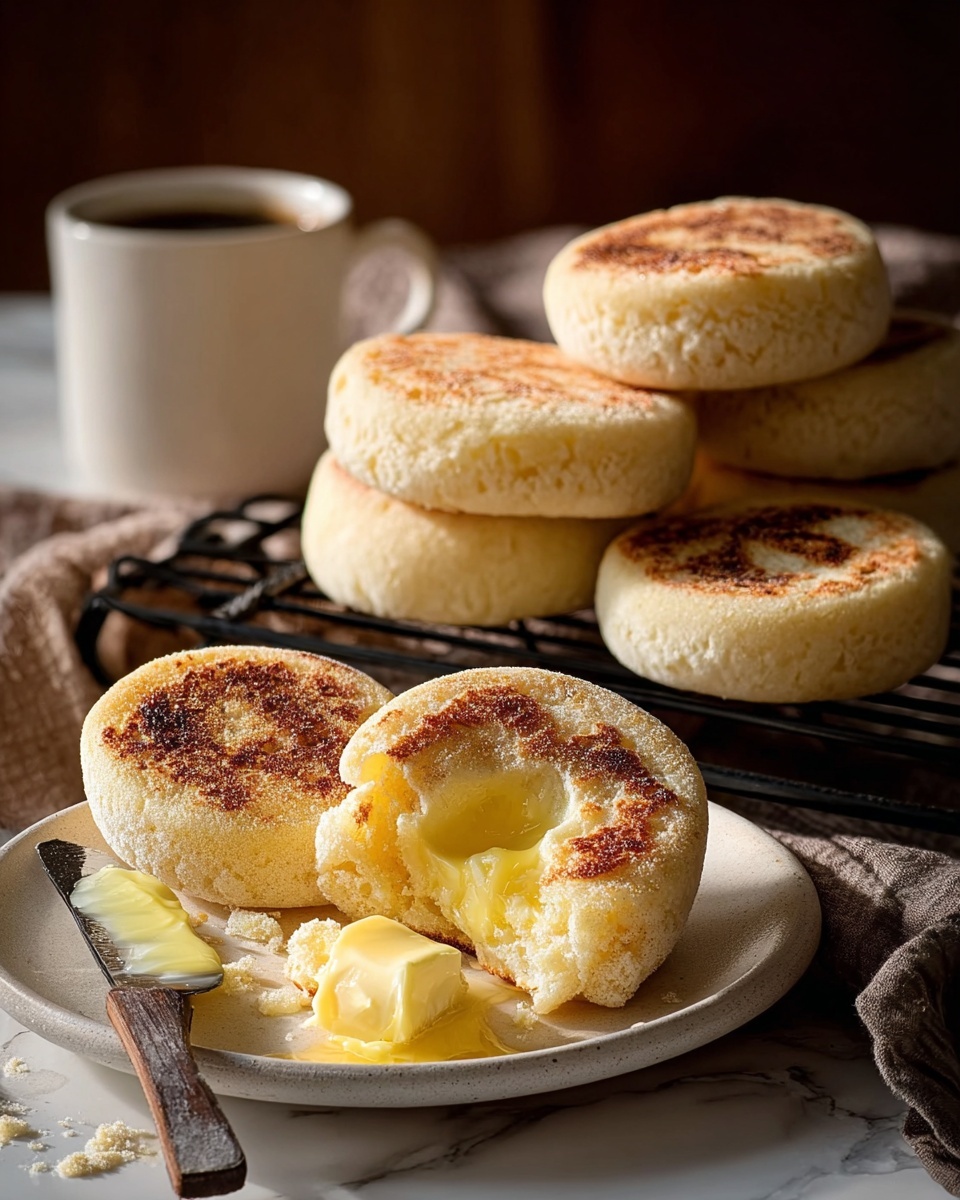
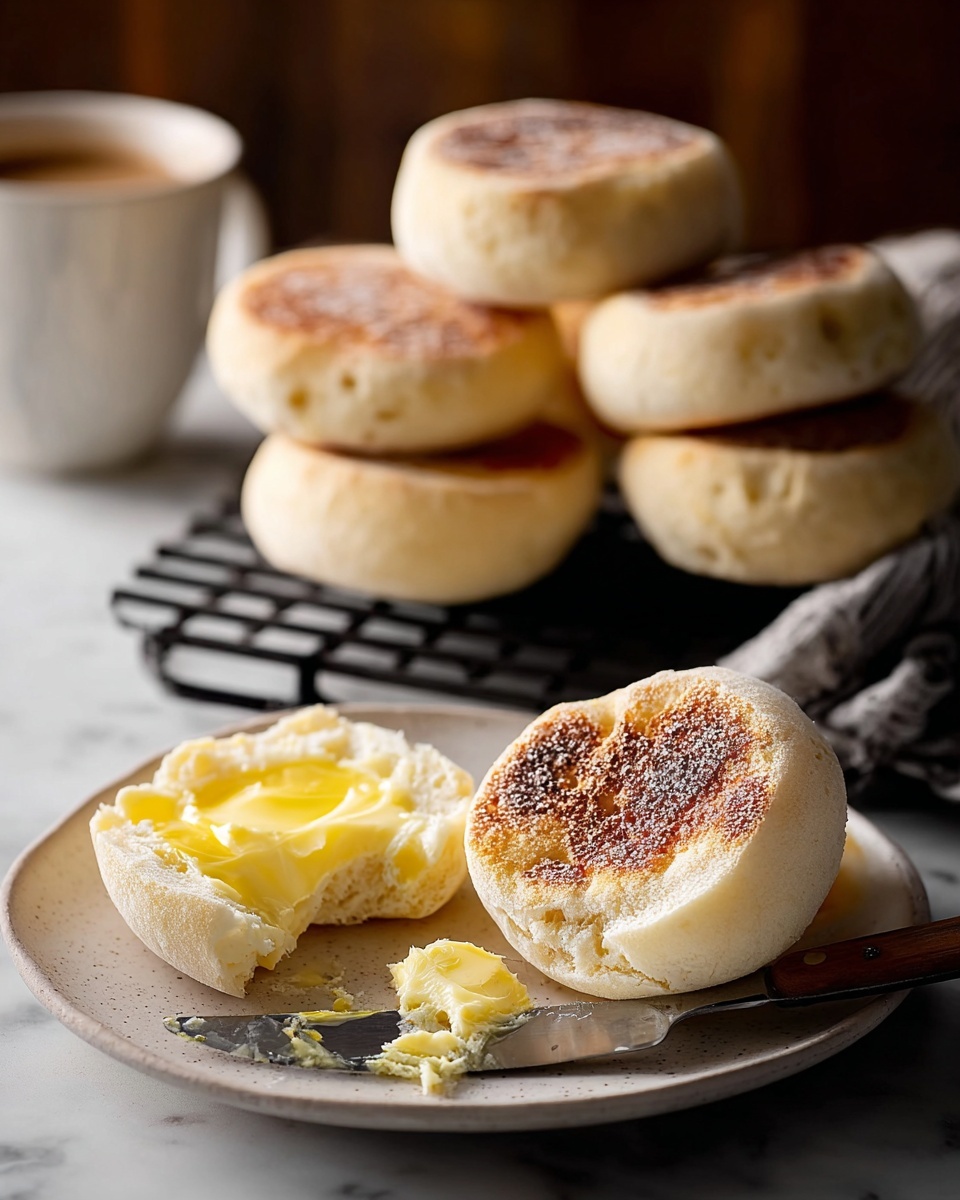
Transfer your muffins to a wire rack to cool completely. Once cooled, use a fork to split them open. This technique preserves those wonderful craggy edges and pockets that catch butter and jam like a charm.
Step 7: Toast and Enjoy
Now for the best part—toast your muffins until they’re warm and crispy, spread on butter, jam, or your favorite toppings, or make a scrumptious sandwich. Each bite delivers the satisfaction of homemade goodness and bakery charm.
How to Serve Homemade English Muffins Recipe
Garnishes
One of the joys of Homemade English Muffins Recipe is how versatile they are. Classic butter and a drizzle of honey bring out natural sweetness, while cream cheese and smoked salmon turn them into elegant bites. Fresh herbs and a sprinkle of sea salt can add a delightful twist for savory lovers.
Side Dishes
Pair your muffins with fresh fruit or a colorful salad for a light meal, or serve alongside scrambled eggs and crispy bacon for a hearty breakfast spread. They also shine next to a bowl of warm soup or stew, perfect for dipping and savoring every bit.
Creative Ways to Present
Use these muffins as the base for unique sandwiches, like a classic eggs Benedict or a breakfast slider. You can also slice them horizontally and use them like mini pizzas with tomato sauce and cheese or even transform them into sweet French toast rounds for a brunch twist.
Make Ahead and Storage
Storing Leftovers
If you have leftover muffins, store them in an airtight container at room temperature for up to two days. This keeps them soft and ready for a quick breakfast or snack without losing their charm.
Freezing
To make these muffins last longer, wrap them individually and freeze. Properly stored, they’ll maintain their flavor and texture for up to three months, so you can enjoy your Homemade English Muffins Recipe anytime the craving hits.
Reheating
For the best experience, thaw frozen muffins and toast them lightly. This revives their crispy exterior and soft interior beautifully, bringing back that fresh-baked flavor every time.
FAQs
Can I use whole wheat flour instead of all-purpose flour?
Absolutely! Whole wheat flour can add a nutty flavor and a bit more fiber, though the texture will be a little denser. You might want to use a mix of whole wheat and all-purpose to keep the muffins light and airy.
Why do I fork-split the muffins instead of cutting them?
Fork-splitting creates those signature nooks and crannies that are perfect for holding butter and jam. Using a knife tends to compress and flatten the muffin’s interior texture.
Can I make these in an oven instead of a skillet?
Yes, you can bake these muffins on a baking sheet at moderate heat, but the skillet method gives that iconic crust and texture that ovens sometimes can’t replicate as well.
What does the white vinegar do in the recipe?
White vinegar reacts with baking soda to help tenderize the crumb and adds a slight tang reminiscent of popular store-bought English muffins.
How do I know when the muffins are done cooking?
They should be golden brown on both sides and cooked through so that when you press lightly, they feel springy. The slow cooking time on low heat ensures even doneness without burning.
Final Thoughts
There is something truly magical about pulling fresh, golden English muffins from your own skillet—especially knowing you made them from scratch. This Homemade English Muffins Recipe not only nurtures your taste buds but also fills your kitchen with comforting aromas and pride. Give this recipe a try and watch your mornings light up with warm buttery goodness, every single time!
Print
Homemade English Muffins Recipe
- Prep Time: 2 hours
- Cook Time: 15 minutes
- Total Time: 2 hours 15 minutes
- Yield: 8-10 English muffins
- Category: Breakfast
- Method: Stovetop
- Cuisine: British
- Diet: Vegetarian
Description
Classic homemade English muffins with a tender, chewy texture and a golden crust. These English muffins are made from scratch using a combination of yeast, warm milk, and butter, cooked on a griddle for a perfectly soft interior filled with nooks and crannies. Ideal for toasting and pairing with butter, jam, or your favorite sandwich fillings.
Ingredients
Dry Ingredients
- 3½ cups All-Purpose Flour
- 2¼ teaspoons Active Dry Yeast
- 1 tablespoon Sugar
- 1 teaspoon Salt
- ½ teaspoon Baking Soda
Wet Ingredients
- 1 cup Warm Milk
- 2 tablespoons Butter, melted
- ½ cup Warm Water
- 1 large Egg
- 1 teaspoon White Vinegar
For Cooking
- Cornmeal for dusting
- Oil for greasing the skillet or griddle
Instructions
- Warm the skillet or griddle: Preheat your skillet or griddle over low heat to ensure a gentle cooking environment while the dough proofs.
- Activate the yeast: In a mixing bowl, combine warm water, warm milk, sugar, and active dry yeast. Let this mixture sit undisturbed until it becomes frothy, indicating the yeast is active.
- Make the dough: Add melted butter, egg, white vinegar, all-purpose flour, salt, and baking soda to the yeast mixture. Stir to form a sticky dough.
- Prepare the cooking surface: Lightly oil the skillet or griddle and sprinkle cornmeal over it to prevent sticking and add texture to the muffins.
- Allow the dough to rise: Cover the dough and let it rise in a warm place for 1½ hours until it doubles in size.
- Shape the muffins: Divide the risen dough into 8 to 10 equal pieces. Shape each piece into a disc and coat both sides lightly with cornmeal.
- Cook the muffins: Place the discs onto the preheated, cornmeal-coated skillet or griddle. Cover and cook over low heat for 7–8 minutes per side until golden brown and cooked through.
- Cool the muffins: Transfer the cooked muffins to a wire rack and allow them to cool to preserve their texture.
- Serve: Split the muffins with a fork to maintain their signature texture and toast, spread, or use them in sandwiches as desired.
Notes
- Ensure the milk and water are warm to activate the yeast effectively, but not too hot to kill it.
- Coating the muffins with cornmeal prevents sticking and adds a rustic texture.
- Cooking on low heat ensures the muffins cook through without burning.
- Fork-splitting the muffins helps preserve their characteristic nooks and crannies for better butter and jam absorption.
- Store cooled muffins in an airtight container or freeze for longer storage.


