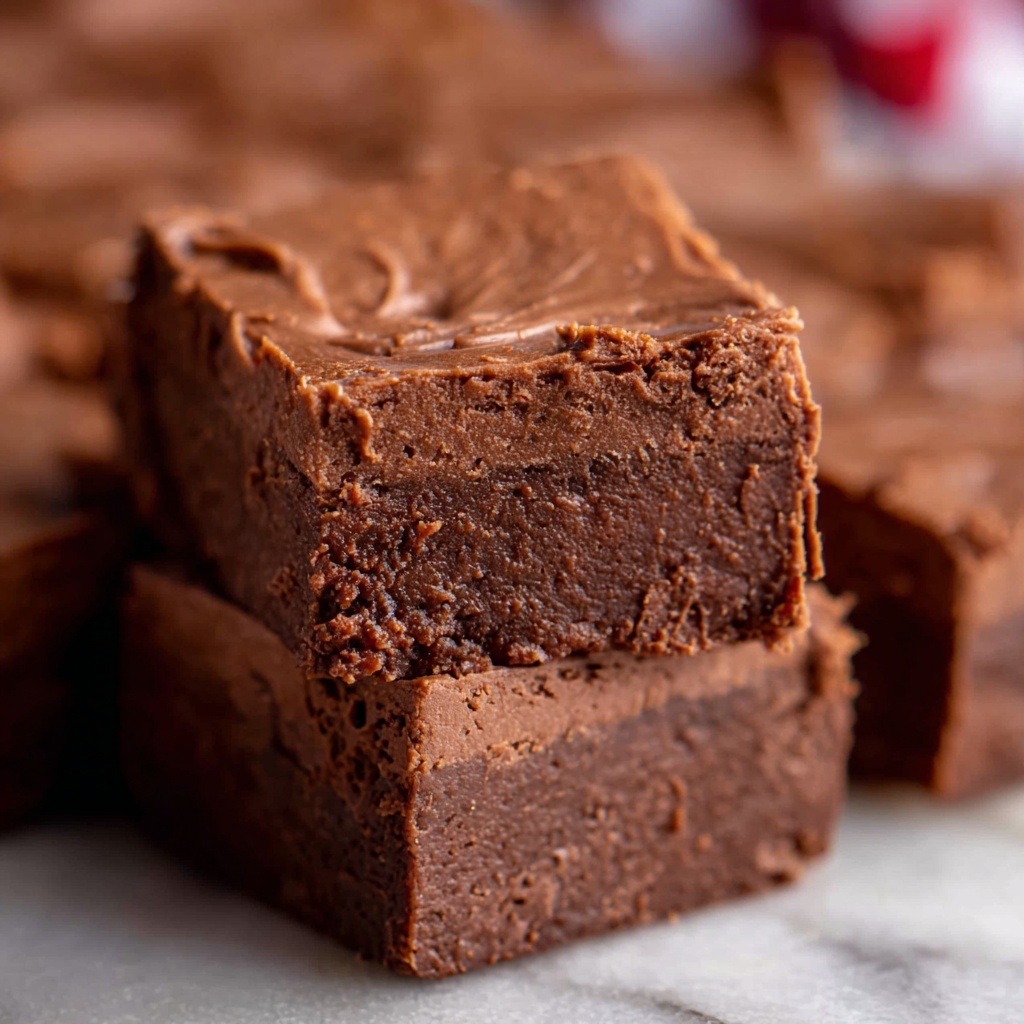
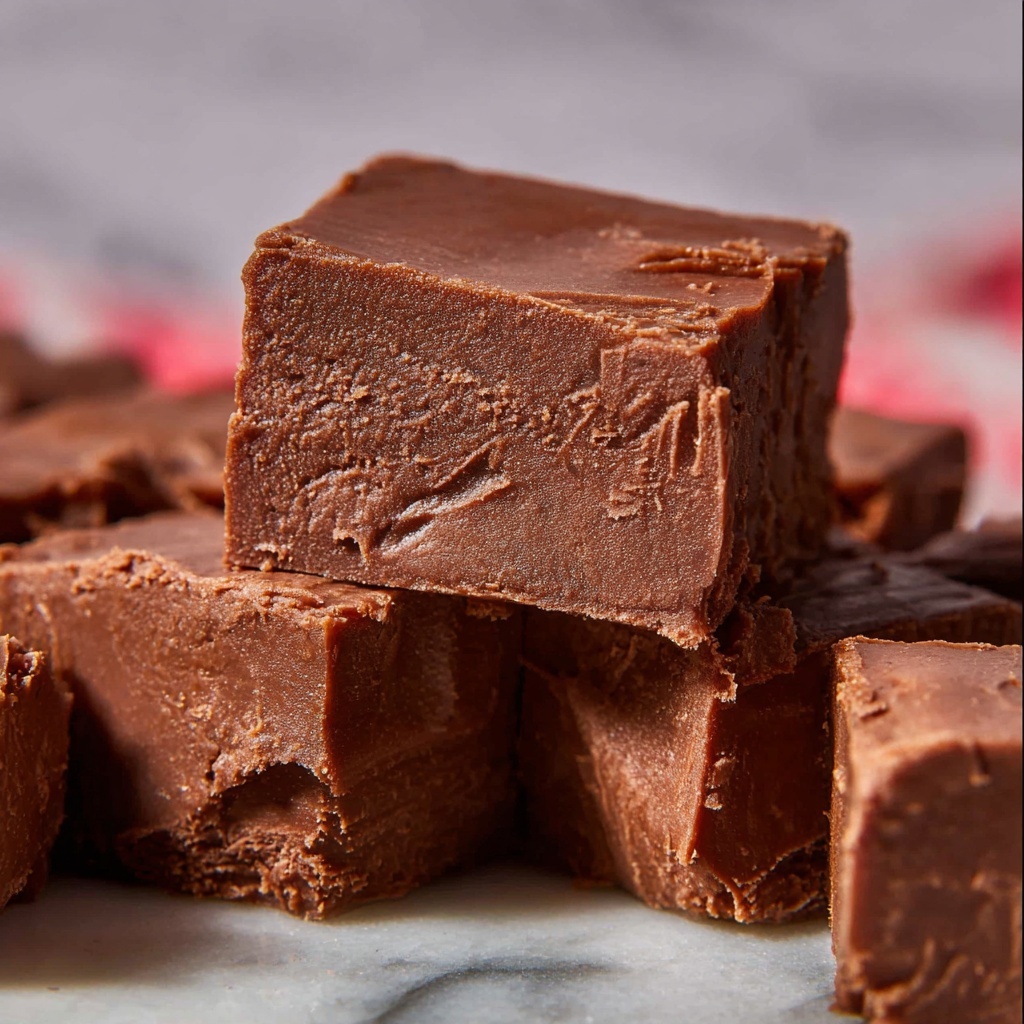
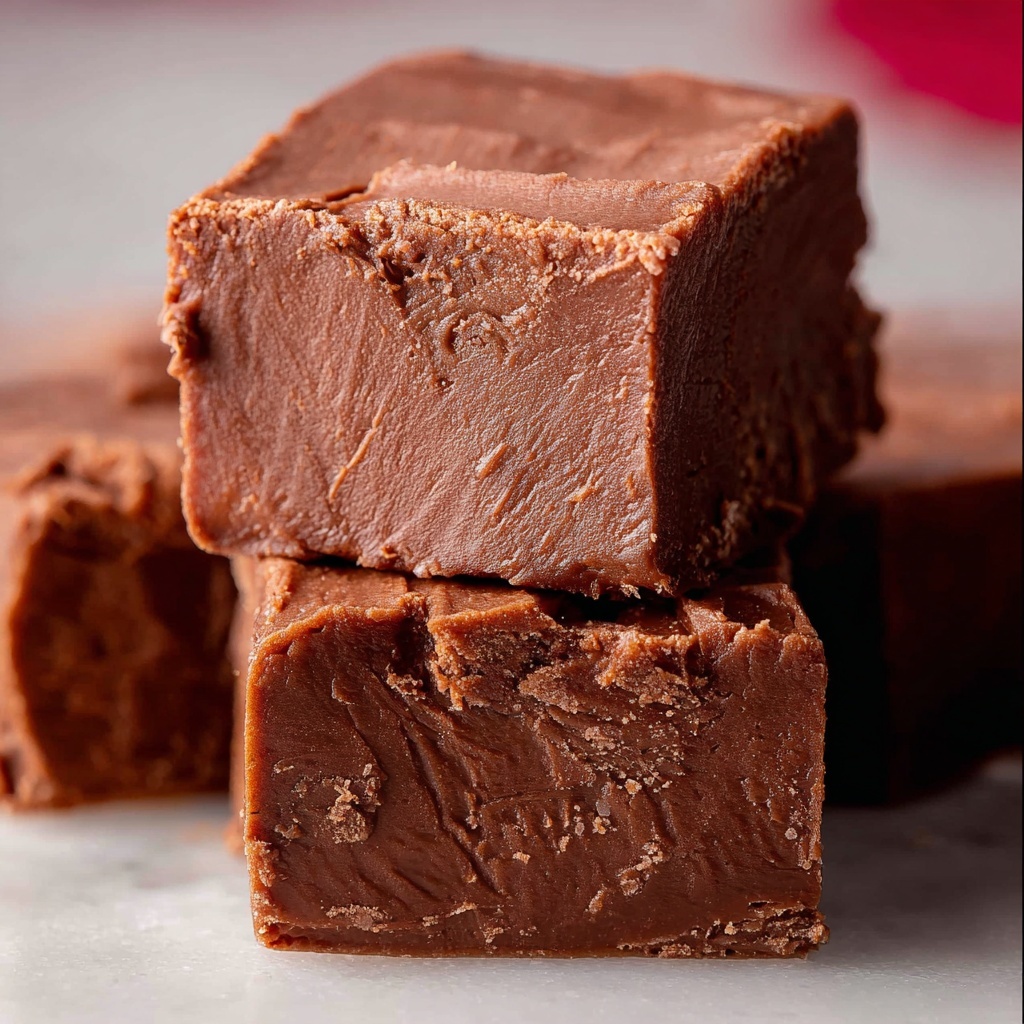
If you are looking to delight your friends and family with a dessert that feels like a warm hug, then you absolutely must try Mom’s Marshmallow Fudge Recipe! This classic treat is a luscious blend of creamy chocolate and fluffy marshmallow sweetness, wrapped up in a rich, buttery texture that simply melts in your mouth. Whether it’s for the holidays or just because, this fudge recipe is a timeless favorite that brings comfort and joy to every bite.
Ingredients You’ll Need
The magic of Mom’s Marshmallow Fudge Recipe comes from its simple yet perfectly balanced ingredients. Each component plays an essential role—from that velvety butter creating smoothness to the marshmallow creme adding that signature fluffy texture, this is a recipe where quality and care really shine through.
- 3/4 cup butter: Use real butter, not margarine, for that rich, creamy base that sets the fudge apart.
- 2 & 1/2 cups white granulated sugar: The sweet backbone of the fudge, dissolving perfectly to create the ideal texture.
- 2/3 cup full-fat evaporated milk: Adds depth and creaminess without overwhelming the chocolate flavor.
- 12 ounce package semi-sweet chocolate chips: High-quality chocolate chips melt smoothly for that luscious, chocolatey goodness.
- 7 ounce jar marshmallow cream (fluff): This is the secret ingredient that gives the fudge an irresistibly light, fluffy swirl.
- 1 teaspoon vanilla extract: A splash of vanilla deepens and rounds out the flavor beautifully.
How to Make Mom’s Marshmallow Fudge Recipe
Step 1: Get Prepared
Before you even turn on the stove, make sure all your ingredients are measured and ready to go. Fudge-making is a quick and thorough process where timing and readiness make all the difference between silky smooth fudge and a grainy mess.
Step 2: Prep Your Pan
Line an 8×8 or 9×9 inch square pan with parchment paper. This simple step ensures your fudge will come out cleanly, ready for slicing and sharing without sticking or crumbling.
Step 3: Check Chocolate and Marshmallow Creme
Open your package of high-quality semi-sweet chocolate chips and remove the foil lid from your marshmallow cream jar. Everything should be set perfectly for quick and easy mixing when the time comes.
Step 4: Melt the Butter
In a heavy 3-quart saucepan over medium heat, begin melting your butter. Use a spoon to coat the sides of the pan with butter—this helps prevent sugar crystals forming later and gives the fudge a smooth finish.
Step 5: Add Sugar Carefully
Slowly pour the sugar into the center of the pan without allowing it to touch the sides, because any sugar crystals clinging to the pan can cause graininess. Stir gently to moisten all the sugar with butter, ensuring no crystals are left loose around the edges.
Step 6: Stir in Evaporated Milk
Pour in the evaporated milk and stir meticulously, dissolving every last bit of sugar before letting the mixture reach a boil. This careful dissolving step is the key for a silky fudge texture without grit.
Step 7: Bring to a Rolling Boil
Turn the heat up to medium-high, stirring constantly. Once the mixture comes to a rolling boil with bubbles rising from the bottom, start a timer for 5 minutes. Keep stirring continuously and carefully maintain the heat to avoid burning while hitting the perfect temperature range of 234 to 236 degrees F.
Step 8: Mix in the Chocolate Chips
After 5 minutes, remove the pan from heat and pour in all the chocolate chips at once. Stir vigorously until the chocolate is completely melted and silky smooth. Any lumps here will show up in the final fudge, so thorough mixing is essential!
Step 9: Add Marshmallow Creme
Give your marshmallow creme a quick zap in the microwave (10 to 15 seconds) to soften for easy scooping. Then fold it into the chocolate mixture and beat until it’s nearly fully combined, leaving just a few streaks for that classic fudgy swirl.
Step 10: Stir in Vanilla
Add your teaspoon of vanilla extract and keep stirring until the mixture looks even and smooth without any marshmallow streaks lingering. Then you can stop — perfect blending is key here.
Step 11: Pour and Settle
Pour the luscious fudge mixture into your prepared pan immediately. Leave any dried or thick bits clinging to the pan behind to avoid a gritty texture. Give your pan a gentle shake to help the fudge settle into its characteristic rippled surface texture. No smoothing needed—nature takes care of that!
Step 12: Let It Cool
Patience is needed here! Allow the fudge to cool to room temperature without disturbing it. This is when the magic happens and the fudge sets into that perfectly rich and chewy treat you love.
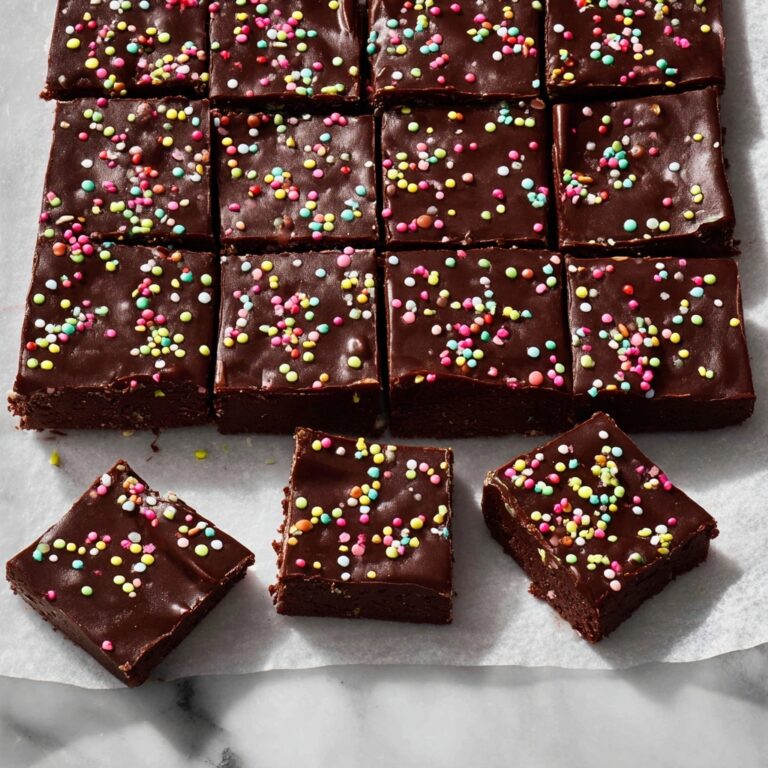
Step 13: Slice and Enjoy
Cut your pan into 7 by 7 rows to make about 49 bite-sized pieces. Because fudge is so rich, these small squares are just right for savoring multiple while keeping the experience delightful and not overwhelming.
Step 14: Store Properly
Cover your fudge with plastic wrap and keep it at room temperature. Refrigerating can dry it out, so counter storage is best. Warning: keeping it handy like this means you’re probably going to sneak “just a sliver” all day long!
How to Serve Mom’s Marshmallow Fudge Recipe
Garnishes
If you want to dress up your fudge for a party or special event, a sprinkle of crushed nuts, a dusting of cocoa powder, or a few mini marshmallows add an inviting texture and visual appeal. These simple touches can elevate the presentation without hiding that fudge’s luscious charm.
Side Dishes
This fudge pairs wonderfully with fresh berries or a scoop of creamy vanilla ice cream. Those fresh, bright flavors contrast the richness, making each bite like a little celebration of balance and sweetness.
Creative Ways to Present
Consider serving your fudge on a rustic wooden board accompanied by handwritten notes about the history of Mom’s Marshmallow Fudge Recipe. Or individually wrap pieces in festive wax paper for gifting. These thoughtful acts create memorable experiences around this timeless treat.
Make Ahead and Storage
Storing Leftovers
Simply cover your fudge tightly with plastic wrap and leave it on the counter. This method keeps it soft and moist for up to a week, ensuring every piece tastes just as good as the first.
Freezing
Fudge freezes well if wrapped tightly in plastic wrap and then a layer of aluminum foil. When you’re ready to enjoy, thaw it overnight in the refrigerator to prevent any condensation from affecting the texture.
Reheating
Reheating fudge isn’t usually necessary or recommended because it’s meant to be served at room temperature. However, if you want a warmed treat, gently microwave an individual piece for just 5 to 10 seconds until soft but not melted.
FAQs
Can I use margarine instead of butter in Mom’s Marshmallow Fudge Recipe?
Butter is essential for both flavor and texture in this recipe. Margarine contains water and other additives that can make the fudge grainy or oily, so it’s best to stick with real butter.
Why do I need to avoid sugar crystals on the pan edges?
Sugar crystals left on the pan walls can cause your fudge to become grainy instead of smooth. Carefully moisten the sugar and keep the sides clear by spooning butter around the edges for perfect dissolution.
Can I substitute sweetened condensed milk for evaporated milk?
It’s important to use evaporated milk because sweetened condensed milk is thicker and much sweeter, which would throw off the fudge’s consistency and flavor balance.
How do I know when the fudge mixture has reached the right temperature?
A candy thermometer reading between 234 and 236 degrees Fahrenheit at the end of the boil indicates the perfect soft-ball stage for fudge, ensuring it sets properly but remains creamy.
What causes fudgy lumps and how do I avoid them?
Lumps often come from incomplete melting of chocolate or marshmallow creme. Stir thoroughly until everything is smooth and combined before pouring into the pan to avoid any chunkiness.
Final Thoughts
Making Mom’s Marshmallow Fudge Recipe is truly a labor of love that rewards you with every sweet bite. It’s a recipe that feels like home in dessert form — creamy, nostalgic, and utterly addictive. I hope you give it a try and create joyful moments with those you care about as much as I have with this treasured classic.
Print
Mom’s Marshmallow Fudge Recipe
- Prep Time: 5 minutes
- Cook Time: 5 minutes
- Total Time: 10 minutes
- Yield: Approximately 49 small pieces
- Category: Dessert
- Method: Stovetop
- Cuisine: American
Description
Mom’s Marshmallow Fudge is a rich, creamy, and irresistibly smooth chocolate confection that combines semi-sweet chocolate chips with fluffy marshmallow cream for a melt-in-your-mouth treat. This classic fudge recipe is cooked on the stovetop and finished with vanilla extract for a perfect balance of flavors, yielding about 49 bite-sized pieces from an 8×8 pan. Ideal for holiday gifting or indulgent snacking.
Ingredients
Fudge Base
- 3/4 cup butter (1 and 1/2 sticks; do not use margarine)
- 2 1/2 cups white granulated sugar
- 2/3 cup full-fat evaporated milk (do not use sweetened condensed milk)
- 12-ounce package high-quality semi-sweet chocolate chips (about 2 cups)
- 7-ounce jar marshmallow cream (also called marshmallow fluff)
- 1 teaspoon vanilla extract
Instructions
- Prepare Your Ingredients: Measure and have all ingredients ready before starting because fudge preparation moves quickly and requires continuous attention once started.
- Line the Pan: Line an 8×8 or 9×9 inch square pan with parchment paper to ensure easy removal of fudge once set.
- Prepare Chocolate and Marshmallow Cream: Open the chocolate chips package and remove the foil seal from the marshmallow cream jar to get them ready for melting and mixing.
- Melt Butter: In a 3-quart heavy saucepan over medium heat, add the butter and use a spoon to grease the sides of the pan by dragging the melting butter up the sides all around the pot.
- Add Sugar: Slowly pour the sugar into the center of the pan without letting any crystals touch the sides. Stir carefully to moisten all sugar with butter, avoiding sugar crystals on the pan sides or spoon to prevent grainy fudge.
- Stir in Evaporated Milk: Add evaporated milk to the pan and stir thoroughly to dissolve all sugar crystals before the mixture boils.
- Bring to a Rolling Boil: Increase heat to medium-high and stir constantly until the mixture boils vigorously. Once boiling, reduce heat to medium and boil for 5 minutes, stirring constantly, aiming for 234-236°F on a candy thermometer. Remove early if it reaches the temperature sooner.
- Add Chocolate Chips: Remove from heat and add all chocolate chips at once, stirring vigorously until fully melted and the mixture is smooth without lumps.
- Add Marshmallow Cream: Microwave the marshmallow cream for 10-15 seconds to soften, then quickly stir it into the chocolate mixture until nearly blended.
- Add Vanilla Extract: Stir in vanilla and continue mixing until the mixture is even and smooth, stopping as soon as fully combined to maintain texture.
- Pour into Prepared Pan: Immediately pour the smooth fudge mixture into the lined pan, leaving behind any hardened bits on the edges of the saucepan. Gently shake the pan to settle the fudge without smoothing the top.
- Cool and Set: Allow the fudge to cool completely to room temperature to firm up; do not refrigerate.
- Slice and Serve: Once set, slice the fudge into a 7×7 grid for about 49 small pieces, perfect for serving.
- Store Properly: Store the fudge covered with plastic wrap on the counter. Avoid refrigeration to maintain ideal texture.
Notes
- Use high-quality semi-sweet chocolate chips for best flavor and texture.
- Avoid sugar crystals on pan sides or spoon to ensure smooth fudge.
- Do not substitute evaporated milk with sweetened condensed milk.
- Stir constantly during boiling to prevent burning or grainy texture.
- Do not overcook fudge mixture; follow candy thermometer guidelines.
- Do not refrigerate fudge to prevent it from drying out or becoming too hard.
- Microwaving marshmallow cream softens it for easier mixing but do not overheat.

