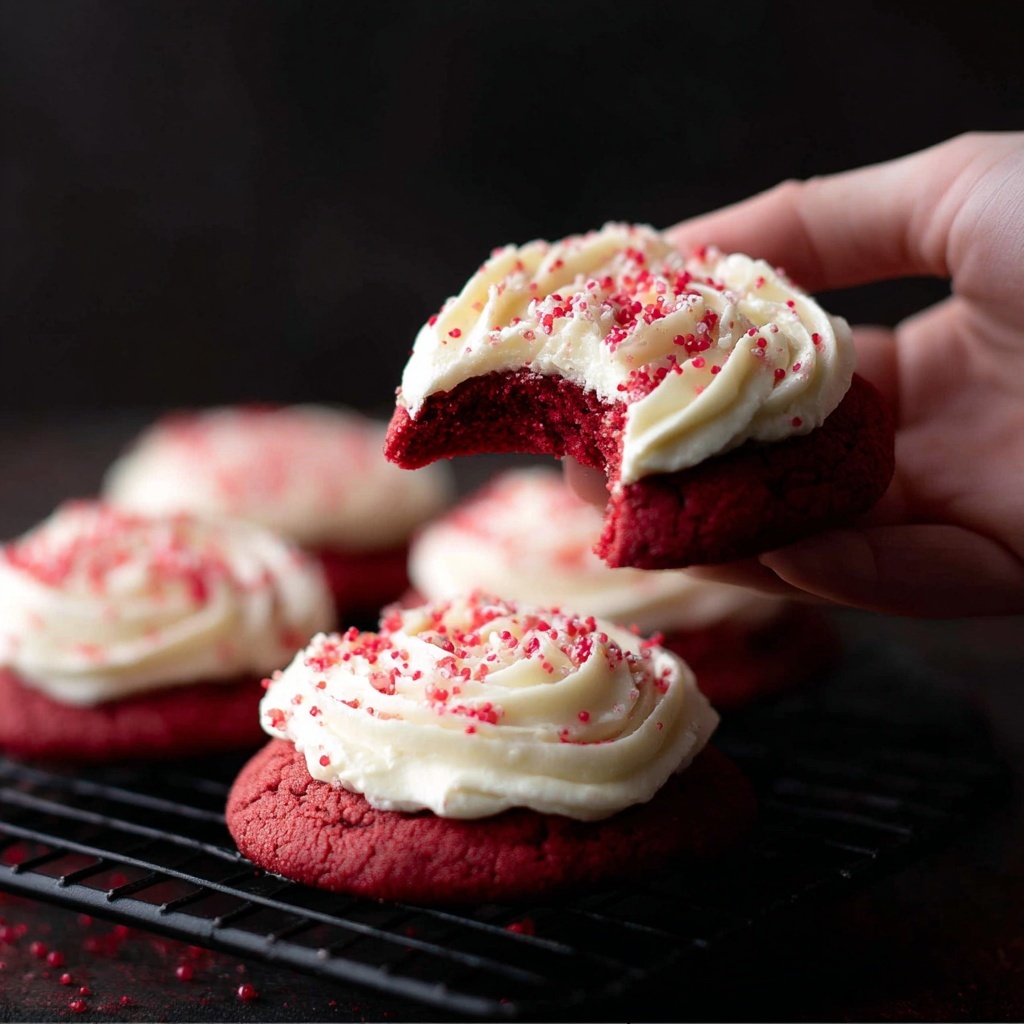
If you have a soft spot for that luxurious, velvety texture and a beautiful pop of red color that just screams celebration, then this Red Velvet Cookies Recipe is about to become your new obsession. Imagine biting into a cookie that’s gorgeously tender with a hint of cocoa, balanced by a tangy cream cheese frosting that melts in your mouth. These cookies blend all the festive vibes you want from a red velvet cake but in an irresistibly cozy and portable cookie form. Perfect for sharing (or sneaking one when no one’s looking), this recipe brings a perfect harmony of flavor and texture you’ll want to make again and again.

Ingredients You’ll Need
Every great recipe starts with a handful of simple, quality ingredients, and this Red Velvet Cookies Recipe is no exception. Each ingredient plays its part to create that iconic red velvet flavor with the moist, soft texture that makes these cookies so special.
- Unsalted butter (softened): Provides richness and a tender crumb to the cookie base.
- Vanilla bean paste or extract: Adds a warm, aromatic depth to the batter and frosting.
- Caster sugar: Sweetens the cookies evenly while helping with texture.
- Eggs (room temperature): Bind the ingredients while contributing to the moist, chewy texture.
- Sour cream or plain full-fat yogurt: Brings moisture and a subtle tang that enhances the classic red velvet flavor.
- Cocoa powder: Injects that delicate chocolate note that defines red velvet recipes.
- Red food coloring: Gives these cookies their signature vibrant and festive red hue.
- Plain white flour: Forms the structure of the cookies, keeping them soft yet sturdy.
- Baking powder: Helps the cookies rise lightly, maintaining their softness.
- Softened unsalted butter (for frosting): Adds creaminess and smooth texture to the topping.
- Cream cheese (softened): The star of the frosting, bringing tang and rich flavor to balance the sweetness.
- Powdered (icing) sugar: Sweetens and thickens the frosting to a luscious consistency.
- Red sprinkles (optional): Adds a whimsical, festive touch on top of the finished cookies.
How to Make Red Velvet Cookies Recipe
Step 1: Prepare the Cookie Dough
Start by creaming the softened butter with the caster sugar and vanilla bean paste until the mixture is light and fluffy. This process is key because it traps air, giving you that tender, melt-in-your-mouth cookie texture. Next, beat in the eggs one at a time, making sure each is fully incorporated before adding the next. Then, blend in the sour cream and cocoa powder, which adds just a subtle chocolate note to your batter without overpowering the red velvet essence. Finally, combine your dry ingredients—flour and baking powder—then gradually fold them into the wet mixture along with the red food coloring for that perfect hue.
Step 2: Shape and Bake the Cookies
Once your dough is perfectly mixed and glossy with rich red coloring, scoop it onto a baking tray lined with parchment paper. Try to keep the sizes even so they bake uniformly—about 20-24 cookies total. Bake them in a preheated oven at 175°C (350°F) for roughly 12 to 15 minutes; you’re looking for edges to set but the middle to remain soft. This will keep them wonderfully chewy once cooled. Let the cookies cool completely on a wire rack before frosting to prevent the cream cheese from melting too much.
Step 3: Make the Cream Cheese Frosting
Cream together the softened butter and cream cheese until silky smooth—this makes all the difference for that luxurious frosting texture. Add in the vanilla bean paste and gradually mix in the powdered sugar to reach a thick, spreadable consistency. This frosting perfectly complements the tender red velvet cookie base with its tangy sweetness, creating a flavor combo you won’t want to miss.
Step 4: Frost and Decorate
Once the cookies are cool, generously spread the cream cheese frosting on top of each one. For a sprinkle of fun and color, add some red sprinkles while the frosting is still soft—they’ll stick beautifully and enhance the festive look. Now your Red Velvet Cookies Recipe is ready for your first mouthwatering bite!
How to Serve Red Velvet Cookies Recipe
Garnishes
While the classic red sprinkles add cheer and texture, you can also experiment with finely chopped pecans or a dusting of cocoa powder for a touch of elegance. A small dollop of fresh whipped cream alongside the cookie can elevate the experience for guests during gatherings or celebrations.
Side Dishes
Pair these cookies with a cold glass of milk or a hot cup of coffee to balance the sweetness and enrich your snack time. For a more decadent pairing, serve alongside a scoop of vanilla ice cream or a warm berry compote, enhancing the overall dessert experience.
Creative Ways to Present
Looking to impress your friends or family? Stack the cookies into a pretty tower on a cake stand for a festive centerpiece. Alternatively, sandwich two cookies with frosting between them for delightful red velvet cookie sandwiches. These also make wonderful edible gifts when wrapped in cellophane and tied with a festive ribbon.
Make Ahead and Storage
Storing Leftovers
Keep any leftover Red Velvet Cookies in an airtight container at room temperature for up to 3 days to maintain their freshness. The cream cheese frosting stays soft and flavorful, ensuring each bite remains as satisfying as the first.
Freezing
You can freeze the unfrosted cookie dough for up to a month by shaping the dough into balls, placing them on a tray, and freezing until solid before transferring to a freezer bag. Bake directly from frozen by adding a couple of extra minutes to the baking time. Alternatively, freeze fully baked and frosted cookies on a tray, then store in an airtight container for up to 2 weeks; just be sure to thaw before serving.
Reheating
If you prefer your cookies slightly warm, gently reheat them in the oven at 150°C (300°F) for about 5 minutes. Avoid microwaving as it can sometimes make the frosting too soft or runny. Warming these cookies brings out the flavors beautifully while maintaining that perfect texture.
FAQs
Can I use regular cream instead of sour cream or yogurt?
Regular cream lacks the tanginess that sour cream or yogurt adds, which is essential for authentic red velvet flavor. It also doesn’t provide the same texture, so sticking to sour cream or full-fat yogurt is best.
Is it possible to make these cookies vegan?
To make a vegan version of this Red Velvet Cookies Recipe, you’d need to substitute butter and eggs with plant-based alternatives and choose vegan cream cheese for the frosting. While the texture and flavor might slightly differ, it can still be delicious with these tweaks!
Why is there cocoa powder in red velvet cookies?
Cocoa powder gives red velvet its subtle chocolate undertone, balancing the sweetness and complementing the cream cheese frosting perfectly. It’s a small but crucial ingredient that defines the overall taste.
Can I skip the cream cheese frosting?
While you can technically enjoy these cookies on their own, the cream cheese frosting adds a tangy richness that completes the classic red velvet experience. If you want a simple twist, try dusting with powdered sugar instead, but the frosting really elevates the cookie’s flavor.
What’s the best way to achieve that vibrant red color?
Using gel-based or paste red food coloring yields the richest color without affecting the moisture of the dough. Liquid food coloring can be used, but you may need more to reach the same intensity, which could change the texture slightly.
Final Thoughts
This Red Velvet Cookies Recipe is nothing short of a showstopper, combining the best elements of a beloved cake into a perfectly portable cookie format. Whether you’re baking for a special occasion or just because you deserve a sweet treat, these cookies deliver on flavor, texture, and that joyful pop of color. I hope you love making and sharing these as much as I do—they’re guaranteed to bring smiles at every bite!
Print
Red Velvet Cookies Recipe
- Prep Time: 20 minutes
- Cook Time: 15 minutes
- Total Time: 35 minutes
- Yield: 20 – 24 cookies
- Category: Dessert
- Method: Baking
- Cuisine: American
Description
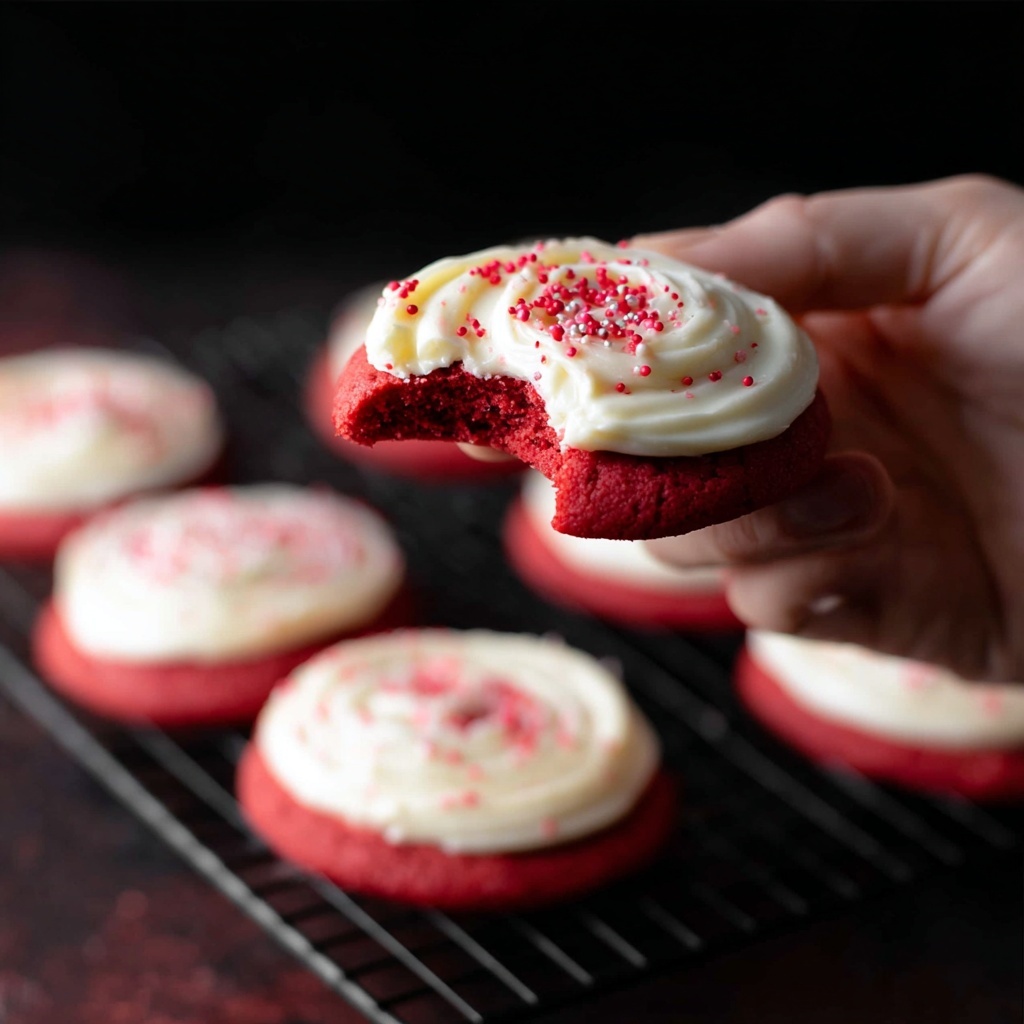
Delight in these soft and chewy Red Velvet Cookies, featuring a rich cocoa flavor blended with a hint of vanilla and a striking red hue. Topped with a luscious cream cheese frosting and optional red sprinkles, these cookies are perfect for festive occasions or a special treat any time of year.
Ingredients
Cookie Dough
- 1/2 cup unsalted butter, softened (110g / 3 3/4 oz)
- 1 tsp vanilla bean paste (or extract/essence)
- 1 cup caster sugar (220g / 7 3/4 oz)
- 2 eggs, at room temperature
- 1/4 cup sour cream or plain yogurt (full fat)
- 2 tbsp cocoa powder
- 3/4 tbsp red food colouring
- 2 cups plain white flour (250g / 9 oz)
- 1 tsp baking powder
Cream Cheese Frosting
- 6 tbsp unsalted butter, softened (75g / 2 1/2 oz)
- 5 oz / 150g cream cheese, softened
- 1 tsp vanilla bean paste (or extract/essence)
- 2 1/4 cups powdered (icing) sugar (225g / 7 1/2 oz)
- Red sprinkles (optional)
Instructions
- Prepare the cookie dough: In a large mixing bowl, cream together the softened butter, vanilla bean paste, and caster sugar until light and fluffy. Add the eggs one at a time, beating well after each addition. Mix in the sour cream or yogurt until fully incorporated.
- Add cocoa and red coloring: Sift the cocoa powder and mix it with the red food colouring. Stir this mixture into the wet ingredients until the dough takes on a vibrant red velvet hue and the cocoa is evenly distributed.
- Incorporate dry ingredients: In a separate bowl, sift together the plain white flour and baking powder. Gradually fold the dry ingredients into the wet dough, mixing until just combined to avoid overworking the dough, which could toughen the cookies.
- Chill the dough: Cover the dough with plastic wrap and refrigerate for at least 30 minutes. This helps the dough firm up for easier handling and results in a better texture when baked.
- Preheat the oven and prepare baking sheets: Preheat your oven to 350°F (175°C). Line baking sheets with parchment paper or silicone mats to prevent sticking and ensure easy cleanup.
- Shape and bake the cookies: Using a spoon or cookie scoop, place rounded tablespoons of dough onto the prepared baking sheets, spacing them about 2 inches apart to allow for spreading. Bake in the preheated oven for 12-15 minutes, or until the edges are set but the centers remain soft.
- Cool the cookies: Remove the cookies from the oven and allow them to cool on the baking sheet for 5 minutes before transferring to wire racks to cool completely.
- Make the cream cheese frosting: In a medium bowl, beat the softened butter and cream cheese together until smooth and creamy. Add the vanilla bean paste and mix until combined. Gradually add the powdered sugar, beating well after each addition, until the frosting is thick and spreadable.
- Frost the cooled cookies: Once the cookies are fully cooled, spread or pipe the cream cheese frosting evenly over each cookie. Optionally, decorate with red sprinkles for an extra festive touch.
- Serve and enjoy: Allow the frosting to set slightly before serving. Store any leftovers in an airtight container in the refrigerator to maintain freshness.
Notes
- For best results, ensure all dairy ingredients are at room temperature before mixing.
- Adjust red food colouring quantity depending on the desired intensity of the red color.
- Cookies can be stored in an airtight container in the refrigerator for up to 5 days.
- You can freeze unfrosted cookies for up to 3 months; thaw before frosting.
- Use full-fat sour cream or yogurt to maintain the tender crumb of the cookies.


