
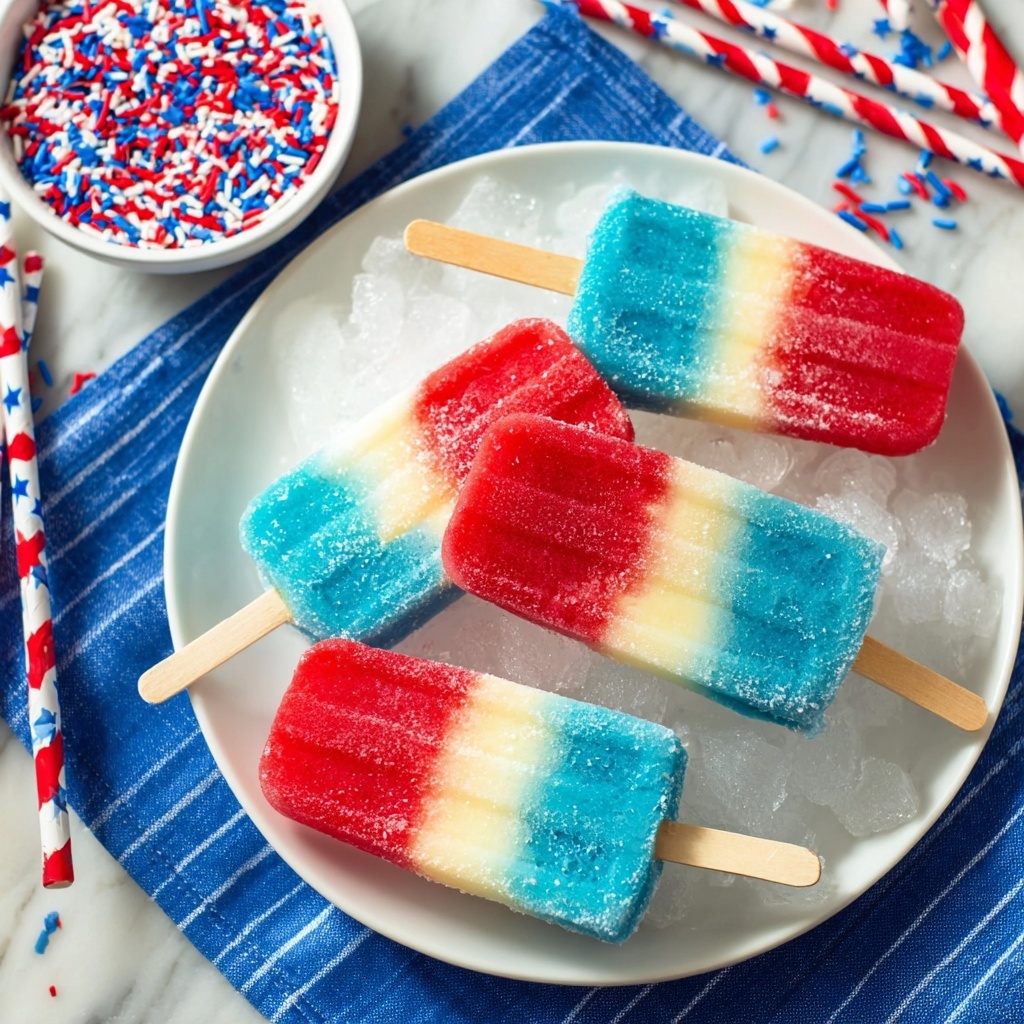
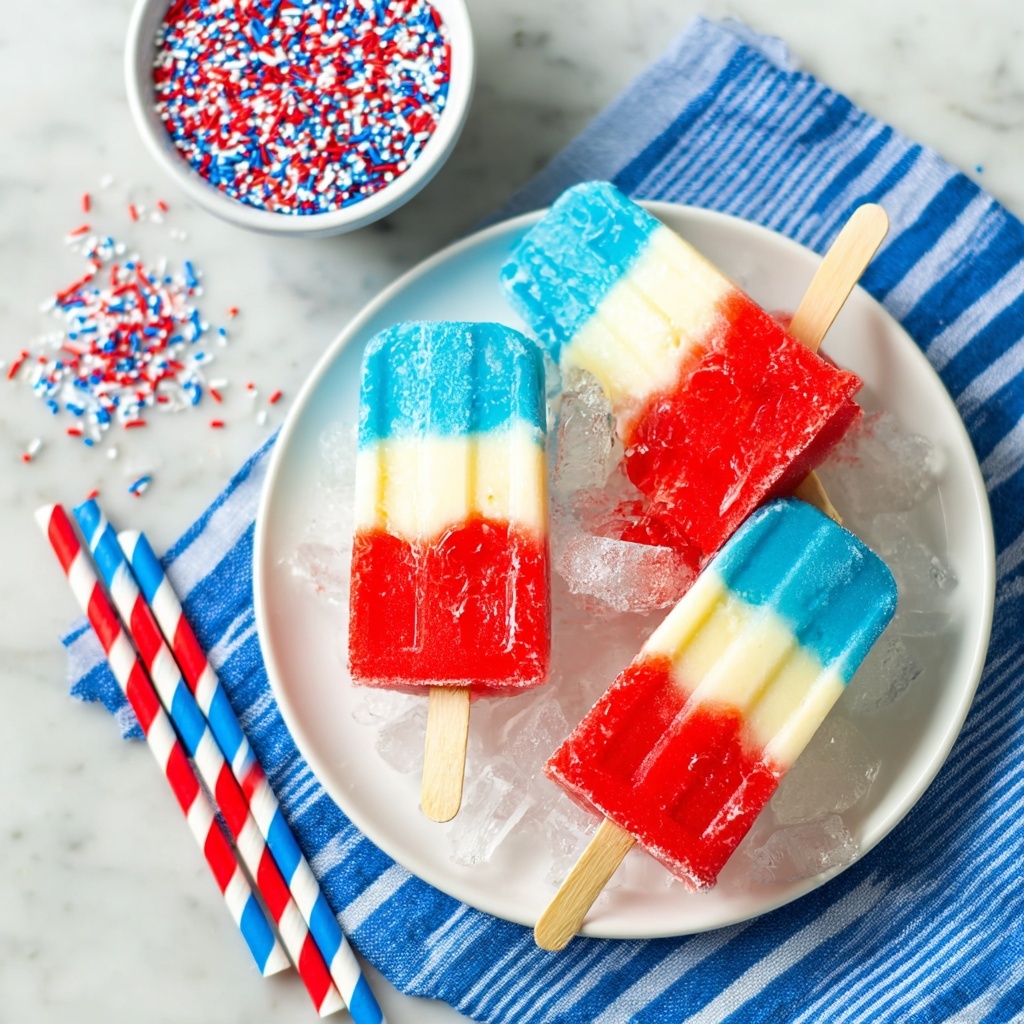
If you are looking for a show-stopping treat that combines fun, flavor, and a patriotic pop of color, then the Red White and Blue Pudding Popsicles Recipe is your new best friend. These layered pudding popsicles are creamy, vibrant, and ridiculously easy to make, turning simple ingredients into a festive dessert that delights both kids and adults alike. Whether you’re hosting a summer barbecue or craving a nostalgic frozen treat, these popsicles offer a perfect balance of sweet white chocolate pudding and eye-catching red and blue hues that are impossible to resist.
Ingredients You’ll Need
This recipe keeps things wonderfully straightforward with just a handful of ingredients that promise a creamy texture and beautiful colors. Each element plays a vital role in delivering that smooth, luscious pudding base and those vibrant red and blue layers that make the popsicles a star on any dessert table.
- White chocolate instant pudding mix (3 boxes, 3.3 ounces each): Provides a creamy, sweet base that’s rich and luscious, perfect for pudding pops.
- Whole milk (5 cups): The milk turns the dry pudding mix into that irresistible, silky texture you want.
- Red food coloring: Gives you the vibrant red layer, making the popsicles visually fun and patriotic.
- Blue food coloring: Adds the cool, striking blue layer, completing that classic red, white, and blue look.
How to Make Red White and Blue Pudding Popsicles Recipe
Step 1: Mix the Base
Start by combining all three boxes of white chocolate instant pudding with the whole milk in a large bowl. Using a whisk, blend everything together until the mixture is smooth and begins to thicken slightly. This step is the foundation of creamy deliciousness for your popsicles.
Step 2: Separate the Pudding
Divide the pudding evenly into three separate bowls. This separation is key to ensuring you get beautiful, distinct layers of red, white, and blue in your popsicles.
Step 3: Color Your Layers
Add red food coloring to one bowl and whisk until you reach your desired shade of red. Repeat the process with blue food coloring in the second bowl. Leave the third bowl plain to keep that classic white layer in the middle of your popsicles.
Step 4: Prepare for Piping
Transfer each colored pudding into its own resealable plastic bag. Snip a small corner off each bag to create a piping bag. This makes it easy to layer the pudding neatly into your popsicle molds with precision and minimal mess.
Step 5: Layer and Freeze
Pipe the red pudding into the bottom third of each popsicle mold, then follow with the white pudding for the middle third, and finish with the blue pudding filling the top third. Secure the lids, insert the sticks, and place the molds flat in your freezer for at least four hours. The waiting is the hardest part!
Step 6: Unmold and Enjoy
After the popsicles have fully frozen, carefully unmold each one. You’re now ready to enjoy a bright, cool, and creamy treat that’s as fun to eat as it is to look at.
How to Serve Red White and Blue Pudding Popsicles Recipe
Garnishes
To elevate these pudding pops, consider adding fresh berries on the side or a light dusting of finely grated white chocolate. Not only does this add a touch of elegance, but it also complements the popsicles’ creamy flavors perfectly while keeping with the patriotic theme.
Side Dishes
Serve these popsicles alongside a fresh fruit salad or a simple bowl of mixed berries. The natural sweetness and acidity of the fruit provide a lovely contrast that keeps the dessert feeling light and refreshing.
Creative Ways to Present
For a festive twist, serve these pudding popsicles in clear glass jars filled with crushed ice or floral ice cubes. You could also line them up on a patriotic-themed platter with small American flags or colorful paper straws for a fun presentation that’ll wow your guests.
Make Ahead and Storage
Storing Leftovers
These popsicles are best enjoyed fresh from the freezer, but if you happen to have leftovers, keep them tightly covered or in an airtight container to prevent freezer burn and maintain their creamy texture.
Freezing
Freeze your pudding popsicles on a flat surface to ensure their shape sets correctly. For best flavor and texture, consume within two weeks of freezing. This keeps each bite creamy and flavorful.
Reheating
No reheating needed here! These pudding popsicles are designed to be enjoyed frozen, offering a cool, refreshing treat. If a softer texture is preferred, allow them to sit at room temperature for a few minutes before enjoying.
FAQs
Can I use a different type of pudding mix?
Absolutely! While the white chocolate pudding provides a rich and distinctive flavor, feel free to experiment with vanilla or other pudding flavors to customize your popsicles.
What if I don’t have food coloring?
You can skip the coloring if you prefer, focusing instead on the creamy pudding taste. Alternatively, use natural colorings like beet juice for red or blueberry puree for blue to keep things more natural.
How long does it take to set these popsicles?
Plan for at least four hours of freezing time. This ensures the pudding layers freeze firmly, making unmolding easier and eating more enjoyable.
Can I make these dairy-free?
Yes, you can substitute whole milk with a non-dairy milk like almond or coconut milk and look for dairy-free pudding mixes for a vegan-friendly version of the Red White and Blue Pudding Popsicles Recipe.
What if I don’t have popsicle molds?
No worries! You can use small cups and popsicle sticks as a DIY mold option. Just fill the cups with the layered pudding and insert the sticks before freezing.
Final Thoughts
There’s something truly magical about making treats that are as fun to create as they are to enjoy, and this Red White and Blue Pudding Popsicles Recipe fits that bill perfectly. Creamy, colorful, and endlessly cheerful, these popsicles are a wonderful way to celebrate any occasion with a touch of homemade charm. So grab your pudding mix, dive into those colors, and make some memories with every delicious icy bite!
Print
Red White and Blue Pudding Popsicles Recipe
- Prep Time: 15 minutes
- Cook Time: 0 minutes
- Total Time: 4 hours 15 minutes
- Yield: 12 popsicles
- Category: Dessert
- Method: No-Cook
- Cuisine: American
- Diet: Vegetarian
Description
These Red White and Blue Popsicles are a fun and patriotic frozen treat made from creamy white chocolate pudding tinted with vibrant food coloring. Perfect for summer days or festive celebrations, they combine layers of red, white, and blue pudding for a visually striking and delicious dessert that’s easy to prepare without any cooking required.
Ingredients
White Chocolate Pudding Base
- 3 boxes white chocolate instant pudding (3.3 ounces each)
- 5 cups whole milk
Coloring
- Red food coloring
- Blue food coloring
Instructions
- Combine Pudding and Milk: In a large bowl, mix the white chocolate instant pudding mixes with the whole milk until smooth and well combined.
- Whisk Thoroughly: Whisk the mixture vigorously until it thickens and the pudding is fully incorporated.
- Divide Pudding: Transfer the pudding evenly into three separate bowls to prepare for coloring.
- Add Red Color: Stir red food coloring into one of the bowls, adjusting the amount until you achieve your desired shade of red.
- Add Blue Color: Similarly, whisk blue food coloring into the second bowl until the color is vibrant and even.
- Keep One Bowl White: Leave the third bowl with the plain white pudding as is, without adding any coloring.
- Prepare for Piping: Spoon the pudding from each bowl into individual zip-top bags to use as piping bags; seal the bags securely.
- Cut Piping Tips: Snip a small corner off the end of each bag to create a piping tip for controlled dispensing.
- Pipe Red Layer: Carefully pipe the red pudding into the popsicle molds to fill about one-third of each mold.
- Pipe White Layer: Follow by piping the white pudding layer on top of the red, filling the next third of the mold.
- Pipe Blue Layer: Complete each mold by piping the blue pudding on top, filling to the top.
- Insert Lids and Sticks: Place the lids on the popsicle molds securely, inserting the sticks into their slots.
- Freeze: Place the molds on a flat surface in the freezer and freeze for at least 4 hours until fully set.
- Unmold and Serve: Gently remove the popsicles from the molds and serve immediately for a refreshing and colorful treat.
Notes
- Make sure not to overfill the molds to prevent overflow when layering the puddings.
- If pudding is too thick to pipe easily, whisk in a little extra milk to loosen it before piping.
- The puddings need ample freezing time to set properly—at least 4 hours is recommended.
- Use whole milk for the creamiest texture; low-fat milk may reduce creaminess.
- For easier unmolding, briefly run warm water on the outside of the popsicle molds.
